6
Section 2: Installing the Quilt Artist
™
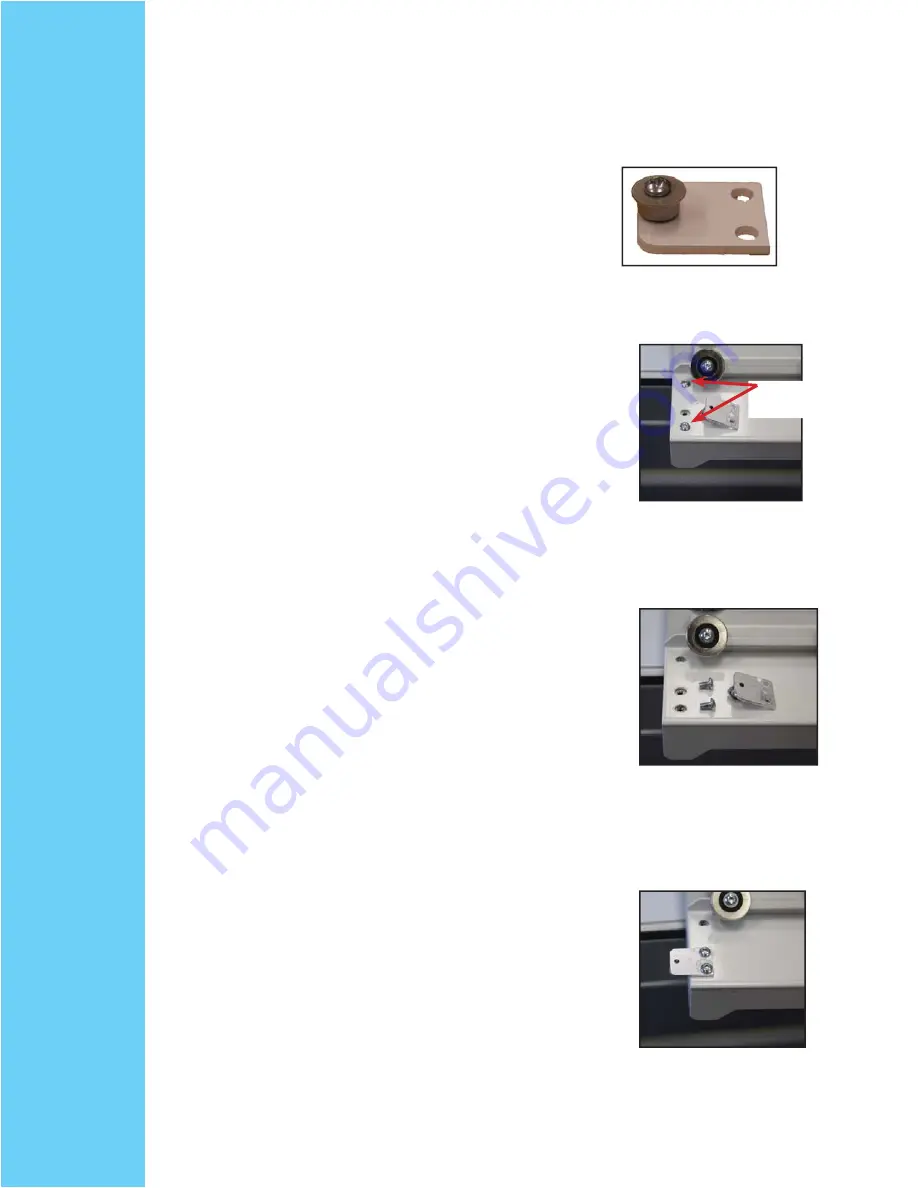
Attaching the Rear Idler pulley
Step 1:
Locate the Idler pulley so that we can attach it
to the bottom side of the lower carriage.
See fi gure 2-1
Step 2:
Locate the lower carriage. If your machine is
not on the carriage turn the lower carriage over so that
we can attach the idler pulley. If your machine is on the
carriage we can still attach this pulley we will just need
to do it with out turning the carriage over.
Note: If you already have encoder installed on your carriage this
idler pulley will be on the same end as the encoder.
Step 3:
On the bottom of the lower carriage you will
fi nd two holes next to each other . One with a screw
and one without a screw.
See fi gure 2-2
Step 4:
Remove the screws from the holes shown.
See fi gure 2-2
Step 5:
You now have the two screws you will need
to install the idler pulley onto the bottom of the lower
carriage.
See fi gure 2-3
Step 6:
Secure the Idler pulley to the carriage.
See
fi gure 2-4
Figure 2-1
Figure 2-2
Figure 2-3
Figure 2-4
Screws used
for pulley
Summary of Contents for QUILT ARTIST II
Page 2: ...2 ...
Page 15: ...15 ...
Page 16: ...16 Operating PFAFF QUILT ARTIST II ...
Page 42: ...42 ...


