background image

Summary of Contents for Tipmatic 6110

Page 1: ...D C 1 C C C D 30 D C 0 og C 03 0 sfl NJ 0 C a 01 0 0 an 1 IT ...

Page 2: ...ured blue must be con nected to the terminal which is marked with the lettter N or coloured black The wire which is coloured brown must be connected to the terminal which is marked with the letter L or coloured red Cut off mains plugs are definitely not to be used but disposed of immediately Defective mains leads must be replaced completely Only 3 A spare fuses must be used as approved by ASTA acc...

Page 3: ...MrsJ OCD a owl ...

Page 4: ...h controls 11 Stitch length knob 1 2 Connection socket foot control Model 6230 13 Base plate 14 Detachable work support 1 5 Sewing foot holder with sewing foot 16 Needle threader 17 Threading slit 1 8 Needle thread tension 19 Take up lever 20 Presser bar lifter 21 Key for reverse sewing 22 Needle holder with fixing screw 23 Dual feed top feed 24 Reel holder with unwinding disk 25 Second spare reel...

Page 5: ...r service center for examination repair electrical or mechanical adlustment 4 Never operate the sewing machine with any air openings blocked Keep ventilation openings of the sewing machine and foot control free from the accumulation of lint dust and loose cloth 5 Never drop or insert any object into any opening 6 Do not use outdoors 7 Do not operate where aerosol Isprayl products are being used or...

Page 6: ...or if it is wrongly ope rated we will not accept any liability for any damage caused 10 To avoid the risk of electric shock do not open the machine There are no paris inside the machine which the user can repair This is solely the responsibility of our qualified service staff 11 Be sure to use only original PFAFF parts Environment The recommended environment is Ambient temperature 10 C to 40 C Hum...

Page 7: ...logy and this instruction book is Just as uncomplicated as your PFAFF sewing machine If you now take time enough to study the instruction book nothing can go wrong After all this is the only way to learn all the things the machine can do and to make full use of them If you have any further questions that is no prob lem Your PFAFF dealer will be at your service with any help or advice you need So n...

Page 8: ...Darning with straight stitch 51 Decorative stitches 61 64 Dual fabric feed 24 25 Elastic stitch 41 Elastic stitches 40 43 Electrical connection 12 13 Eyelet embroidery 68 Fancy elastic knob 30 Fancy elastic stitch 45 Fancy stitch table 10 Faults 86 Foot control 1 3 Foot control 13 Free arm 14 Fringe foot 79 Function keys 31 Gathering foot 75 Gathering with elastic thread 50 Gathering with straight...

Page 9: ...th zigzag stitch Setting stretch stitch Setting utility stitches Sewing chart Sewing feet lspecial accessories Sewing feet standard accessories Sewing lamp Sewing on buttons Sewing problems Shell edging Slow sewing Smocking Special accessory table Stitch density Stitch length control Straight stitch j Stretch triple straight stitch Stretch triple zigzag stitch Tacking J Thread tension Thread trimm...

Page 10: ...h For all straight stitch and topstitch sewing jobs needle position center up to 6 mm stitch length HI Straight stitch For all sewing and topstitching jobs requiring needle position right a right needle position H Blind stitch wide For securing seams invisibly on stronger fabrics HD Blind stitch narrow For securing seams invisibly on finer materials I Greek stitch wide A classical decorative stitc...

Page 11: ...ng stitch A classical decorative stitch for embroidering borders LF Emperor stitch narrow A dainty decorative stitch LI Greek stitch narrow A classical decorative stitch M Elastic stitch For sewing on rubber tape darning tears and inserting patches ME Elastic blind stitch For securing seams invisibly and serging an edge at the same time particularly for light elastic fabric MF Elastic blind stitch...

Page 12: ...For stretch seams requiring a right needle position right needle position H Pullover stitch wide Elastic closing and serging seams for rough jersey HD Pullover stitch middle Elastic closing and serging seams for medium material quality HG Pullover stitch narrow Elastic closing and serging seams for fine jersey I Closed overlock stitch wide A closing and serging seam for fraying material ID Turkish...

Page 13: ...I Weaving stitch An ornamental seam e g for bath equipment LK Diagonal stitch narrow A decorative elastic stitch LDK Diagonal stitch wide A decorative elastic stitch LEI Branch stitch A decorative elastic stitch e g for sportswear LGK Border stitch A decorative stitch e g for traditional embroidery LMK Triangle stitch A decorative elastic stitch M Honeycomb stitch For sewing on elastic thread over...

Page 14: ... 2 lIhi liii IllIj a I stretch ilillflililIiTliIII Ti l i 11111111 I I iij 111111 a a 2 01 tiiLiitl1 iiLiilL iiilL i o c t I a 0 l l I l l l h IIIl l I Il l h IIl l I l l I Il i i l I l l l h l I l i I IIl i U l I l I l I l l stretch r o 0 C C C o x o 0 t C C C 2 a a I Ih I ii I ih I ih I I Ii IIlilill dlliitlh iili it stretch C f C iihi iii i 1iIi liii iil iiii il U 0 oC a 0 C N stretch I C 2 Oil...

Page 15: ...reading the needle page 20 Needle threader page 21 I Pulling up the bobbin thread page 22 Sewing foot lifter page 22 Thread trimmer page 22 I Changing the sewing foot page 23 Dual Feed page 24 25 Top feed page 25 Changing the needle page 26 Needle thread tension page 27 Lowering the feed dog page 27 Reverse sewing page 28 i Stitch length knob page 28 I Pushbutton controls page 29 30 I Function key...

Page 16: ...tment of the carrying case 0 Programs The programs of the sewing machine are illustrated on the inside of the top cover Top cover Open the folding cover 26 upwards Electrical connection Modell 6230 Connect the mains cord with the socket 9 of the sewing machine and the wall socket F Ii N N 12 ...

Page 17: ... the foot control with the connection socket 9 of the sewing machine The sewing speed is regulated by pressing the pedal The sewing speed can also be regulated with the slide control on the head of the foot control Position half speed Position 44 full speed When the main switch 8 is switched on the sewing lamp lights up The sewing machine is now ready to use Connecting the foot control Models 6110...

Page 18: ...thread into guide A from behind and pull it through opening B to the right Wind the thread clockwise a few times around the bobbin Switch on the main switch Hold the end of the thread firmly and press the foot control As soon as the bobbin is full the winding action will stop automatically Cut the thread push the bobbin to the left and A take it off Remember Turn the release disk 6 fully back agai...

Page 19: ...tch on the main switch Hold the end of the thread firmly and press the foot control As soon as the bobbin is full the winding action will be stopped automati cally Cut the thread push the bobbin to the left and take it off Remember Turn the release disk 6 fully back again Then turn the hand wheel 5 towards you until it snaps in TIP If the machine is already threaded you can wind thread from the se...

Page 20: ...e Release the latch and take out the empty bobbin To obtain optimum seam appearance and durability make sure the needle and bobbin thread lensions are correctly adjusted to each other i e Ihe threads are interlaced between the two fabric plies For fancy seams and buttonholes the thread interlace should be visible on the reverse side of the fabric Taking out the bobbin case 18 ...

Page 21: ...read and move your hand sharply upwards The bobbin case must slip downwards a little with each hand movement Correcting the tension Turn adjusting screw C just a little to the left to decrease the bobbin thread tension Turn screw C lust a little to the right to increase the tension Inserting the bobbin case Lift cover F and push the bobbin case fully onto pin 0 of the sewing hook Opening E of the ...

Page 22: ...nder thread guide hook D Pa the thread through the threading slot 17 ar downwards Pull the thread around stop E nto the righthand threading slot and upwarc to the take up lever 19 The thread must b pulled into the take up lever from left to righ Then pass the thread downwards again in th righthand threading slot and behind thread guide F Finally pass the thread from the side behind one of the two ...

Page 23: ...t its high est point Piace the needle thread over hook o and hold it taut Move the threader fully downwards and turn it towards the needle so that the small hook R goes through the needle eye Place the thread into the hook from below Turn the threader towards the rear releasing the thread carefully and allow the threader to move upwards You can now pull the end of the thread through the needle eye...

Page 24: ...e hand wheel towards you until needle is at the top again and the bobbin thread has formed a loop Pull the needle thread to draw up the bobbin thread r Bobbin thread Close the hook cover 28 and pull the thread under the sewing foot to the left Pull the threads from the back to the front over the thread trimmer 30 I Presser bar lifter Thread trimmer 22 ...

Page 25: ...e back at the same time so that it disengages from the sewing toot holder 15 Check Place the sewing foot under the sewing foot holder 15 that the pins of the foot engage in the sewing foot holder when the presser bar lifter 20 is lowered Please check that the sewing foot is properly engaged by raising the presser bar lifter Engaging the sewing foot 23 ...

Page 26: ...As on industria sewing machines it feeds the material from the top and bottom at the same time The fabric is fed accurately On light or difficult materials such as silk and viscose fabrics the dual fabric feed prevents seam puckering The even feeding action also ensures perfect matching of checked and striped fabrics see next page 24 ...

Page 27: ...a little and out to the rear and let it move slowly upwards see also the illustration on page 24 Engaging the top feed Models 6120 6150 6230 Raise the sewing foot Now push the top feed 23 so that it snaps in place Important For all sewing jobs with the top feed only use sewing feet with cutout at the back 25 ...

Page 28: ...edle at its highest point Now loosen the Fixing screw 22 and pull the needle out downa rds To insert The flat side A of the needle must Face to the rear Lower the sewing foot dnd insert the needle pushing it up as far as it will go Hold the needle and tighten the fixing screw 22 firmly A 26 ...

Page 29: ... The normal setting for sewing is 4 to 5 For embroidering darning and buttonhole sewing between 2 and 3 For certain sewing work e g darning the feed dog has to be dropped To do this open the hook cover and press slide B fully to the right Now the feed dog is lowered I I I A J I Lowering the feed dog 27 ...

Page 30: ...uttonholes is in this range The stitch becomes more concentrated the farther you turn towards O Stitch length knob You can set the stitch length 11 from o to 6 mm infinitely with the stitch length knob by turning to the marking for the desi red stitch length You must turn the stitch length knob 11 as far as it will go to sew the stretch stitches with a grey background PFAFF tiptr 1 11A L fl1 Al 28...

Page 31: ...n activated If key G on models 6150 and 6230 is pressed 4 A A A again the width of the stitches can be redu ced by half Setting stretch stitches All the stitches with a grey background are PFAFF tiptronic 6230 stretch stitches i e they are suitable for stretch material Press the selected key down and turn the stitch length knob 11 right to the edge of the grey area Key B releases the keys that hav...

Page 32: ...cy stitch knob Models 6150 and 6230 Each fancy stitch has been given a letter Select a fancy stitch from the program table and turn the fancy stitch knob 7 to the cor rect letter under the marking The stitch length is between 0 5 and 1 mm Fancy stitches and combinations Models 6150 and 6230 Pattern combinations can be produced by pressing the keys together with the fancy stitch knob You will find ...

Page 33: ...ng is interrupted the needle automatically goes to its highest position If key 2 is pressed the diode lights up The needle now remains in the material each time there is an interruption in sewing If you press the key again the diode is extinguished and the needle automatically goes up again 3 Tacking If key 3 tacking is pressed the green diode lights up The machine now only sews one stitch when th...

Page 34: ...Buttonhole Hems with twin needle Smocking Gathering Darning Inserting zippers Rollhemming Sewing lace Shelledging page 34 pages 35 pages 36 39 pages 40 45 pages 42 43 pages 44 45 pages 46 47 page 48 page 48 pages 49 50 pages 51 53 pages 54 55 page 56 page 57 Page 58 Utility stitches and practical sewing 33 ...

Page 35: ...ctions that are necessary when sewing the selected programs The choice of the sewing foot the setting of the needle thread tension and whether the sewing is carried out with the top feed switched on or off a Models 6120 6230 b Model 6110 prog Program pattern Stitch length in mm Stitch width in mm Top feed engaged on disengaged off 0 n Needle thread tension Number of the sewing foot 34 ...

Page 36: ...ad tension is set too loose To adjust the bobbin thread tension please refer to page 19 With programs G and HI you can change the needle position in such a way that you can always guide the sewing foot along the fabric edge for topstitching work If you wish to topstitch at a wider width than this simply guide the fabric along the guide marks on the needle plate or use edge guide 8 The edge guide i...

Page 37: ...hifting insert dress pins crosswise to the basting direction Light fabrics are easier to baste with long straight stitches 6 mm Then you do not need to lower the bottom feed Program G is the basic straight stitch with middle needle position The stitch length can be increased up to 6 mm as required Some sewing jobs can be done easier by changing the needle position e g topstitching a collar or sewi...

Page 38: ... the needle goes into the material and over the edge alternately For serging difficult materials blind stitch foot No 3 is very useful While sewing the thread lies over pin C thus preventing curling of the fabric edge In this way you can sew beautiful smooth seams The edge of the cutting has to be guiding along edge guide B You can adjust this edge guide with adjusting screw A important Only use t...

Page 39: ...ic under the sewing foot so that the crease line runs along edge guide B When the needle enters the crease line it must only pick up one fibre of the fabric J J Th Program MF Stretch is a blind stitch for elastic materials except model 6110 The hem is sewn and serged at the same time i e it is not necessary to serge the fabi edge If the stitches are visible on the face side adjust edge guide B by ...

Page 40: ...ion the button so that the needle enters the left hole in the button Now lower the presser bar lifter the button is now held by the shank of the foot Now sew on the button Make sure that the needle also enters the right hole in the button Then release with key B and the needle automatically goes into the left hand posi tion Now sew with a few stitches Make sure that the needle enters in the left h...

Page 41: ...inside trouser seams The farther you turn the stitch length knob the longer the stitch length Stretch triple zigzag stitch The stretch triple zigzag stitch is a highly elastic and decorative seam which is very suitable for hems on T shirts and underwear Serge the edge of the hem Fold the hem inwards at the required width Topstitch the hem from the face side 40 ...

Page 42: ... stitches Push the part prepared in this way between the elastic tape or place it underneath and pin it firmly in place Sew it on with elastic stitch Leave the ends of the elastic tape overlapping a little and sew over them with elastic stitches On skirts or trousers the elastic tape is sewn onto the prepared edge with elastic stitch Honeycomb stitch Honeycomb stitch is used for elastic and decora...

Page 43: ...ecommend you use blind stitch foot No 3 It Program I is ideal for sewing jersey fabrics guides the fabric better and prevents contrac especially You can use it for sewing on tion of the seam at wider stitch widths sleeve cuffs or knitted collars durably too TIP Make sure that the cuff is stretched while sewing prog H a K Sreich 6 3 5 0 1 3 b1KStretch 61 35j03j Open overlock stitch With this stitch...

Page 44: ...h This stitch is suitable for open knit fabrics Fully fashioned parts can be easily sewn together with it Make sure that the material is led to the right of the needle not to the left TIP To prevent the seam from stretching open while joining it is advisable to add a woollen thread under slight tension 43 ...

Page 45: ... on the inside Place the fabric under the sewing foot with the edges about 1 8 of an inch apart Sew on the face side making sure the needle enters the material on the right and left side What is a covering stitch You can use the following programs for sewing a flat covering seam This produces the typical flatlock effect which lends a professional look to collar plackets or raglan seams 44 ...

Page 46: ...t 3 4 of an inch and over stitch each edge with fancy elastic stitch Pennant stitch Pennant stitch is one of the many covering stitches Since it can be stretched it is parti cularly suitable for overstitching the bands on elastic material e g sweat shirts or sports wear Sew the band onto the part with overlock stitch The seam allowance can now be over stitched from the right side of the fabric Mak...

Page 47: ...PFAFF tiptron ic 6230 tipmatic 6110 6120 6150 PFAFF instruction manual ...

Page 48: ...ater For materials such as velvet leather or thick woollens which are difficult to feed it can be placed over or under the fabric In this way the material is not braked and buttonholes are much easier to make To produce beautiful seams embroidering or darning threads are ideally suitable Mark the starting point of the buttonhole either with a magic pen or dress pin and always sew a sample buttonho...

Page 49: ...jumps to the left position and you can sew up the buttonhole with a few stitches Cut the buttonhole open with a pair of scissors or a seam ripper To produce highly durable buttonholes e g for sportswear we recommend using a gimp thread For all stretchable materials too a gimp thread is very important in order to avoid overstretching of the buttonhole Place the gimp thread over the back ridge A and...

Page 50: ... the hen over before topstitch ng To thread the twin needle please refer to page 64 Fine light materials such as batiste viscose or silk are particularly suitable for effective smocking When smocking with an elastic thread you should use an additional bobbin case and wind the elastic thread by hand Since elastic thread is a lot thicker than the normal bobbin thread the tension of the bob bin case ...

Page 51: ...ee gathering seams Mark the first line on the face side of the fabric and stitch along it Leave about four or five inches of thread protruding at the end You can now stitch the other seams at sewing foot width using the first one as a guide Now gather the part by pulling the bottom threads You determine the amount of gather yourself Finally knot the thread ends together to secure the gather 49 ...

Page 52: ...itches using program M then leave the needle down in the fabric The needle must be at the middle of the sewing foot Raise the sewing foot and place the elastic thread around the needle Lower the sewing foot again and sew a few more stitches but do not pull the ends of the elastic thread until these are sewn From then on you determine the amount of gather by the amount you pull on the elastic threa...

Page 53: ...notch E darning position Place the darning work in the darning hoop Lower the feed dog Draw up the bobbin thread and hold the threads when you start sewing Darn over the damaged area by moving the part evenly in the required direction When doing so move the part in shallow curves This prevents tearing of the darn later When you have stitched evenly over the darning area turn the fabric by 90 degre...

Page 54: ...hen doing so make sure the stitch rows overlap each other Sewing on patches The best way to darn larger holes is to cover the damaged area with a piece of new mate rial Baste the piece of new material onto the damaged area from the face side Overstitch its edges with elastic stitch Now cut back the damaged material up to the seam on the reverse side TIP In order to turn at the corners more easily ...

Page 55: ...2fl Z D DO V _ 0 Q E 0 CDE_ r 0 3 o a DD COO 0 3 00 0 0 D 43c LD oC 0 0 aoO C ci ci 0 D 00 ci ...

Page 56: ...older to the left or right depending on the method of insertion Using one of the three needle positions you can also set the needle so that it enters close to the edge of the zipper teeth If the sewing toot is engaged on the right side the needle position must only be changed to the right If the foot is engaged left the needle must only be moved to the left Engage the zipper foot to the right side...

Page 57: ...ing the seam Close the zipper and baste the overlap evenly onto the other zipper half Afterwards stitch along the basted seam TIP To achieve accurate seams we recom mend using the edge guide Trouser zippers Iron the seam margin over making sure there is an overlap of about 15 32 4 mm Baste the zipper under the overlapping edge so that the teeth are still visible Engage the zipper foot on the right...

Page 58: ...e over double about 5 64 2 mm per fold Place the folded fabric edge under the hemmer and sew a few stitches Leave the needle in the material Raise the sewng foot and push the fabric Into the scroll of the hemmer Lower the sewing foot and guide the fabric edge evenly in the hemer When doing so make sure the fabric does not run under th right side of the sewing foot TIP For sIlk vScuse or Qhlffor rn...

Page 59: ...r the lace at the middle and iron it over to the side Stitch over both edges of the lace with small and dense zigzag stitches Cut back the waste material Lace edges Lace trimmings provide many new ways of designing and enhancing home textiles This is the way to do it First serge the raw edges Stitch the lace onto the face side up to the first corner Fold the corner and stitch over it diagonally Al...

Page 60: ...n Serge the raw edge and iron the seam margin over to the left While sewing make sure that the fabric runs under the sewing foot at half the foot width only This provides a more promi nent shell edging effect TIP If you add a coloured wool thread at the edge you can strengthen the shell edging and obtain a pretty contrast at the same time instead of a woollen thread you can also place a different ...

Page 61: ...es 4 Sewing table for embroidery Decorative stitches Monograms Appliqué Richelieu Quilting Eyelet embroidery Hemstitching page 60 page 61 64 page 65 page 66 page 66 page 67 page 68 page 69 Decorative and traditional I 59 ...

Page 62: ...ommend using special embroidery threads which are available from your Ptaff dealer For the parts to be embroidered you should either use an iron on backing or place silk backing paper under the fabric This prevents the material from contracting You can mark out the embroidery pattern with a magic pen or marking chalk These lines will dissolve after a few hours or can be ironed away The following r...

Page 63: ... but tonhole range The larger the stitch density you set is the farther the pattern is stretched apart Changing the pattern width The machine automatically Sets a stitch width of 6 mm for the fancy stitches If you wish to alter the width select key G at the same time All the stitches are now reduced by half i e reduced to a width of 3 mm j 1 I I I II I I II I 61 ...

Page 64: ...t with program V F After that turn the fabric and sew the border back again in reverse Embroider stitch U parallel to it Finally add program X to every fifth zigzag point In this border embroidery example multi coloured embroidery thread is used as an additional effect Apply iron on backing or place silk backing paper under the fabric Embroider over the marked middle with program M D F Then turn t...

Page 65: ...der with the combination L G K Stretch LIE Stretch completes the border Combinations with coloured thread An additional effect can be produced with dif ferent coloured thread Multicolour thread was used for the middle border in this example You can obtain it in a great variety of shades from our PFAFF dealer Apply iron on backing or place silk backing paper under the fabric Mark the middle with ta...

Page 66: ...g the twin needle Insert the twin needle Fit the second reel holder and place one reel of thread on each holder In the left threading slot 17 you will find tension disk C While threading make sure that you pass one thread left and one thread right over tension disk C Place the threads farther than normal but make sure the threads are not twisted with each other Pull the threads right and left into...

Page 67: ...arning position Knot the threads and pull off the Avalon Any waste is dissolved in water TIP If you sew fast but move the material slowly the stitches will be made dense On terry cloth the monogram must first be presewn with narrow zigzag stitches and then oversewn with a wider zigzag stitch This makes sure the terry cloth loops are properly covered Block capitals are a little easier to embroider ...

Page 68: ... the needle passes the outer edge so that no fraying occurs later This very artistic form of bar and eyelet embroidery is easy to make with your sewing mach me Transfer your pattern onto the face side of the fabric using the magic pen Then place two plies of embroidery Avalon backing under the area to be embroidered and tauten the fabric and backing in an embroidery hoop Insert foot number 0 To ma...

Page 69: ...ie Dual Feed is of particular assistance when doing this Cut out the parts of your quilt with templates you have bought or made your self A seam allowance of 0 7 cm should already be included in the templates Spread out the parts as in the pattern and form small squares that you can match together These squares are then sewn together to form the surface of the quilt The seam allowances of quilts a...

Page 70: ...ddle cutout of the needle plate Then push the plate down at the tront Place the marked fabric taut in an embroi dery hoop Cut one or two of the fabric threads and push the fabric over the pin in the eyelet plate The fabric must fit snugly around the pin Draw up the bobbin thread and hold it for the first few stitches You can now stitch around the cut with the selected program By doing this it is i...

Page 71: ...C DC CD Q 3 DC E 3 C 2 CD 3 0 DC DC CD CD CD 0 3 CD 2 DC 0 C D CD 0 DC 3 CDD D 33 DC 9 CDDC 3 CD 3 0 0 DC DC 3 ODC rlo 3 DCD 3 0 C 03 3 CD V o CD 3 C 0 CD CD CI 3 C 3 3CD Cs 3 0 CD DCD CD C CD D 9 3 CD C CD 3 CD 3 0 0 CD DCD 3 3 CD 0 0 CI CD C 32 0 CD 3 9 3 C DID D C CD DC 3 g 2 2 DCCD g g DC DCCD 03 V 3 3 DC CD C 3 DC 3 3 DI 0 3 nQ CD 03 a 3 CD CDCD CDDCC CD CD 0 CD 3 CD DC CC CD DC II 3 3 0 CD 0...

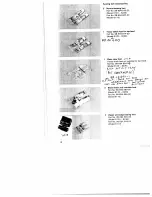
Page 72: ...ies Special accessory table Felling foot Gathering foot Cording foot Bias binder Multistitch gatherer Cording foot Appliqué foot Fringe foot Needle table pages 72 73 page 74 page 75 page 75 page 76 page 77 page 77 page 78 page 78 page 79 pages 80 81 71 ...

Page 73: ... Model 6120 6230 NO I O Clearviewfoot L Q Fancy stitch foot not suitable for top feed Part No 98 694 864 00 Model 6110 6230 LJILc PvT j q çv 9 tSfr rV 1fA1 4 A S T 3 Blind stitch and overlock foot Part No 98 694 890 00 Model 6120 6230 Part No 98 694 845 00 Model 6110 4 Zipper and edge sewing foot Part No 98 694 884 00 Model 6120 6230 Part No 98 694 843 00 Model 61101 72 ...

Page 74: ...30 6 Darning foot Part No 93 035960 91 Model 6110 6230 For Model 6110 special accessory 7 Hemmer Part No 98 694818 00 Model 6110 6230 For Model 6110 special accessory 8 Edge guide Part No 98 802422 00 Model 6110 6230 Second spool holder 9333vC3 t Seam ripper Brush Oil tube R 73 ...

Page 75: ...e with round hole 98 694822 00 For top stitching seams and sewing very light and soft materials silk jersey etc Lap feller 4 5 mm 93 042946 91 For lap feller seams Lap feller 6 5 mm 93 042 948 91 For lap feller seams Gathering foot 93 036998 91 For gathering frills etc Mu tistitch gathering foot 98 999650 00 For placing dense or loose remove foot holder pleats on frills etc Cording foot 93 036915 ...

Page 76: ... can be made quickly and easily with the gathering foot Gathering by hand is no longer necessary Engage the gathering foot by hooking the rear bar of the foot into the rear groove of the foot holder Push the foot upwards until it snaps into the front bar Place the fabric to be gathered under the sewing foot and the gatherfree fabric from the top through the foot cutout The fabric parts lie face si...

Page 77: ... a gimp thread this makes the cording look wider In this case however do not use a cording tongue To do this remove the needle plate Thread the gimp thread through the hole of the needle plate from below to the top Replace the needle plate The notch bet ween the needle plate and the sewing machine provides space for the gimp thread This thread must be fed under the cloth plate so that it does not ...

Page 78: ... be bound into the slot of the binder The raw edge must be placed between the bias tape edges During sewing the bias tape will enclose the raw edge automatically TIP You can obtain an additional effect by using zigzag stitch or a fancy stitch This is a really classic sewing footi You can make closely or widely spaced pleats as if by magic The multistitch gathering foot can be used in three differe...

Page 79: ... a thread of a different colour Appliqué foot Appliqués are quickly made and always pro duce a beautiful fancy effect By using diffe rent materials and patterns you can obtain variations galore You can make a perfect densely stitched seam with the appliqué foot because it has a special cutout on its sole for the zigzag seam Insert the appliqué foot in the sewing machine Transfer your drafted patte...

Page 80: ...k paper underlay and engage the fringe foot Embroider the motif row by row For circ les you have to work from the outside inward For thicker threads you may have to choose a longer stitch length it is best to sew a test seam first When you have finished pull the work out of the machine carefully because if you pull too fast you will pull the last loops tight Knot the threads on the reverse side 79...

Page 81: ...aff stretch fabric needle very Needle size point suitable for delicate stretch and warp 75 90 knits 130 705 H SKF Large ball Open corsetry fabrics Lycra Simplex Needle size point Lastex 70 110 130 705 H J Sharp round Twill workwear heavy linen fabrics Needle size point blue jeans light sailcloth 90 110 130 705 H LR Narrow twist Leather suede calf and goatskin Needle size point 70 120 right 130 705...

Page 82: ...e desired ornamentation turn the hand wheel to check whether the needles sew through the fabric correctly In this way needle breakage can generally be avoided Fancy stitch zigzag patterns 1 30 7 05 H ZWI Size 80 0 5 1 5 mm wide 1 6 mm ornamentation Size 80 0 5 1 5 mm thin 2 0 mm ornamentation Size 80 0 5 1 5 mm thin 2 5 mm ornamentation Hemming special double needle 130 705 H ZWI HO decorative Siz...

Page 83: ...Maintenance and fault finding I E r Changing the needle plate Cleaning and oiling Changing the sewing lamp Sewing problems and their solution Page 84 Page 84 Page 85 Page 86 83 ...

Page 84: ...h the screwdriver into the left opening and take the needle plate out Replacing Cleaning and oiling Switch off the main switch Remove the needle plate and lower the feed dog Clean the feed dog and hook area with the brush Then apply a drop of oil every 15 to 20 hours of operation to the hook You can see where to apply the oil in the illustration and on the oil bottle supplied The machine is otherw...

Page 85: ...er to change the bulb we recommend placing the sewing machine on the hand wheel as illustrated Hold the sewing machine tightly Push the bulb into its holder as far as it will go and turn it anticlockwise to remove Insertion Insert the bulb in the diagonal holder and turn it so that both stops of the bulb engage Now push the bulb fully into the holder and turn it clockwise so that it is held firmly...

Page 86: ... right 6 The machine is running with difficulty There are thread remnants in the hook race Remedy Push needle fully upwards flat side facing the back Use needle system 130 705 H Insert a new needle Check how machine is threaded Use a larger needle See above Adjust thread tension Only use good threads Use needle with large eye System 130 NI Insert new needle and push fully in Insert new needle See ...

Page 87: ...L9 ...

Page 88: ...co ...

Page 89: ...gesellschaft Werk Karisruhe Durlach GritznerstraL e 11 76227 Karlsruhe Gedrucki in Deutschland Druckerei Gablenz GmbH 76356 Weingarten Stettiner StraSe 17 Technische Anderungen vorbehaften Nr 29629996 65 OOO OG englisch 8 93 ...

Reviews: