background image

Summary of Contents for varimatic 6086

Page 1: ...varimatic 6089 6086 Bedienungsanweisung Instruction Book Mode d emploi Gebruiksaanwijzing ...

Page 2: ...l The drive belt must never be adjusted by anyone but an authorized Pfaff agent Special safety rules for United Kingdom see page 30 4 L Mesures de sécurité IEC 335 2 28 a Toujours faire preuve de prudence et continuellement surveiller le travail b Toujours débrancher Ia machine du secteur avant de quitter Ia machine avant les travaux d entretien et en cas de remplacement de pièces me caniques ou d...

Page 3: ...rche arrière 124 Bras libre 1 25 lnterrupteur general 1 28 Socle 129 Compartiment du crochet 130 Compartiment a accessoires 131 Coupe fil Bedieningsdelen van de naaimachine 101 Draadhefboom 102 Spoelvoorspanning 103 Handgreep 104 Spoelwinder 105 Handwiel 106 Koppelschroef 107 Steeklengte instelwiel 108 Afneembare werkbox tevens accessoiresbakje 109 Steekplaat 110 Naaivoethouder met naaivoet 111 ln...

Page 4: ......

Page 5: ...eifer 1 30 Zubehörfach bei Flachbettmaschinen 131 Fadenabschneider Parts of the sewing machine 101 Take up lever 102 Bobbin winding tension 103 Carrying handle 104 Bobbin winder 105 Hand wheel 106 Stop motion knob 107 Stitch length control 108 Detachable work support with accessory compartment 109 Needle plate 110 Sewing foot holder with sewing foot 111 Threading slots 112 Needle thread tension 11...

Page 6: ...but an authorized Pfaff agent Safety rules for United Kingdom see page 40 Mesures de sécurité IEC 335 2 28 a Toujours faire preuve de prudence et continuellement surveiller le travail b Toujours débrancher Ia machine du secteur avant de quitter Ia machine avant les travaux d entretien et en cas de remplacement de pièces me caniques ou d accessoires c Puissance maximale admissible de lampoule 1 5 W...

Page 7: ...thorized dealer or service center for exami nation repair electrical or mechanical adjustment 4 Never operate the sewing machine with any air openings blocked Keep ventilation openings of the sewing machine and foot controller free from the accumulation of lint dust and loose cloth 5 Never drop or insert any object into any opening 6 Do not use outdoors 7 Do not operate where aerosol spray product...

Page 8: ...er und die Bedienungsanlei tung aus dem Fach N nehmen So wie die Abbildung oben zeigt beides wieder einräumen Take foot control and Instruction Book out of compartment N Put back again as shown in the illustration above Retirer le rheostat a pédale et Is notice dempIoi de Ia case N et es remettre dans Ia case comme on voit sur Ia pho to du haut De voetpedaal en de gebruiksaanwijzing uit yak N neme...

Page 9: ...l ler näht die Pfaff Electronic Anlasser Schalter Q Stellung halbe Endgeschwin digkeit Stellung 41 voile Endgeschwindigkeit Push master switch P the sewing light goes on Operating the foot control The farther you press the pedal down the faster the machine runs Electronic foot control slide Q Position half the top speed Position 14 full top speed Enfoncer le bouton de l interrupteur general P Ia l...

Page 10: ...ache 129 ou ouvrir le capot 119 Deksel 129 van de machine nemen of afsluitkapje 119 openen 4 Hauptschalter 125 ausschalten Klappe N anheben und die Spulenkapsel herausziehen Switch off master switch 125 Raise latch N and pull out the bobbin case Mettre ía machine hors circuit a I interrupteur general 125 Lever le loquet N et retirer Ia bolte a canette De stroom uitschakelen med hoofd schakelaar 12...

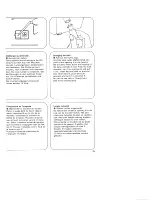
Page 11: ...tegen geleider P drukken INähwerk ausschalten Handrad 105 festhalten und Scheibe 106 nach vorn drehen Disengaging the sewing mechanism Hold the hand wheel steady and turn knob 106 toward you Débrayer le mécanisme de couture Retenir le volant 105 et tourner le dis que 106 vers avant Handwiel uitschak en Pak het hand wiel 105 vast en draai koppelschroef 106 naar u toe 4Garnrollenstift 115 ganz hochz...

Page 12: ... den Fu1 anlasser betätigen und spulen 1st die Spule voll bleibt sie stehen Die voIle Spule nach links drUcken abneh men und den Faden abschneiden Bobbin winding Switch on master switch Pull thread from thread reel into bobbin winding tension 102 lead to the right and wind a few times around the bobbin in the direction of the arrow Then actuate the foot control and wind the bobbin The bobbin stops...

Page 13: ...squ a ce qu il s enclenche Naaimechanisme inschakelen Het hand wiel vasthouden en koppelschroef 106 van u af draaien Dan het handwiel naar u toe draaien tot het inklikt I Spule einlegen N Faden nach hinten Den Faden in den Schlitz 0 und bis zur Offnung P ziehen nserting the bobbin N with the thread unreeling toward the back Draw the thread into slot 0 and into eye P Mise en place de Ia canette N l...

Page 14: ...ede spanning moet de spoelhuls blijven zweven door een rukje aan de draad te geven moet de spoel steeds een stukje zakken Stelschroefje N naar links losser naar rechts is vastere spanning Spulenkapsel einsetzen Hauptschalter 125 ausscha ten Klappe 0 anheben und die Kapsel bis zum Anschlag auf Stift P schieben Aus schnitt Q mu2 dabei nach oben zeigen Inserting the bobbin case Switch off master swit...

Page 15: ...it a I interrupteur general 125 L aiguille et le levier releveur de fil 101 doivent se trouver en position haute Lever le pied presseur Tirer le fil de a bobine dens Ia pretension du dévidoir par lea fentes N et 0 derriere le guide fil P Remonter dans Ia fente 0 par le releveur de fil 101 redescendre par Ia fente Q et passer derriere le guide fil R et dans le guide fil droit S du pince aiguille Bo...

Page 16: ...haute Remonter le hI de canette a l aide du fil d aiguille Onderdraad omhoog halen Bovendraad vasthouden Handwiel met de hand naar u toe draaien en één steek maken tot naald en draadhefboom weer boven staan Met de bovendraad de onderdraad naar boven trekken 4Ober und Unterfaden nach rechts unter den Nähfu legen etwa 10cm Place both threads towards the right under the sewing foot approx 10cm Couche...

Page 17: ...ur général 125 Placer du tissu sous le pied presseur Do stroom uitschakelen met hoofd schakelaar 125 Werkstuk onder do naaivoet leggen 4Beim Einlegen extrem dicker Stofflagen Hebel 113 hhher anheben To insert extra thick fabric plies lift lever 113 higher Pour les tissus ties épais lever davantage Ic levier 113 Is het werkstuk erg dik dan stofaan drukker 113 hoger duwen rHauptschalter einschalten ...

Page 18: ...anning 112 N Instelmarkering Important The following is essential for obtaining good sewing results 1 The needle must be in order 2 The needle and bobbin thread tensions must be correct The bobbin thread tension has been cor rectly set at the works If after checking of the bobbin thread tension see p 81 a correction is necessary the adjusting screw must only be turned minimally Checking the needle...

Page 19: ...j dens de fabricage of de juiste wijze ge regeld Indien nodig deze spanning wijzigen met het instelschroefje op de spoelhuls Dit schroefje altijd minimaal verdraaien zie bldz 8 Bovendraadspanning kontroleren De gebruikelijke draadspanning ligt in de zone tussen 3 en 5 Hoe hoger het cij fer hoe zwaarder de spanning Kontro leer de spanning altijd met een brede zigzagsteek Een kort stukje proefnaaien...

Page 20: ...et the number indicating the stitch length at mark N Fig 0 bottoml shows how to set the stitch length control for sewing stretch stitches Reglage de Ia longueur du point Les chiffres sur le disque 107 indiquent Ia longueur du point en mm Celle ci est reglable entre 0 et 6 mm La longueur de point choisie est indiquee face au repére N L illustration 0 en has montre le reglage du regle point pour Ia ...

Page 21: ...ong as you hold this button the machine sews back wards Couture en marche arrière Abaisser a touche 123 La machine coud en arrière aussi longtemps que a touche est maintenue en bas Achteruit stikken of afhechten Toets 123 naar beneden drukken de machine stikt achteruit Zolang men de toets ingedrukt houdt blijft de machine achteruit stikken 15 ...

Page 22: ...21 D Zickzackstich 2 mm Stretch3fachZickzackstich 2 mm E Zickzackstich 3 5 mm Stretch 3fach Zickzackstich 3 5 mm F Zickzackstich 5 mm Stretch 3fach Zickzackstich 5 mm G Geradstich Stretch3fach Geradstich In der Programmtabelle auf der Seite 70 sind die Stiche und Stichkombinationen mit Hinweisen für ihre Verwendung angegeben Die Buchstaben der Tasten ihrer Maschine bestimmen die Programme und Komb...

Page 23: ... 21 0 2 mm zigzag stitch Elastic triple zigzag stitch 2 mm E 3 5 mm zigzag stitch Elastic triple zigzag stitch 3 5 mm F 5 mm zigzag stitch Elastic triple zigzag stitch 5 mm G Straight stitch Elastic triple straight stitch All stitches and stitch combinations are listed in the stitch program chart on page 71 This chart also contains possi ble applications The letters of the buttons on your machine ...

Page 24: ...es touches de votre machine déterminent les program mes simples et combines réalisables Tiptoetsen De Hobbyserie is uitgevoerd met een per type verschillend aantal tiptoetsen en programma s A B C zijn de knoopsgatentoetsen Toets B is tevens de uitschakeltoets voor de ingetipte toetsen en voor de linker naaldstand zie pag 211 In de stekentabel op pag 73 staan de steken en de steekkombinaties met aa...

Page 25: ...e moitié N N Nutzstiche einstellen Selecting utility stitches Taste tippen und die gewUnschte Stich Push the button required and set the lange zwischen 1 und 6 einstellen stitch length between 1 and 6 All zigzag stitches are halved in width when button G is pressed I 4 Nuttige steken instellen Toets indrukken De gewenste steeklengte tussen 1 6 mm instellen met het steeklengtewiel Alle zigzagsteken...

Page 26: ...tton G all elastic triple zigzag stitches can be halved in width Reglage des points elastiques Appuyer sur Ia touche G et régler le reglepoint de a longueur de points sur le symbole jusqu a Ia butée Tous les triple points zigzag élastiques sont réduits de moité en largeur en appuyant sur Ia touche G Stretchsteken instellen Gewenste steek intoetsen G en de steeklengteknop draaien op het stuitpunt v...

Page 27: ...aight stitching Stichlage Mitte Taste 0 tippen Left needle position push button B Central needle position push button G Deport du point droit Naaldstand instellen Deport a gauche appuyer sur a Naaldstand links toets B indrukken touche B Naaldstand midden toets G indrukken Deport au milieu appuyer sur Ia touche 0 21 ...

Page 28: ...points indiqués sur es touches Ia roue de réglage N des points décoratifs doit étre débrayée A cet effet placer le point sous le repère N Thumb wheel for fancy stitches Every fancy stitch is provided with a letter Select the fancy stitch from the table Set the corresponding letter at mark 0 by turning thumb wheel N Select a stitch length between 0 5 and 1 For sewing the stitches indicated on the f...

Page 29: ...hen 0 5 und 1 wählen Beim Hin weis stretch Stichlängen Einsteller auf drehen Fancy stitches and combinations Pattern combinations can be produced by pressing the keys in connection with the fancy stitches The table shows the stitches and under them the corre sponding buttons to push Select a stitch length between 0 5 and 1 If the patterns are marked stretch set the stitch length control at 4Sierst...

Page 30: ...ln System 130 705 H Hauptschalter 125 ausschalten Schraube N äsen Nade herausnehmen Neue Nade fiache Kolbenseite nach hinten ganz nach oben schieben Schraube festdrehen Changing the needle System 130 705 H Switch off master switch 125 Loosen screw N Take out the needle Push new needle with its flat side facing rear up as far as it will go Tighten the screw Remplacement de l aiguille système 130 70...

Page 31: ...teg 0 in die Nut P einrastet Fitting the sewing foot lower the presser bar lifter and move the foot so that pins 0 snap into grooves P Mise en place de Ia semelle du pied presseur Abaisser le levier du pied presseur deplacer Ia semelle de manière que les étriers 0 s engagent dans es rainures P Naaivoet aanzetten De stofaandrukker laten zakken en het zooltje intussen zo schuiven dat stift 0 in uith...

Page 32: ...e couture contre Ia machine comme on voit sur Ia figure 0 Werkvlak veranderen De werkbox iets optillen en naar voren wegtrekken N Voor bet weer aansluiten do werkbox in do richting van do pijl tegen de machine schuiven 0 4 Zubehörfach Den Deckel der Nähfläche 108 öffnen Darunter ist Platz für Nãhzubehör Accessory box Open the cover of work support 108 Under this lid there is room for your sewing a...

Page 33: ...sher Pieds presseurs accessoires standards 1 Semelle a 4 Semelle a point boutonnières invisible 2 Semelle pour 5 Semelle poser Ia fermeture transparente a glissiere 7 Guide bord 3 Semelle normale 8 Rondelle de feutre Naajvoeten standaard accessoires 1 Knoopsgatenvoet 4 Blindzoomvoet 2 Treksluitingvoet 5 Borduurvoet 3 Normal naaivoetje 7 Lineal 8 Viltringetje I 27 4 Blindstichful 5 KlarsichtfuR 7 L...

Page 34: ...or clear view foot and edge guide Stitch Button G Edge guide N can be used with nearly all sewing feet Fitting the edge guide Push edge guide N through hole 0 and secure it in position with screw P The guide can be adjusted to the desired stitching margin for various appli cations With the edge guide attached it is easy to sew parallel lines of stitches or to stitch parallel to the edge The guide ...

Page 35: ...oujours nette et réguliere Watteren Naaivoetje Normale naaivoet of borduurvoet en geleide lineaal Steek Toets G De lineaal N kan bij nagenoeg ails naai voetjes worden gebruikt Bevestigen van de Iineaal De Iineaal N door gaatje 0 schuiven en met schroef P vastdraaien De lineaal kan op iedere gewenste breedte afge steld worden Parallel lopende stiksels of sierstiksels langs kragen zomen ed kan men m...

Page 36: ...e may not correspond with the colour coding of the terminals in your plug proceed as follows the wire which is coloured blue must be connected to the terminal which is marked with the letter N or coloured black The wire which is coloured brown must be connected to the terminal which is marked with the letter L or coloured red Please note When a 1 3 ampere plug is used a 3 ampere fuse has to be fit...

Page 37: ...rch kann die Knopflochlänge bestimmt wer den Zum Knopflochnähen homes Näh garn verwenden Buttonho e setting Push button C Set the needle thread tension at range 3 for buttonhole sewing Attach the buttonhole foot Set the stitch density at range N Insert a gimp thread in the sewing foot as shown in the illustration Place the thread over the back ridge 0 and pull it taut so that it is held in tab P a...

Page 38: ...fiehlt sich vor dem Nähen der Knopflöcher in das Kleidungsstuck em Probeknopfloch zu nähen Sewing buttonholes Pull the bottom of the buttonhole foot forward as far as it will go 1 Sew first buttonhole seam Raise the needle 2 Push button B until 4 to 6 bartacking stitches are sewn holding the work piece fast Raise the needle Then release the button 3 Push button A Sew the second but tonhole seam th...

Page 39: ...nt de commencer a coudre es boutonnières Les iIIustratons Os montrent pas a semelle du pied presseur Voor een beter overzicht is de knoopsgatenvoet op de afbeeldingen weggelaten N Knoopsgaten maken De slede van de voet oerst geheel naar u toe schuiven 1 Het eersto rijtje naaien tot het pijltje van de voet op de gewenste Iengte staat Naald omhoog brengen 2 Toots B indrukken ingedrukt houden en 4 6 ...

Page 40: ...wickeln Abb 01 Die Fadenenden von Hand verknoten Sewing on buttons Sewing foot Clear view foot or without sewing foot Stitch Button E Feed dog Lowered Thread Fine sewing thread Move the needle to its left position and turn the hand wheel towards you until the needle descends Position the button on the previously marked material Carefully place mate rial and button under the sewing foot holder Lowe...

Page 41: ...l env Passer es fils d aiguille et de canette sur I envers par es trous du bouton fig P et enrouler les fils aches autour de Ia queue du bouton fig Q Ensuite nouer les bouts de fil a Ia main I Knopen aanzetten Naaivoet Zonder yost of met de borduurvoet Steek toets E Transporteur laten zakken Garen dun naaigaren Draai het handwiel zover near u toe tot de naald links naar beneden gaat Leg nu de knoo...

Page 42: ...stehen lessen Ndhfult anheben und den ReiP verschlult öffnen Abb 01 Nähfult senken Naht zu Ende nähen This is how the zipper foot is engaged Insert the foot with the back pin in the back groove R and push the shoe of the foot upwards until the front pin S snaps in The zipper foot can be pushed to the positions left lFig N right or centre Completely concealed zip closure Baste in zip by hand first ...

Page 43: ...rir a formeture a glissiere fig 0 Rabaisser le pied presseur et terminor a couture Ritssluiting inzetten Naaivoet ritsvoet Steeklengte 2 3 Steek Toets G Garen normaal garen Zo wordt tie ritsvoet ingeklikt Het achterasje van do ritsvoet in uitho ing R hangen en de zool naar boven drukken tot het voorste asje in uitholling S klikt Deze voet kan voor iedere bowerking in de goode positie geschoven wor...

Page 44: ...R schileRen NähfuR senken und die Naht fertig nähen Das Ende der ReiRverschluIf naht durch einen Riegel sichern Zippers in ladies s acks For machine setting see page 36 Engage the zipper foot on the right Press the edges of the placket Baste the closed zip to the right edge of the placket on the reverse fabric side so that its teeth are still visible Pin facing strip 0 to the underside and stitch ...

Page 45: ...r I aiguille dans le tissu remonter le pied presseur et fermer Ia fermeture a glissiere Rabaisser le pied presseur et terminer Ia couture A Ia fin de Ia couture coudre un arrét Treksluiting in damespantalon Machine instellen zie blz 37 Verschuif de zool van de treksluiting voet geheel naar links De inslagen van bet split Scherp instrij ken De treksluiting gesloten zóver on der de rechterzijde van ...

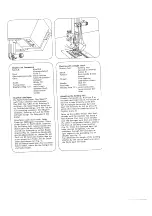
Page 46: ...dle thread tension Fine machine embroidery thread Size 70 Lowered 121 push backwards lower presser bar lifter Attaching the darning foot Position the needle up Push bar P to the back and hold it there Fit the pin of the foot in hole N at the same time fork R engages the presser bar and push the foot fully in Let go of bar P which then rests on retaining screw 0 Tighten screw 0 Draw up the bobbin t...

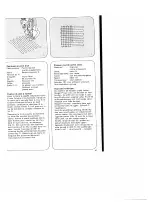
Page 47: ...es fits uniformément de petits points fig T Determiner soi méme Ia longueur des points en deplacant I ouvrage plus ou moms vite Stoppen med de rechte steek Naaivoet stopvoet extra accessoire Steak mets G Bovenspanning iets losser Garen dun machinestopgaren Nacld dikte 70 Transporteur laten zakken Schuifle 121 naar achteren schuiven Stofaandrukker omlaag Stopvoet bevestigen De naald in de hoogste s...

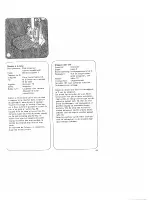
Page 48: ...urch von rechts schöner aus Darning with wool Sewing foot Darning toot special accessory Button E 3 in buttonhole range Embroidery and darning thread wool Needle Size 70 Feed dog lowered Darning stop 121 push backwards lower presser bar lifter Draw the wool thread through the needle hole of the darning foot and into thread guide P Place the wool thread under the darning foot Start at the top left ...

Page 49: ...et wot Naaivoet stopvoet Steek toets E Bovenspanning knoopsgatenzone hi 3 Naaigaren dun on soepel garen liefst stopgaren wol Naatd dikte 70 Transporteur uitgeschakeld Schuifje 121 naar achteren schuiven Stofaandrukker omlaag Stock de draad wol door het draadgleut je P van do stopvoet Do draad ligt nu onder de voot Start links boven het gat en span woldraden naar rechts en terug over hot gat tot di...

Page 50: ...hook raceway now and then as shown in the illustration N Nettoyage et graissage Qdbrancher Ia machine du secteur Amener l aiguille en position haute Sortir Ia boite a canette et degagor a somelle Engager le tenon avant N dii pied a boutonnières dans l ouvorture 0 a gauche de Ia plaque Abaisser a semelle et Ia plaque a aiguille est libérbe Enlever Ia plaque a aiguille A l aide d un pinceau nettoyor...

Page 51: ...mpoule vers le haut et Ia tourner vers P Puissance maximale admissible de l ampoule 15 Watts Changing the bulb Pull out the mains plug Hold the edge guide slightly tilted and push it into opening N in the head of the machine Press down the housing of the lamp and hold it fast Push the bulb upwards turn it in direction 0 and pull it out Insert the new bulb so that the pins enter slots 0 push the bu...

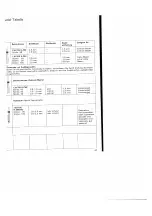
Page 52: ...H SKF grofe Grobmaschige Miederwaren Lycra Nadelstàrke Kugelspitze Simplex Lastex 70 110 130 705 H J spitze Köper Berufsbekleidung schwere Nadelstàrke Rundspitze Leinenstoffe Blue Jeans feines Segel 90 110 tuch 130 705 H IL Schneidspitze Leder Wildleder Kaibsleder Ziegenleder Nadelstärke rechts 70 120 schneidendl 130 705 H PCL Schneidspitze Kunstieder Plastik Folien Wachstuch Nadelstärke mit Spitz...

Page 53: ...ng ausnähen kontrollieren Sic durch Drehung des Hand rades ob die Nadeln einwandfrei einstechen Dadurch wird em Nadelbrechen weitgehendst ausgescha Itet Zierstichmuster Zickzack Muster 130 705 H ZWI Stärke 80 0 5 1 5 mm breit 1 6 mm Verzierungen Stärke 80 0 5 1 5 mm schma 2 0 mm Verzierungen Stdrke 80 0 5 1 5 mm schmal 2 5 mm__ Verzierungen Hohisaum Spezial Doppelnadel Dekorativer Hohlsaumeffekt S...

Page 54: ...nitted fabrics 130 705 H SKF Heavy Wide meshed corsetry Lycra Simplex 70 110 ball point and Lastex 130 705 H J Acute Twill workwear heavy linen blue jeans 90 110 round point and light canvas 130 705 H LL Narrow Leather suede calf and goatskin 70 1 20 twist point leathers 130 705 H PCL Narrow wedge Imitation leathers plastic materials 80 110 point with plastic sheeting and oilcloth left twist groov...

Page 55: ...re you start sewing turn the handwheel and check to malce sure the needles stitch into the fabric properly In this way needle breakage can be largely prevented fl Decorative and zigzag patterns 705HZWl 80 0 5 1 5 mm wide I 1 6mm Ornamentations 80 0 5 1 5 mm narrow 2 0 mm Ornamentations 80 0 5 1 5 mm Ornamentations Special hemstitching twin needle 1 130 705 H ZWI HO If 80 2 0 3 0 mm very narrow Dec...

Page 56: ...705 H SKF grande pointe Lycra grande maille gaines combines Grosseur de bille etc Lycra Simplex Lastex l aiguille 70à 110 130 705 H J pointe ronde Croisé vêtements de travail lins lourds Grosseur de pointue blue jeans toile a voiles fine l aiguille 90à 110 1301705 H IL pointe Cuir daim veau chevreau Grosseur de coupante l aiguille 70à 120 a droite 130 705 H PCL pointe cou Similicuir plastique feui...

Page 57: ...et contrOlez si es aiguilles pénètrent impeccablement dans Ia plaque Ainsi vous ne risquez pas que es aiguilles cassent au cours de Ia couture Motifs au point d ornementation Motifs au point zigzag 130 705 I f ZWI Grosseur 80 0 5 1 5 mm large 1 6 mm Ornementations Grosseur 80 0 5 1 5 mm étroite 2 0mm Ornementations Grosseur 80 0 5 1 5 mm étroite 2 5 mm Ornementations Ouiiet ajour AiguiHe doub e sp...

Page 58: ...te stretch 75 90 klein naald oog stoffen b v zijden jersey 130 705 H SKF grote bol Grofmazige foundation lycra naalddikte vormige punt simplex lastex 70 110 1301705 H J spitse Keper werkkleding zwaar linnen naalddikte naaldpunt jeans fijn zeildoek 90 110 130 705 K LI snijpunt Leer wildleer kalfsleer naalddikte rechts 70 120 snijdend 130 705 H PCI snijpunt met Skai plastic folie wasdoek naalddikte ...

Page 59: ...fect in grofmazige weefsels Benaming Steeklengte Steekbreedte Naald Geschkt voor afstand 130 705 H ZW 2 5 mm 1 6 mm normale biezen naalddikte 80 2 5 mm 2 0 mm normale biezen 130 705 H ZWI naalddikte 80 2 5 mm 2 5 mm brede biezen naalddikte 90 2 5 mm 3 0 mm brede biezen naalddikte 100 3 0 mm 4 0 mm extra brede biezen Sierstiks s met de tweelingnaald Voor de gewenste steek gemaakt wordt eerst kontro...

Page 60: ...t nicht richtig eingesetzt 4 Die Naht ist nicht gIeichmà1ig Die Spannung 1st verstellt Zu starkes knotiges oder hartes Garn Der Unterfaden 1st ungleich aufgespult Fadenschlingen unterhaib oder oberhaib des Stoffes Nadel bis zum Anschlag hochschieben Flache Kolbenseite nach hinten Nadel System 130 705 H einsetzen Neue Nadel einsetzen Einfddelweg uberprufen Stärkere Nadel einsetzen Siehe unter 1 Fad...

Page 61: ... Fadenreste entfernen und our einen Greiterbahn Tropfen 01 in die Greiferbahn geben 7 Die Maschine näht die Stiche auf den Tipptasten nicht Modelle mit Zierstichen Zierstich Einstellrad ist eingeschaltet Einstellrad ausschalten auf den Punkt stellen 8 Wichtige Hinweise Vor dem Auswechseln von NähfüIen und Nadein mu der Hauptschalter 125 ausgeschaltet werden Die eingefädette Maschine nicht ohne Sto...

Page 62: ...orm Tension out of adjustment Thread too thick knotty or hard Bobbin thread wound unevenly Kinks appear on top and bottom of material Push needle up as far as it will go its flat shank side facing rear Insert system 130 705 H needle Insert new needle Check threading Use thicker needle See par 1 above Regulate thread tension Use only good quality thread Insert new needle and push it up as far as it...

Page 63: ...a drop of oil into hook raceway 7 The machine does not sew the stitches on the push buttons Models with fancy stitches Fancy stitch thumb wheel is engaged Disengage thumb wheel set at dot 8 Fundamental rules Before exchanging either sewing foot or needle switch off master switch 125 Never run a threaded machine unless there is a piece of fabric under the sewing foot If you have to leave the machin...

Page 64: ...Le fit est trop gros noueux ou dur Canette irregulierement garnie Engager l aiguille a fond le méplat du talon vers l arrière N utiliser que des aiguilles du système 130 705 H Placer une aiguille neuve Contrôler les passages du fit Utiliser une aiguille plus forte Voir 1 Régler convenablement les tensions N employer que du fil de qualite Introduire Ia nouvelle aiguille a fond Remplacer l aiguille ...

Page 65: ...outte d huile dans Ia coursière 7 La machine ne coud pas les points commandés par touche Modèle avec points d ornementationl Le disque de reglage des points Débrayer cc disque Ic placer sur le dornementation est embraye point 8 Remarques importantes Pour remplacer le pied presseur et I aiguille placer l interrupteur general i 25 sur Arrêt Ne jamais mettre en marche Ia machine enfilée sans tissu so...

Page 66: ...g De spanning is versteld Te dik onregelmatig of te stug garen De onderdraad is niet regelmatig opgespoeld Grote lussen onder de stof Opheffen Naald zover mogelijk naar boven schuifen met de platte kant van u at Naald system 130 705 H inzetten Nieuwe naald inzetten De machine opnieuw inrijgen Dikkere naald inzetten Zie onder opheffen 1 Bovenspanning losser zetten Goede kwaliteit gemerceriseerd of ...

Page 67: ... doen 7 De machine types met siersteken maakt niet de steken van de tiptoetsen Het insteiwiel voor de siersteken is Instelwiel voor de siersteken ingeschakeld uitschakelen 8 Belangrijke aanwijzingen Bij het verwisselen van naalden en naaivoetjes moet de stroom uitgeschakeld worden Daarvoor hoofdschakeJaar 125 indrukken De ingeregen machine nooit zonder stof eronder laten draaien Wanneer men ook vo...

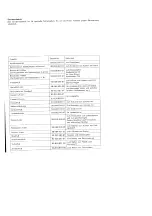
Page 68: ... und weichen Stichplatte mit Rundloch 93 032087 91 Stoffen Seidenjersey etc Kapper 4 5 mm 93 035946 91 für Kappnahte Kapper 6 5 mm 93 035948 91 Krbuselfulf 93 035 998 9 1 zum Kräuseln von Volants etc Mehrstichkräusler 98 999 650 01 Zum Kräuseln von Volants etc Kordonierfull 93 035915 91 zum Kordonieren Lochstickplatte 93 036 97645 für Lochstickerei zum Versäubern von Schnittkanten und zum gleichze...

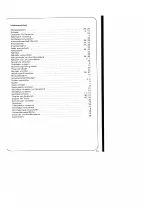
Page 69: ...19 Oberfaden ein egen 9 Oberfadenspannung prufen 12 Programmtabelle 70 Reinigen und Olen 44 ReiBverschIu1 einnähen 36 37 RUckwärtsnãhen 1 5 Sicherheitsbestimmungen 1 Spulen vorbereiten 4 5 Spulen 6 Spule einlegen 7 Spulenkapsef einsetzen 8 Stichlänge einstellen bei Geradstich 21 Stichlänge einstellen 14 Stoffdrückerhebel 11 13 Stopfen mit Geradstich 40 41 Stopfen mit Wolle 42 43 Stretchstiche eins...

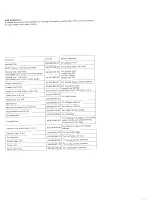
Page 70: ...te with round needle hole 93 032087 91 and soft fabrics silk jersey etc l Felling foot 4 5 mm 93 035 946 91 For felled seams Felling foot 6 5 mm 93 035948 91 Shirring foot 93 035998 91 For shirring valances Multi stitch gathering attachment 98 999 650 0 1 For shirring valances Single needle cording foot 93 03591 5 91 For single needle cording Eyeletting plate 93 036 976 45 For eyeletting For finis...

Page 71: ...lts and how to remedy them 56 57 Fingertip controls 1 7 Inserting the bobbin 7 Inserting the bobbin case 8 Lowering the feed dog 24 Needle chart 47 48 Needle thread tension 1 2 Operating the foot control 3 1 2 Presser bar lifter 11 13 Program table 71 Reverse sewing 1 5 Safety rules 1 Setting stretch stitches 20 Setting the needle position for straight stitch 21 Setting the stitch length 14 Settin...

Page 72: ...oie Plaque a aigui le avec trou rond 93 032 087 9 1 etc Rabatteur 4 5mm 93 035946 91 coutures rabattues Rabatteur 6 5mm 93 035948 91 Pied fronceur 93 035998 91 froncage de volants etc Fronçeur multipoints 98 999 650 01 froncement de volants etc Pied guide cordonnet 93 03591 5 91 pose de cordons Plaque pour broderie a jour 93 036 976 45 broderies a jours surfi age de bords de coupe Pied overlock 98...

Page 73: ...ur pantalons dames 38 39 Insertion de fermetures a glissiere 36 37 Levier presse tissu 11 13 Mesures de sécurité 1 Mise en place de Ia canette 7 Mise en place de Ia boite a canette 8 Nettoyage et graissage 44 Perturbations et remèdes correspondants 58 59 Pieds presseurs 27 Plaque de rangement 2 Plan de couture variable 26 Points d ornementation points combines 23 Pose de boutons 34 35 Preparation ...

Page 74: ...en b v Flechte steek steekplaat 93 032 087 9 1 zijden jersey Platte naadvoet 4 5 mm 93 035 946 9 1 Voor platte naden Platte naadvoet 6 5 mm 93 035 948 9 1 Rimpelvoet I 93 035 998 91 Rimpelen van volants etc Rimpel en plooivoet 98 999650 01 Rimpelen van volants etc Kordonneervoet 93 03591 5 91 Voor kordonneerwerk Nestelplaatje 93 036 976 45 Nestelgaatjes Voor het afwerken van dunne stoffen Overlock...

Page 75: ... Nuttige steken instellen 19 Onderdraad naar boven halen 10 Opheffen van storingen 60 61 Programmatabel 73 Schoonmaken en smeren 44 Siersteken instellen 22 Siersteek kombinaties 23 Spoelen voorbereiden 4 5 Spoelen 6 Spoel in do spoelhu s 7 Spoelhuls in de machine 8 Spoelspanning kontroleren 8 Steeklengte instellen 14 Stofdrukker 11 13 Stoppen 40 41 Stoppen met wol 42 43 Stretchsteken instellen 20 ...

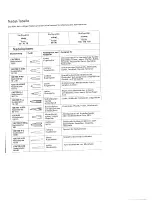
Page 76: ... in I III IH CD CD c S CD CD G H D D E F I E C C O Ohne Drehen des Stoffes nur tippen und das Knopf 01 Knopfiocher J loch st fertig Die Stichdichte lält sich regulieren 02 Geradstich Für alie Näharbeiten und einen 6 mm Ziersteppstich Vielseitig anwendbar zum Versäubern von Nähten 03 Zickzackstich Applizieren Spitzen einsetzen Nähen von Raupen ndhten Sticken Knöpfe annähen Stopten usw 04 Stretch 3f...

Page 77: ...ed to great stress which stretch straight stitch under stress itch program chart ted in this chart are the stitch program number the corresponding stitch and in lower half the buttons to be pressed to sew this seam pattern For all stitch programs arked stretch turn the stitch control toward stretch as far as it will go r all other programs select the stitch length as desired The individual stitch ...

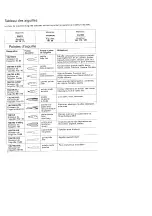
Page 78: ...vrage 1 suffit d appuyer sur des 01 Boutonnières touches densité des points reglable i Point de base pour executer les coutures et pour 02 Point droit réaliser un point décoratif de 6 mm surpiqures Emplois multiples surfilage applications incrustations 03 Point zigzag de dentelle nervures broderies reprisage etc 04 Triple couture Coutures élastiques soumises a effort elles s étirent point droit sa...

Page 79: ...iii Ill Ill I l CD CD CD I El CD 1 D D E S SI ER I 0 D Jr Benaming Toepassen Automatisch zonder de stof te keren alleen intippen en 1 Knoopsgaten het knoopsgat is klaar De steekdichtheid is instelbaar Voor at het naaiwerk en een zadelsteek tot 6 mm in 2 Rechte steek I modellen uitgevuerd met 6 mm steeklengte I Veelzijdig toe to passen zoals afwerken 3 Zigzagsteek kant inzetten kordonneren borduren...

Page 80: ...hnische Andertrngen oorheh teri Gedruckt in Deutschlaiid Sobject to Iterations in design Printed in Germany Sons toute reserve de modifications techniques Imprimé en R F A Tochnische wijaigingen voorbehouden Gedrukt n Duitsiand Nr 29 629999 80000 8 0694 deutsch englisch franzossch holldnd sch ...

Reviews: