List of figures
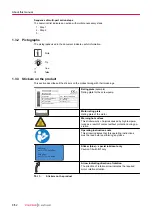
Fig. 1:
Position of the stickers on the screw pump
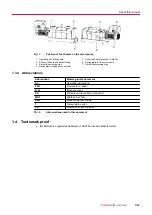
Fig. 2:
Operating principle
Fig. 3:
Arrangement of screw pump
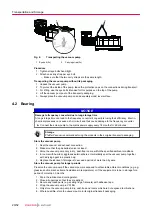
Fig. 4:
Transporting the vacuum pump
Fig. 5:
Connecting exhaust side
Fig. 6:
Cooling water connection
Fig. 7:
Sealing gas connection
Fig. 8:
Filling lubricant on the motor side
Fig. 9:
Filling lubricant on the vacuum side
Fig. 10:
Connecting power supply to the frequency converter
Fig. 11:
Connecting temperature switch
Fig. 12:
Checking the lubricant level
Fig. 13:
Draining lubricant on the motor side
Fig. 14:
Draining lubricant on the vacuum side
Fig. 15:
Filling lubricant on the motor side
Fig. 16:
Filling lubricant on the vacuum side
Fig. 17:
Disassembling and cleaning the intake strainer
Fig. 18:
Cleaning the gas ballast filter
Fig. 19:
Dimensions Hepta 950 L | 72 Hz
List of figures
6/52


