P. G.
TM0047
4-1
SECTION 4. PROGRAMMING OPTIONS
4.0 PROGRAMMING OPTIONS
The amplifier contains a number of options which are programmed before the unit is
installed, or may be adjusted during system installation or modification. They are set in
a default setting by PG before shipment. A summary diagram of these jumpers is
affixed to the inside of the removable amplifier cover for use in the field, but a larger view
is shown herein (Fig 4-1) together with the following description of these settings.
It is suggested that when jumpers are removed to break a circuit, that they be reinstalled
on one pin at the same location to keep them readily available if the option is reselected
at a later date.
4.1 DC CONTINUITY (DC)
A DC jumper is provided to permit the amplifier to isolate J1 from DC if there is NO need
for downstream power and particularly if a DC grounded device is installed in series with
the amplifier. Removing the jumper breaks the DC connection from connector J2 to J1,
and is recommended practice.
The jumper is labelled “DCJ1 DCJ2”. The jumper provides DC continuity to the J1 and
J2 connectors. The “EX” is used to provide connection from the local power DC
receptacle to power the amplifier. The “EX” jumper should always be installed.
NOTE:
Breaking the DC connection also disconnects the low frequency FAULT code
from being transmitted along the cable from a downlink amplifier or power
supply.
4.2 ATTENUATION (AC AND AP)
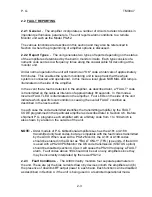
The A300 amplifier has a nominal overall gain of 20 dB in both the SMR and the PCS
frequency bands, but this gain may be reduced by built-in attenuators included in each
frequency band. The attenuators are installed on the uplink side of the amplifier and
hence do not have significant impact on the uplink system noise figure.
The attenuator for each band is set for values from 0 to 15 dB by four jumpers in a
binary sequence. Setting the jumpers to the “IN” position inserts, 1, 2, 4 or 8 dB
attenuation in the circuit for that band. Refer to the label attached to the inside of the
cover for an enlarged view of these jumpers and their setting positions.
NOTE
: The jumpers must be set to either the IN or OUT positions for correct attenuator
operation. Do not leave open. If the optional AUTOSET control board is fitted,
see Appendix A for further information.


