
MAGNIUM
GEAR
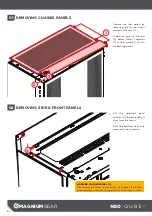
04
DUAL-SYSTEM
Use as Power Switch
Use as Power LED
01
02
03
04
05
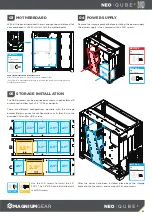
MOTHERBOARD
FRONT I/O
HEADER DIAGRAM
MINI-ITX
PCIe DEVICE
REVOLT X
01
04
02
03
05
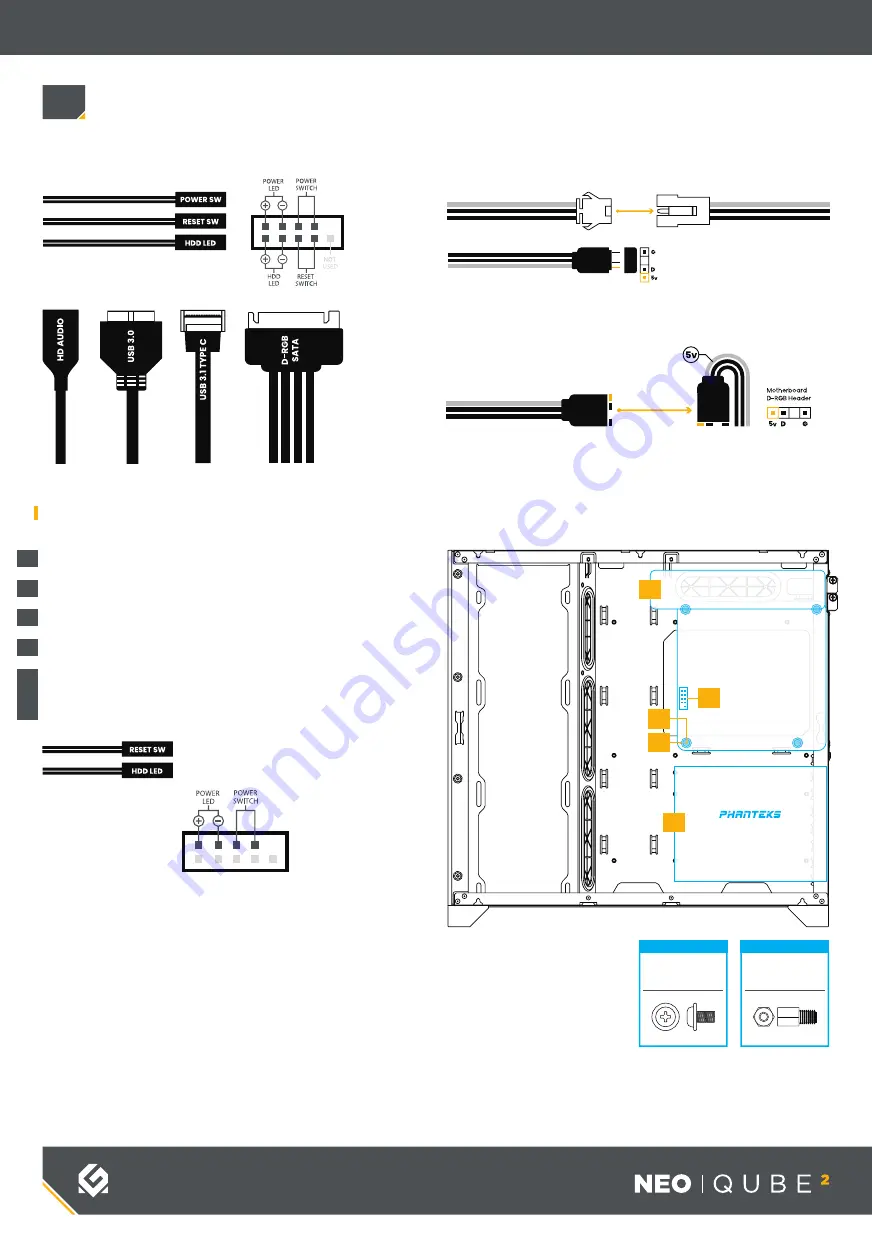
OPTIONAL |
Only applicable when installing a dual-system into the NEO Qube 2.
Motherboard
Screw
4x
INSTALL
Motherboard
Stand-off
4x
INSTALL
The front I/O cables can now be connected to the motherboard
and power supply.
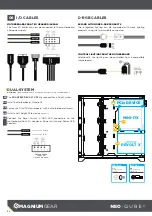
The integrated lighting can be expanded with more lighting
products using the two available connectors.
Additionally, the lighting can be controlled from a compatible
motherboard.
D-RGB CABLES
EXPAND WITH MORE D-RGB PRODUCTS
CONTROL LIGHTING FROM THE MOTHERBOARD
MOTHERBOARD FRONT I/O HEADER DIAGRAM
06
I/O CABLES
The
PHANTEKS REVOLT X PSU
is required for a Dual-System.
Install 4x Motherboard Stand-offs.
Secure the Mini-ITX Motherboard with 4x Motherboard Screws.
Install a half-height PCIe device
(optional)
.
Connect the Reset Switch & HDD LED connectors to the
motherboard front I/O header as Power Switch and Power LED
headers.


