background image

83 


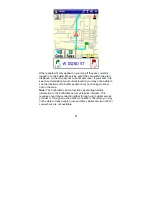
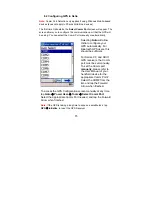
8.2 Configuring GPS in Ostia 


Note:

 Comm Port Selection only applies if using Windows Mobile-based 

devices (does not apply to Pharos All-In-One devices)


The first time Ostia starts, the 

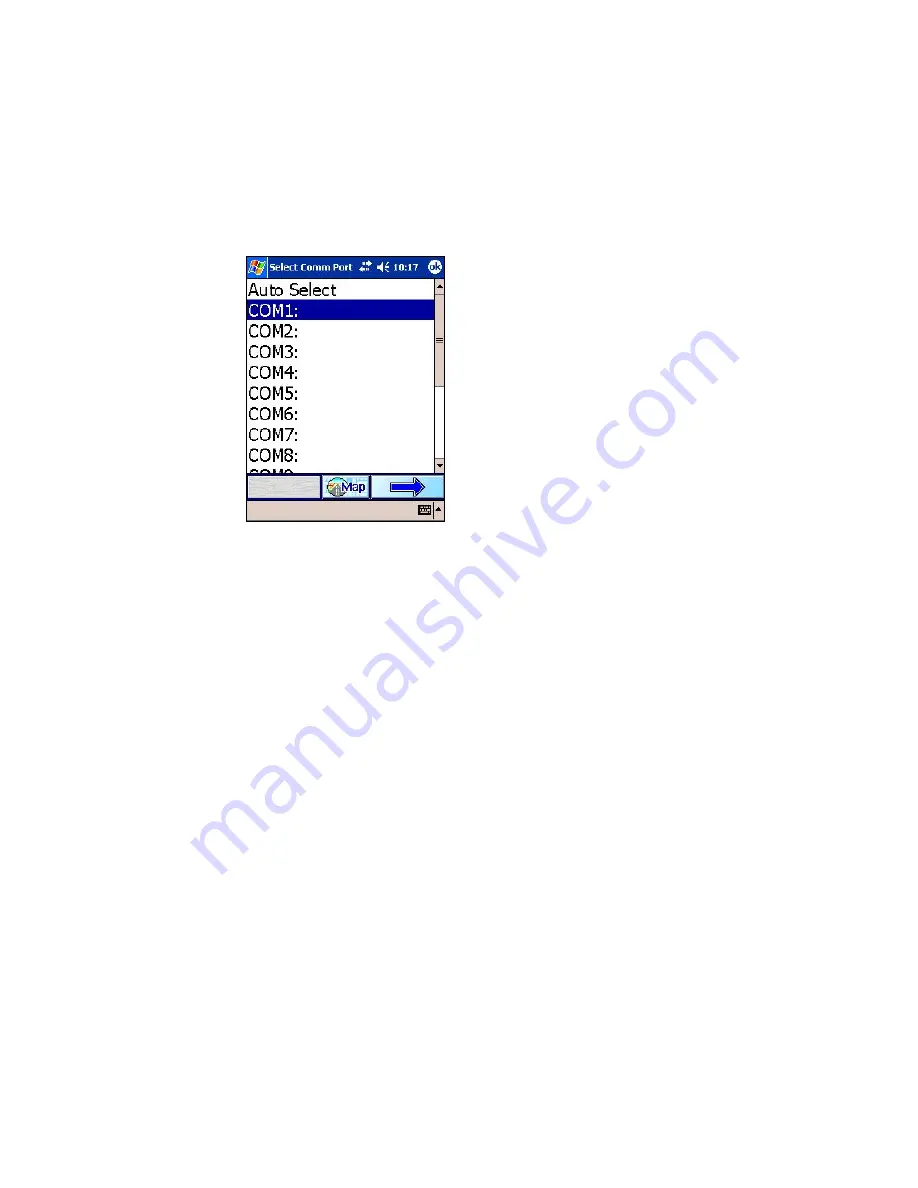
Select Comm Port

 screen will appear. The 

screen allows you to configure the communication port that the GPS will 
be using. You can select the Comm Port manually or automatically. 


Selecting 

Auto 

will allow 

Ostia to configure your 
GPS automatically. For 
Bluetooth GPS users, this 
should be sufficient. 
 
For Serial, CF, and SDIO 
GPS receivers, the Comm 
port must be set manually. 
To set the Comm port 

manually

, please refer to 

the User Manual of your 
handheld device for the 
appropriate Comm Port #. 
Select the COM# from the 
list, and tap the Forward 
Arrow when finished. 
 

To access the GPS Configuration screen manually at any time, 
tap 

Goto 

Æ

 Power User 

Æ

 Tools 

Æ

 Select Comm Port

Select the appropriate Comm Port needed, and tap the Forward 
Arrow when finished. 


  Note:

 If the GPS is taking a long time to acquire a satellite lock, tap  


GPS 

Æ

 Initialize

, to reset the GPS Receiver 


Summary of Contents for Ostia 3.x

Page 1: ...Ostia User s Manual ...

Page 2: ... higher Memory 5 MB Program memory cards are suggested for map storage Compact Flash card or SD MMC card memory 64 MB minimum Desktop Laptop Requirements CPU Pentium class Operating System Windows 2000 XP or higher USB port or Card Reader for data transfers to Windows Mobile based devices Microsoft ActiveSync must be installed and connected if transferring data via connection from the device to US...

Page 3: ...g and Transferring Maps 15 2 5 Other MapFinder Functions 16 3 0 Ostia Terms and Abbreviations 17 4 0 On screen Features 18 4 1 Map Screen Buttons 18 4 2 Goto Buttons 19 4 3 Power User 20 4 4 View Buttons 22 4 5 Options Buttons 23 4 6 Smart Navigator Buttons 24 4 7 Options Details 26 5 0 General Features of Ostia 28 5 1 Anatomy of the Navigation Screen 28 5 2 Opening and Viewing a Map 29 5 3 Satell...

Page 4: ...s 56 6 8 When to use the Highway Motorway Map 57 7 0 Smart Navigator Services 58 7 1 Register Subscribe 58 7 2 Smart Login 60 7 3 Using Real time Traffic POI Finder and Maps on Demand 62 7 4 Using Follow Me 69 8 0 GPS Receiver Setup and Configuration 82 8 1 GPS Status Indicator Powering on GPS Receiver 82 8 2 Configuring GPS in Ostia 83 8 3 Installing Pharos GPS Hardware 85 9 0 Troubleshooting 89 ...

Page 5: ...gistered Customer you are eligible to download updated maps and software and participate in any future programs or services that Pharos may announce Discounted fees and or additional charges may apply Registration is easy and Pharos never sells or releases user information to any outside entities ...

Page 6: ...oor GPS reception quality Navigation maps may contain errors and omissions or may be out of date with recent road changes or conditions On the rare instance where an address or section is missing from our maps please contact us as soon as possible to ensure that we keep our maps up to date with the least amount of errors as possible Please be attentive to roadway signage all posted roadway informa...

Page 7: ...ire ActiveSync Before Copying Maps Section 2 make sure your Storage Card is in your device or card reader and that it is not locked Use the MapFinder utility to choose and load maps Section 2 Before installing Ostia on your Windows Mobile based devices Section 2 make sure ActiveSync on your desktop shows Connected Know both your departure location and your destination to determine which maps you n...

Page 8: ...t of Reference to another with up to 10 intermittent Multi Stops in a single Route Easy to use Points of Interest categories such as Cash Fuel Food Hotel etc Text directions Visual driving directions and Voice guidance Tap a street on the map to show street information Zoom in and zoom out with stylus Favorites stored on Pocket PC independent of Contacts GPS status indicator with on screen strengt...

Page 9: ...ption and one touch Re Route button o Moving map while navigating with the GPS Receiver o Selectable North Up or Heading Up for map display Smart Navigator Services o 4 Internet based services with subscription o Real time Traffic shows traffic speed and or incident data based on your city where available o POI Finder provides Points of Interest such as businesses fire departments WiFi Hotspots Fe...

Page 10: ...e click on the CDROM Drive to open the Pharos Setup Screen Step 3 Select Ostia to install Ostia to your device and follow the installation instructions on your screen Note Ostia is pre installed on some Pharos devices Note After Ostia has been successfully installed on your device please perform a Soft Reset on your device This will ensure that the Ostia shortcut will appear on the Today screen St...

Page 11: ...haros Setup Screen will directly link to the Pharos Home page assuming your PC is connected to Internet Step 6 To read software or hardware manual select Manual from the Pharos Setup Screen Select the manual you wish to read from the list ...

Page 12: ...to use Pharos MapFinder MapFinder helps you determine which maps you need Simply select the maps you wish to use and copy them to your PC Pocket PC Pharos navigation device Smartphone or Storage Card You can also browse features and data within your maps USA Canada If using European maps select the country that covers your area by clicking on the map The appropriate MapFinder for that country will...

Page 13: ... need more than one map to travel efficiently To view a map on your PC right click on the desired map and select View Current Map This allows searching for Addresses Points of Interest i e Airports City Centers etc and other features After searching a list matching your criteria will appear in the results field Double click the city name you wish to select The map selection will become highlighted...

Page 14: ...isplayed as seen to the right Double click on the map to select it Repeat for additional map selections MapFinder displays the number of maps you have selected how much free space is available on your hard drive and how much storage is required to transfer this map to your Device in the upper right corner of the window ...

Page 15: ...Mobile based device Card Reader Transfer maps directly to a memory card in a card reader Make sure you know which drive letter is assigned to your card reader 1 Choose appropriate option and click Execute Map Copy as seen to the right 2 Select location to store maps Click the drop down menu arrow to scroll through additional options in list For the Windows Mobile based device choose either Main Me...

Page 16: ...ppear in the list if you right click over white space Copy Current Map s map s currently selected will be copied to the device Copy Selected Map downloads maps already on your hard drive to your device Extract Maps to the Hard Drive extracts maps directly to your hard drive only Delete Maps deletes maps from your hard drive only About Pharos MapFinder displays program information Minimize minimize...

Page 17: ...our device Microsoft ActiveSync Developed by Microsoft Use with a Windows Mobile based device and your desktop computer to install manage maps This software can be downloaded from www microsoft com windowsmobile Multi Stop Add up to 10 stops to a route between Origin Destination Point of Interest POI Common points of interest which can be used as PORs are listed in the following categories Cash Fu...

Page 18: ...tor services manage Favorites and view Options GPS Enables you to turn the GPS on off initialize reset the GPS and indicates the current status of the GPS receiver Save Brings up on screen Buttons that allow you to save your GPS Map Center Current Origin Current Destination or Latitude Longitude to Favorites Home or Contacts 2D Enables you to switch back to 2D mode ...

Page 19: ...19 Map Screen 2D Map Screen 3D Goto Screen View Screen Options Screen Smart Navigator Screen ...

Page 20: ...ok Contacts database to set a Destination Home Routes you to the Favorite pre designated as Home Power User Gives you access to additional Ostia features such as setting an Origin or Opening a Map See Section 4 3 Power User for a list of specific functions within this option Map Returns you to the map screen This applies to all screens in which this button appears Forward Arrow Moves forward to th...

Page 21: ...Route and Reverse Route are only available if an Origin and Destination have been selected My Friends only available if you and at least one Friend are logged into Follow Me subscription required Smart Navigator Accesses Smart Navigator Services For more information see Section 4 6 Smart Navigator Requires Internet access and paid subscription from Pharos www PharosGPS com SmartNavigator Note Appl...

Page 22: ...d POIs Found or have been previously saved such as Trip Trace and Favorites Clear Clear features that have been added to the map such as Real time Traffic Places Found a Route Multi stops Trip Trace and Favorites Tools Allows you to Simulate a route Turn GPS receiver On Off Record a Trip Trace Save a Place Delete Favorites Export Favorites as a text file or view Options For more info on Options se...

Page 23: ... GPS Info View Satellite strength and Compass info such as Latitude Longitude time altitude etc Note Altitude is based on Height Above Ellipsoid not Height Above Sea Level Show Destination View the currently selected Destination on the map Back Arrow Moves you back to the previous Screen This applies to all screens in which this button appears ...

Page 24: ...t Lon as a Favorite as Home or to Outlook Contacts Delete Favorites Delete a Favorite from the list of saved places Clear Route Clears the route from the map screen including the Origin Destination and Multi Stops Options Allows for customization of Ostia For details on features inside Options see Section 4 7 Options Details ...

Page 25: ... database subscription required Maps on Demand Capability to download maps to your device via the Internet to your Pocket PC Free service to Registered Users Note POI database files are not included in Maps on Demand download Follow Me Allows you to see exact locations of any member subscriber within your network account or for any member to see you subscription required Smart Help Lists detailed ...

Page 26: ...ware automatically calculate a new route if you go off the calculated route Manual Re route requires you to press the action button to Re route North Up Heading Up Enabling the North Up option will orient the screen to have North always at the top of the screen Heading Up option will set the display to always show the GPS indicator pointing towards the top of the screen with a compass in the upper...

Page 27: ...are not touching Avoid Toll Roads This will calculate a route avoiding marked toll roads completely Only applies to officially designated toll roads Daylight Night View Enabling Daylight View will use lighter colors on your screen Night View will display darker colors on the map making it less bright and less distracting to the driver than Daylight View Smart Server This changes server access betw...

Page 28: ...rt Navigator User ID This allows you to change the email address and password for access to the Smart Navigator Services subscription required Note Applies only if using Windows Mobile based device Color Scheme This allows you to change the color scheme for Ostia The choices are Windows Default Pharos Default Dark Gray Peach Orange and Moss Green ...

Page 29: ...creen GPS Indicator Origin Green flag Current Location Multi Stop Purple flag Menu toggle Distance to next turn Distance to Destination Map scale Destination Red flag Compass Indicator Change 3D to 2D Calculated Route Light Blue Next turn Text display Save Location ...

Page 30: ...ually To manually open maps tap Goto Æ Power User Æ Maps Æ Open and select desired map from the list of available maps Tap the Forward Arrow to open the selected map Repeat to open multiple maps The maximum number of maps that can be opened at one time is 10 Note The last map opened when Ostia was turned off will be the first map opened when Ostia is turned back on and previous PORs are cleared wh...

Page 31: ...acquired The satellites are the gray circles in the black target which will turn green when you have a Lock The Compass indicates the following information when moving at 5mph or faster General direction of travel The red line represents the general direction to your selected Destination Approximate o Latitude o Longitude o Altitude based on HAE Height Above Ellipsoid o Global Time o Speed o Line ...

Page 32: ...Second Edition Version 4 21 or later you have the option to view the screen in Landscape mode or Portrait mode as seen below Landscape Portrait Note To change the view of your device follow these instructions Tap on the Start Menu Æ Settings Æ System Æ Screen and select the desired Orientation ...

Page 33: ...audible Voice Guidance Refer to Section 4 7 Options Details Standard Map View Simplified Arrow View Split Map Arrow View Night View Uses optimal color scheme for night use You can set this view by checking Night View on your Options screen by tapping Goto Æ Power User Æ Tools Æ Options Æ select either Daylight View or Night View and tap Change to cycle through the options Tap Map when finished ...

Page 34: ...units from Kilometers to Miles and vice versa including all distance information related to Route calculation 2D 3D View Tapping on the Screen where the Sky appears in the horizon will change the 3D Bird s Eye View to 2D Overhead View 2D Overhead View 3D Bird View ...

Page 35: ...ound the tip of the stylus Without letting go drag the stylus in the direction you wish to view and the map will move accordingly Note Applies only if using Windows Mobile based devices or Pharos Drive GPS 3 With a GPS Lock press the Directional Pad in the direction you wish to view and the circled cross icon will appear pictured to the right and the map will move accordingly If you wish to resume...

Page 36: ...the stylus or your finger on the screen in a motion from the upper left corner towards the bottom right corner creating a box on the screen The software will attempt to do a best fit zoom to the area within the box Zoom Out Zooming out is the opposite direction bottom left corner to the upper right corner ...

Page 37: ...art Navigator services visit www pharosgps com Each of the Smart Navigator services is described below Refer to Section 7 0 Smart Navigator Services to learn how to use these services Real time Traffic Real time Traffic lets you view live traffic flow and events via Internet connection allowing you to better react to traffic conditions Simply connect to the Internet via ActiveSync from your deskto...

Page 38: ...ction 7 0 Smart Navigator Services to learn how to use this service Note Typical download time varies depending on file size and connection speed 2 3 minutes for broadband Internet connection or 15 30 minutes for wireless connection using GPRS Follow Me Follow Me allows you to see the exact location of members of your Follow Me Group and allows other members to see your location Refer to Section 7...

Page 39: ...ing any of the following methods from Goto Æ Power User Æ Find Recent Destinations Outlook Contacts Favorites Address Intersection or Point of Interest You can also select any location on the map as the Origin by double tapping the screen and choosing Origin The Destination is your ending point You can search for your Destination by using any of the following methods from the Goto screen Address P...

Page 40: ...screen features do the following 1 Tap Goto Æ and choose between Address Point of Interest Saved Place or Home Each of these options is described in detail below Note For information regarding Multi Stop Routing refer to Section 6 2 Adding Multi Stops to a Route Address This option allows you to search for a location by a specific address that can be used as the Destination in a Route Make sure th...

Page 41: ... give a list of possible cities in which that street is located To Enter a House Number and Street Name 1 Regardless of which entry option you chose when you arrive at the House Number screen enter the House Number you re looking for and tap the Forward Arrow Note You can use the Del Delete button to backspace and correct or change your entry 2a Enter the street name in the field provided As you t...

Page 42: ...to Section 5 2 Opening and Viewing a Map 3 Next select the city Based on which street you chose Ostia will show a list of cities in which that street is found Select the desired city from the list and tap the Forward Arrow 4 If accessing the Address from the Goto Button the location can only be saved as a Destination If accessing the Address from Power User you have the option to select this locat...

Page 43: ...ke sure that all necessary maps are already opened From the Map screen tap Goto Æ Saved Place then select from Favorites Recent Destinations or Outlook Contacts Home Once you have saved a location to be designated as your Home you can select this option to have a Route created from your current location to your Home Make sure that all necessary maps from your current location to your home are alre...

Page 44: ...rom the Map screen tap Goto Æ Power User Æ Find Æ Intersection and follow the steps below to perform an Intersection search 1 Enter the street name in the field provided As you type each letter only the next available letters matching the street search will appear usable on the keyboard This will provide a list of the most closely matching streets available which will appear in the next screen Sel...

Page 45: ...ts 4 You have the option to select this location as an Origin Destination or a Multi Stop Highlight your selection and tap OK Note If you would like to Save this location refer to Section 6 4 Saving Position as a Favorite Contact or Home The Route will be displayed on the screen zoomed in on the Destination The on screen text directions display at the bottom if in Simulation Mode or if GPS lock is...

Page 46: ... Æ Find Æ and choose from Outlook Contacts Favorites Address Intersection or Point of Interest After a location has been selected a Set As window will pop up allowing you to set the location as a Destination Origin or Multi stop Choose Multi stop There is also the option to Save the location If you would like to save the location first highlight your selection between Destination Origin and Multi ...

Page 47: ...e connecting all the Multi stops to the Destination or to not use the Multi stops in the route You also have the option here to delete any of the Multi stops in the list Viewing a Multi Stop To View the Multi stops tap Goto Æ Power User Æ View Æ Multi stop This will show the Multi stops in order according to the order in which they were entered Clearing all Multi Stops If you want to Clear all Mul...

Page 48: ... GPS Lock with or without a Route created the center of the screen will represent your current location Using the POI button at this time will provide you with a list of POI categories to choose from based on your current location only Proceed to Step 1 on page 50 to continue POI Search Option B If you do not have a GPS Lock but a Route is created you can search for POIs based on a POR for example...

Page 49: ...t appear after the first letter continue to type the name of the city until the list appears Select the appropriate City and tap the Forward Arrow C2 With the desired city now open and at the map center select Goto Æ Point of Interest Æ Near Destination and choose from Cash Food Fuel and Hotel or tap the Forward Arrow for more POI categories Choose a POI from the list Note If accessing Points of I...

Page 50: ...lected Destination so tap Near Destination and then tap Food Step 3 To narrow the search results you can type in a keyword or the name of the location and tap the Forward Arrow If you leave the field blank it will bring up the maximum number of results within the pre designated radius The results will list each available POI including distance from the center of the screen your current location or...

Page 51: ...as found using the optional paid subscription service POI Finder Refer to Section 7 0 Smart Navigator Services POI Information To retrieve the specific information for any given POI to Route to Call or Set as a Stop tap and hold on any of the POI icons on the screen as seen below Step 4 By tapping on one of the POIs from the list and selecting the Forward Arrow the full details for that POI are di...

Page 52: ...on to save from the list of GPS Map Center Current Destination Current Origin or Latitude Longitude you can also tap the Save button to display this list directly 2 Æ Choose Save as Favorite Enter Favorite Name and tap on the Forward Arrow Save Selected Position as Home 1 Repeat Step 1 above 2 Æ Choose Save as Home This will now be the location the software will route to when choosing Goto Æ Home ...

Page 53: ...h location to save from the list of GPS Map Center Current Destination Current Origin or Lat Lon 2 Æ Choose Save as Favorite Enter Favorite Name and tap on the Forward Arrow Save Selected Position as Home 1 Repeat Step 1 above 2 Æ Choose save as Home This will now be the location the software will route to when choosing Goto Æ Home Save Selected Position to Outlook Contacts 1 Repeat Step 1 above 2...

Page 54: ...e the GPS turned Off Red Smiley Face with a route selected and choose to run a Simulation from Goto Æ Power User Æ Tools Æ Simulation Setting Trip Interval To set the amount of time between each marker tap Goto Æ Forward Arrow twice Æ Options Æ Tracking IntervalÆ Change You have the option to select the amount of time between each marker to be 10 sec 30 sec 1 min 5 min or 20 min Once you have chos...

Page 55: ... when finished Your Trip Trace will be displayed with blue diamonds representing the markers or bread crumb trail recorded for you to follow Note When Viewing a previously Recorded Trip Trace it will not provide an actual Route text directions or voice prompts It will only provide markers bread crumb trail to follow Clearing a Trip Trace To clear the markers from your Trip Trace tap Goto Æ Power U...

Page 56: ...view the exported file on the Device go to Start Æ Programs Æ File Explorer Æ My Documents Æ and select the txt file that contains the name you provided in the previous step The text file contains the following information for each Favorite Name of Favorite Latitude Longitude 6 7 Deleting Favorites To Delete Favorites tap Goto Æ Forward Arrow twice Æ Delete Favorites the pick from the list which F...

Page 57: ...cally opens the Highway Motorway and the Destination maps it will clear out any POR previously set on the map After Ostia opens the Highway Motorway and the Destination maps the Origin will have to be re entered manually unless you have a GPS Lock Note If the Route calculation method for No Highway Motorways is used and you are on a Highway Motorway Ostia will not be able to calculate the Route un...

Page 58: ...gps com products services smartnavigator htm Note Real time Traffic may be referred to as Smart Traffic and POI Finder may be called Smart Finder though in both cases there is no difference in the service offered Maps on Demand and Follow Me come free with a registration of any Smart Navigator subscription Step 2 Click Add to Shopping Basket at the top of the screen Make sure the product and quant...

Page 59: ...r and proceed to Step 6 if not click Cancel Order Step 6 Enter the Credit Card number and Expiration Date The next page confirms your purchase and registration of the product You will receive an email confirmation of the purchase At this point you may start using the Smart Navigator Service you purchased immediately you do not need to wait until you receive the confirmation email ...

Page 60: ... subscription The User ID is NOT case sensitive Tap on Goto Æ Power User Æ Smart Navigator Æ Login to arrive at the User ID entry window to the right Enter the letters for your User ID If your email address contains numbers select the abc or 123 button in the bottom right corner to access the numeric keyboard ...

Page 61: ...at the steps above to get back to the Symbol Menu in order to input the period Jane yahoo com When you are done entering the email address select the Forward Arrow and enter the password which IS case sensitive After entering the password select the Forward Arrow and you will arrive back at the Map Screen Provided you have an Internet connection on your handheld device you are now ready to start u...

Page 62: ...vigator Æ Real time Traffic 1 First make sure you have the correct map open Select your City area and then tap the Forward Arrow 2 The next window will show the city you chose and display the current time and date These indicate the time and day for which the traffic info currently being displayed on the map was recorded Note You may only view the Traffic info for one city at a time ...

Page 63: ...following Real time Traffic and Data incident only Note The traffic and data info is based solely on the databases of the Department of Transportation Some cities do not have Real time Traffic because the DOT has not built traffic sensors into the highways in that state ...

Page 64: ...g Incident Data To view the Real time Incident Data yellow triangles simply tap and hold on a triangle to view the data exactly as the Highway Patrol or other law enforcement entered it into their own computers ...

Page 65: ... POI Finder 1 Enter a keyword or name of POI to narrow the search results or leave blank for a general search then Tap the Forward Arrow 2 Select a POI category and tap the Forward Arrow 3 Lists available POIs as well as the distance from the designated POR or center of Map Screen and their address of each Refer to Section 6 3 Using the Point of Interest Search for additional assistance ...

Page 66: ...route with a width of about 0 5 miles on each side of the route The route Origin is always your current location and its Destination is an address or city center or a zip postal code you can specify Area Map covers a square area of about 10x10 miles with the center at a location you can specify The map center can be an address a city center a zip postal code or your current GPS location Corridor M...

Page 67: ... at the center of the screen Area Map 1 First choose the Country and State Province in which to look by tapping the Country_State i e USA_California button Select your desired Country from the list and tap the Forward Arrow to select the State Province and then tap the Forward Arrow again 2 Next choose to base your search on an address zip postal code or current GPS location a If using address typ...

Page 68: ...lection Ostia will ask the server to generate a map with your specification download it and display it Note A map downloaded from the server does not include any POIs for Cash Food Fuel and Hotel It does however include the index file so you can do address search against the downloaded map Note You can identify the type of a downloaded map by its file name The file name of a corridor map has a pre...

Page 69: ...ables you to both send and receive information Finally there is the Pharos Follow Me Web portal that tracks and distributes the information for your group Each of these pieces is a vital part of the process so we ll begin by having a closer look at them Getting GPS Location Information Your Pharos GPS navigation device includes a powerful GPS receiver which can pinpoint your location with consider...

Page 70: ...with the Pharos Traveler GPS 535 if you have a Wi Fi connection that you can use to connect to the Internet Connecting It All Even if you have a GPS receiver and a mobile phone sharing your location information in real time isn t easy without using a service like Follow Me The Follow Me service gathers the location information from each group member and places a mark on the map to show exactly whe...

Page 71: ...71 ...

Page 72: ...sor has the ability to both add members and invite buddies The supervisor can also remove members and his or her own buddies from the group The supervisor can also track the location of members Group Members Group members are people whose location can be tracked Group members can view the tracking information for other group members You can have up to five members in a Follow Me group The supervis...

Page 73: ...GPS device on the Pharos Web site in order to establish your Follow Me account To do so please visit the following address https services pharosgps com shopping store registration_form a sp You can also visit www pharosgps com and click Support Registration and then Register to display the form Tip You will need the Registration Code and UPC from your Pharos GPS device box in order to complete the...

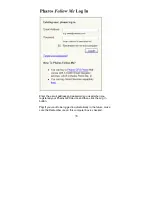
Page 74: ...ddress and password you used when you registered your Pharos GPS device and then click the Log In button Tip If you want to be logged in automatically in the future make sure the Remember me on this computer box is checked ...

Page 75: ...fter you click Log In you ll see a screen similar to the following with your information of course Members and buddies will see a slightly shorter list that only includes the options they are allowed to use ...

Page 76: ...lay the Add Member form Use this form to enter the member s name and e mail address Tip You can add several members at once by clicking Add Members in Batch After you click the Add button the new member is added to your group In addition he will be sent an e mail that includes a randomly generated password so make sure you have entered the e mail address correctly ...

Page 77: ... manage your Group and Buddy List If you are a Member you can manage your Buddy List but not the Group If you are an Observer you don t have a group or a buddy list to manage All you can do is to do the real time tracking view other people s trips whenever allowed For example if you want someone else to take over the group s management click the Reassign Supervisor link Use the Manage My Buddy Lis...

Page 78: ... you choose determines the steps you need to take to begin the tracking In the following sections you see how to begin tracking using your desktop Web browser or your mobile device Monitoring Via a Web Browser You can use a Web browser to monitor the location of group members no matter where you happen to be That is you don t have to be close to the monitored group member locations in order to see...

Page 79: ...rder to keep showing the current member locations You can use the controls along the right side of the map to change the display as needed The map display updates at the selected interval as long as the map page is displayed To stop monitoring the locations click the Main Page link Tip If a group member turns off the Follow Me function on their mobile device their last location continues to displa...

Page 80: ... be able to log in In addition to logging in you must also activate Follow Me by selecting the Follow Me option from the Smart Navigator section of the Power User menu You can deselect the Follow Me option if you want to temporarily stop sending location information to the Follow Me server Note You mobile device will beep each time it sends location information to the Follow Me server You can chan...

Page 81: ...may not be able to see the locations of the other people until you once again zoom out on the map Note The Follow Me service functions by sending location information to the Follow Me server at regular intervals This requires a live data connection either through your cellular service provider or through an active Wi Fi connection Therefore you may not be able to track people in areas where cellul...

Page 82: ...receiver The receiver is either turned Off or the connection power or communication port does not apply for Pharos All In One devices may be disabled and should all be checked Yellow Face The GPS receiver is currently acquiring signals from the satellites for a signal lock but does not yet have a lock Note This will also occur If the GPS does not have a clear view of the sky or if there is environ...

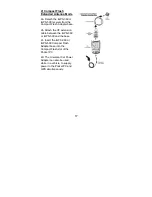
Page 83: ...omatically For Bluetooth GPS users this should be sufficient For Serial CF and SDIO GPS receivers the Comm port must be set manually To set the Comm port manually please refer to the User Manual of your handheld device for the appropriate Comm Port Select the COM from the list and tap the Forward Arrow when finished To access the GPS Configuration screen manually at any time tap Goto Æ Power User ...

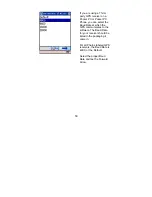
Page 84: ...e you can select the Baud Rate at which the GPS communicates to the software The Baud Rate for your receiver should be listed in the packaging it came in For all Pharos labeled GPS receivers the Baud Rate is 4800 or the Default Select the proper Baud Rate and tap the Forward Arrow ...

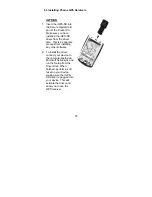
Page 85: ...isc This is a separate process from installing any other software 2 To install the driver connect your device to the computer laptop via Microsoft Activesync and run the Setup from the Driver Disk When finished perform a soft reset on your device making sure the iGPS SD driver is plugged into your device This will activate the driver and allow you to use the GPS receiver iGPS SD PDA ...

Page 86: ...ode 1a Insert the iGPS 360 or iGPS 500 into the Compact Flash adapter and then into the Compact Flash slot of the Pocket PC Note If your GPS did not come with a CF adapter you can purchase one from www services pharosgps com shop ping 1b The Universal Car Power Adapter can also be used while in a vehicle to supply power to the Pocket PC and GPS ...

Page 87: ...base 2b Attach the CF extension cable between the iGPS 360 or iGPS 500 and the base 2c Insert the iGPS 360 or iGPS 500 Compact Flash Adapter base into the Compact Flash slot of the Pocket PC 2d The Universal Car Power Adapter can also be used while in a vehicle to supply power to the Pocket PC and GPS simultaneously ...

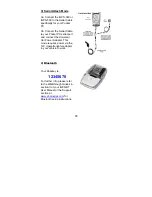
Page 88: ...PC serial port and connect the Universal Car Power Adapter This mode requires power via the 12V cigarette lighter adapter in your vehicle to work 4 Bluetooth Your Passkey is 12345678 For further info please refer to the Walkthrough Guides in section II of your iGPS BT User Manual or the Support section at www pharosgps com for Bluetooth setup instructions ...

Page 89: ... fuel hotel inx and rmf files total of 6 files for each map are stored in a My Documents folder and that the folder is not located inside any other folders or directories It must appear as follows to function properly My Documents Take note of spacing and capitalization They are important The Registration key is located on the inside flap of the cardboard CD holder and the UPC code is on the back ...

Page 90: ...A Phone Toll free at 888 PHAROS8 888 742 7678 for Technical Support in USA and Canada 877 774 2767 for Product Info Sales Fax 310 320 1808 Email Support PharosGPS com Sales PharosGPS com Info PharosGPS com Telephone technical support is available Monday through Friday between the hours of 8 30 AM to 5 30 PM Pacific Standard Time ...

Page 91: ...2 Software Transfer Licensee may permanently transfer the License and all rights hereunder to a third party by written notification to Pharos and where the recipient agrees to the terms of the License When Licensee delivers the entire Software Package to a third party Licensee must also destroy any and all remaining copies of the Software whether installed on a personal computer or other device Su...

Page 92: ...ES AS TO PERFORMANCE OR MERCAHNDISE OR ANY OTHER WARRANTIES WHETHER EXPRESSED OR IMPLIED In particular there is no warranty for high risk activities NO WARRANTY OF FITNESS FOR A PARTICULAR PURPOSE IS OFFERED The user must assume risk of using the program 6 Limitations on Reverse Engineering Decompilation and Disassembly Licensee may not reverse engineer decompile or disassemble the Software except...

Page 93: ...tary commercial product and not subject to disclosure 13 Restricted Rights End User hereby represents and warrants that the Products shall be protected for public disclosure and considered exempt from and statute law regulation or code including any sunshine Act Public Records Act Freedom of Information Act or equivalent which permits access and or reproduction or use of the Products In the event ...

Reviews: