4
GeTTING ReADY TO FLY YOuR J-3 CuB 370 RTF
STeP 1: CHARGING THe FLIGHT BATTeRY
❑
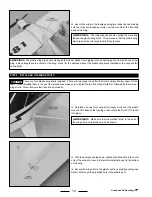
To unplug the connectors, squeeze the tab on the battery connector and pull the two connectors apart.
❑
After charging the flight battery, install it in the fuselage, using the same techniques as when you installed it previously.
✦
WARNING
✦
Always remove the flight battery from the fuselage for the charging process.
❑
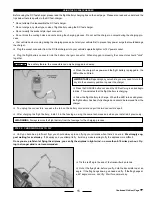
Plug the flight battery connector into the battery charger connector. When
plugged in properly the connectors should "click" together.
As a safety feature, the connectors can only be plugged
in one way.
❑
Plug the charger into an AC wall outlet.
❑
Charge the flight battery for 2-3 hours.
Be careful not to overcharge
the flight battery.
PRO TIP
If the flight battery is hot to the
touch, it is fully charged. Unplug
it from the charger immediately.
✦
IMPORTANT
✦
Before charging the flight battery, the flight battery must be fully discharged. Discharge the flight battery by running
the motor until it stops. This will ensure that you don't overcharge the flight battery.
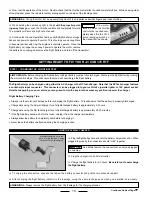
The flight battery can be charged using either the AC charger or the DC fast-charger. Note that the DC fast-charger features
a socket-style input connector. This connector can be plugged into your vehicle's cigarette lighter or 12V power socket.
Note that depending on your vehicle, you may need to turn the key into the accessory position to power the charger.
Flight Battery Charging Tips:
●
Always run the motor until it stops before recharging the flight battery. This will ensure that the battery is properly discharged.
●
Charge-time using the AC wall charger for a fully discharged battery is approximately 2-3 hours.
●
Charge-time using the DC fast-charger for a fully discharged battery is approximately 20-30 minutes.
●
If the flight battery becomes hot to the touch, unplug it from the charger immediately.
●
Always allow the battery to completely cool before recharging it.
●
Never leave the battery unattended during the charging process.
❑
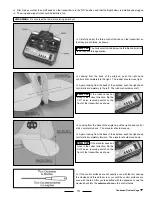
Now, test the operation of the motor. Double-check that the throttle control stick is pulled completely back. While keeping clear
of the propeller, press the red motor safety arming switch on the side of the fuselage once.
✦
WARNING
✦
During the motor test, keep everything clear of the propeller, especially fingers and loose clothing.
❑
While holding the airplane upright in the air
with the propeller point-
ing away from you
, push the throttle control stick completely forward.
The propeller will spin at a high rate of speed.
❑
Continue the Ground Operations Testing until the flight battery no longer
has enough power to operate the motor. This should give you enough time
to become familiar with how the airplane's controls operate. Once the
flight battery no longer has enough power to operate the motor, remove
the battery door, unplug and remove the flight battery, and turn off the transmitter.
uSING THe AC WALL CHARGeR
Continued On Next Page
☛
If the motor
turns on when the throttle
control stick is pulled com
-
pletely back, flip the CH 3
servo reversing switch on
the transmitter, as shown.


