Step One
Installing your coaxial cable
1.
Fit your female coaxial connector to one end of the
coaxial cable and fi t your male coaxial connector to
the other end. It is important that when fi tting coaxial
connectors that the cable makes full contact with the
pin of the coaxial connector. This is best acheived by
soldering the cable into the connector. Failure to make
a full contact between the cable and the connector pin
will disable the remote control function of the SLx link.
2.
Route your length of coaxial cable from the Sky™/
Sky+™/ Sky+ HD™ receiver location (female socket
connector) to your second TV location (male plug
connector). You can route the cable indoors or outdoors
but it is important to ensure that there are no kinks or
twists in the cable and that tight bends are avoided as
this can damage the cable core.
Note:
It is important that the coaxial cable signal is not
interrupted by isolated wall plates, non-bypass aerial
amplifi ers or aerial splitters as these will disable the
remote control function.
If necessary, please use non-isolated wall plates or a
digital bypass kit with your aerial amplifi er/splitter to
avoid such problems (contact your local electrical or
satellite installer for details).
3.
Once your length of coaxial cable is in place, connect
the female coaxial connector to the
RF2
socket on the
back of your Sky™/Sky+™ receiver.
Step Two
Installing the SLx link (
Figure 3)
1.
Connect the short lead with a male plug which is
attached to the SLx link to the aerial input socket
on your second TV. If you are using a separate VCR
(excluding TV/VCR combination systems) then you
must connect the SLx link to the VCR aerial input, not
the TV aerial input.
2.
Connect the male plug on your length of coaxial
cable to the female socket on the SLx link.
3.
Position the SLx infrared eye in a clear line of sight
from where you will be using the remote control, (eg
on top of your television).
1. It is
IMPORTANT
that you follow
ALL
sections
of the installation instructions in order to fully
install your SLx link.
2.
Please switch off all equipment and remove the
plugs from the wall sockets before attempting to
install any cabling. Please do not switch on any
equipment until
you reach Step Three of this installation guide.
3.
We have provided the instructions below for self
installation, however for best results we suggest
that the SLx link is fi tted by an experienced
electrical/aerial installer.
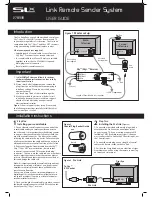
Figure 1
shows a typical system setup. Please read
the following instructions carefully for full details of
how to install your SLx link.
Important
The SLx link allows you to both watch and control your
Sky™, Sky+™ or Sky+ HD™ receiver from a second TV
in your home regardless of its location. The SLx link is
compatible with Sky™, Sky+™ and Sky+ HD™ receivers
using your existing or additional remote control.
What you may need (not supplied)
•
Suitable length of coaxial cable to route from your
Sky™/Sky™+ receiver to your second television.
•
For coaxial cable runs of over 10 metres, a suitable
amplifi er, such as the SLx 27822BM, is required.
•
Male (plug) coaxial connector.
•
Female (socket) coaxial connector.
Introduction
Installation instructions
Figure 3
SLx Link
Figure 2
Coaxial Plug/Socket Guide
To Sky™
RF2 Socket
Male
2
1
Female
Digi Eye
Figure 1
Master set up
To VCR (
if applicable)
Scart Lead
(not supplied)
Sky™/Sky+™ Receiver
Main
Television
Second
Television
Coax Flylead
(not supplied)
RF In
RF Out 1
RF Out 2
RF In
Scart In
RF In
To Dish
LNB
TV VCR
To Aerial
Length of Coaxial Cable (not supplied)
SLx
Link
Digi Eye
27833R
Link Remote Sender System
USER GUIDE
RF In
SLx Link


