background image

PSR07 Smart Color Button


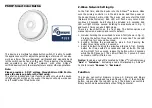
This device is a multiple functions button switch. It is able to switch 

the appliances on/off or adjust the percentage of dimmer. It can also 

work as a timer. The well designed wall bracket and magnetic back 

let the switch can be fixed on the wall. This product can be included 

and  operated  in  any  Z-Wave

TM

  network    with  other  Z-Wave

TM


certified devices from other manufacturers and/or other applications. 


Note: 

Please  provide  a  5  DVC  voltage  through  Micro  USB  Port  to 

wake the device up before the first using.


The rotation function and timer functions work only when the device 

is fitted upright or stick on the wall or the device will only work as an 

on/off switch when fitted horizontal.  


Z-Wave Network Setting Up 


In  the  first  time,  add  the  device  into  the  Z-Wave

TM

  network.  Make 

sure the primary controller is in the add mode. And then power on 

the  device  through  micro  USB.  The  device  will  auto  start  the  NWI 

(Network  Wide  Inclusion).  Red  LED  will  flash  every  second  and 

continue  30  seconds.  And  it  should  be  included  in  5  seconds.  Red 

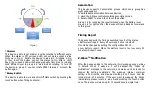
LED  will  light  ON  one  second.  Rotating  to  area  A(shown  in  Fig.  1) 

and touch 3 times can abort NWI mode. 

There  is  a  touch  button  on  the  front  side.  The  button  carries  out 

manual inclusion, exclusion and reset to default. 


1.


Include: Pointing the arrowhead to area A first (shown in Fig. 1). 

Pressing the button three times within 1.5 seconds. The red LED 

will light up for 1 second if succeed. 

2.


Exclude:  Pointing  the  arrowhead  to  area  A  first.  Pressing  the 

button three times within 1.5 seconds. 

3. 

Reset to default: Pointing the arrowhead to area A first. Pressing 

button  four  times  within  2  seconds  and  hold  at  fourth.  The  red 

LED will light for 3 seconds, release the button within 2 seconds 

while the LED goes out. The LED will flash for 1 second if reset 

succeed, or LED will flash once


Notice

: Including a node ID allocated by Z-Wave

TM

 Controller means 

Add

” or “

Inclusion

”.  Excluding a node ID allocated by Z-Wave

TM


Controller means “

Remove

” or “

Exclusion

”.


Function


This  device  can  control  dimmers  in  group  2:  Dimmer  and  Binary 

Switch. Point the arrowhead to area A(shown in Fig. 1) then hold the 

button, release after the red LED go out.  The device can switch to 

Binary Switch mode automatically when fitting horizontal.


Summary of Contents for PSR07

Page 1: ...ld be included in 5 seconds Red LED will light ON one second Rotating to area A shown in Fig 1 and touch 3 times can abort NWI mode There is a touch button on the front side The button carries out manual inclusion exclusion and reset to default 1 Include Pointing the arrowhead to area A first shown in Fig 1 Pressing the button three times within 1 5 seconds The red LED will light up for 1 second i...

Page 2: ...ate PSR07 to area A then touch the button Group 1 is for receiving the report message like the battery level Group 2 is for light control the device will send Basic Set command to this group Timing Report The device supports the timing unsolicited report of the status Battery level report Every 6 hours report once in default It could be changed by setting the configuration NO 10 Low battery report...

Page 3: ...device supports the Z Wave firmware update via OTA Let the controller into the firmware update mode and rotate to area A then touch the button once to start update After finish the firmware download the red LED will start to flash every 0 5 second Please don t remove the battery before the LED stop flashing Notice recommend using OTA when the device is charging Supported Z Wave Command Classes COM...

Page 4: ... to turn the lamp on then adjust the percentage The device can not join to Z Wave network 1 The device may in a Z Wave network 2 The arrowhead points to wrong area 1 Exclude the device then include again 2 Pointing the arrowhead to area A then include again Button no response 1 The button will no response when LED is flashing Wait for the LED go out and try again Specification Operating Voltage 3 ...

Page 5: ...cordance with the instructions may cause harmful interference to radio communications However there is no guarantee that interference will not occur in a particular installation If this equipment does cause harmful interference to radio or television reception which can be determined by turning the equipment off and on the user is encouraged to try to correct the interference by one of the followi...

Reviews: