background image

24

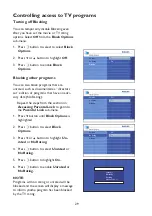
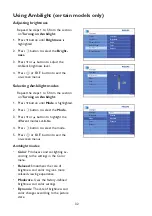
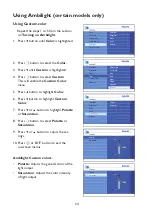
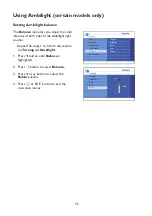
Controlling access to TV channels

Parental Lock

004

006
007
008
009

002

Clear All
Lock All
Movie Rating
TV Rating
Block Options

Change Code

003

005

Lock Channel

Parental Lock

Clear All

Movie Rating
TV Rating
Block Options

Change Code

Locked

Lock Channel

Lock All

Yes

Parental Lock

Clear All

Movie Rating
TV Rating
Block Options

Change Code

Cleared

Lock Channel

Lock All

Yes

Channel 2

Blocked By

Channel Blocking

Access Code : ----

Locking channels

Use your current access code to gain entry 
to the Parental Lock sub-menu.

Press 

1. 

button to select 

Lock  

Channel

The list of all the available channels will 
be displayed on the right panel.

Press 

2. 

ï 

button until 

Parental Lock

 is 

highlighted.

Press 

3. 

button to select 

Parental 

Lock

If you are using Parental Lock for the first 
time, you must enter the factory default 
code 

0711.

Summary of Contents for 26PFL5322

Page 1: ...FLAT TV User Manual philips 26PFL5322 32PFL5332 32PFL7342 37PFL5332 37PFL7342 42PFL5332 42PFL5432 42PFL7342 52PFL5432 ...

Page 2: ...IMPORTANT ...

Page 3: ...roduct P S To get the most from your PHILIPS purchase be sure to complete and return your Product Registration Card at once Know these safety symbols This bolt of lightning indicates uninsulated material within your unit may cause an electrical shock For the safety of everyone in your household please do not remove product covering The exclamation point calls attention to features for which you sh...

Page 4: ...ly 25 Using the TV Rating lock For certain regions only 27 Turning off Blocking 29 Blocking other programs 29 Using Active Control 30 Turning off Active Control 30 Using Ambilight certain models only 31 Turning on Ambilight 31 Turning off Ambilight 31 Adjusting brightness 32 Selecting Ambilight modes 32 Selecting Ambilight color 33 Using Custom color 34 Setting Ambilight balance 35 Turning on Clos...

Page 5: ...left side or top of the TV set VOLUME 1 To increase volume level press VOLUME to decrease level press VOLUME MENU 2 To display the on screen menus or to exit from the on screen menus The CHANNEL buttons can be used to navigate the menu items The VOLUME buttons can be used to select the menu items CHANNEL 3 To select the TV channel numbers up wards or downwards POWER 4 To turn off or turn on the TV...

Page 6: ...RF button 4 To channel surf up to 8 channels Auto Sound button 5 To select factory pre set Sound settings Incredible Surround button 6 To enable Incredible Surround in stereo mode and Spatial in mono mode Cursor buttons 7 To navigate and select menu items and adjust indiividual settings OK button 8 To select menu items or confirm selec tion Mute button 9 To turn up or turn down the sound level Vol...

Page 7: ... pre set Picture settings Program List button 18 To display the list of available channels which you can scroll through using the cursor buttons Menu button 19 To display the on screen menus and exit menus from the screen Channel buttons 20 To select the channel number upwards or downwards Alternate Channel button 21 To display the last viewed channel and the current channel NOTE The u button is u...

Page 8: ...Spanish Manual Auto Program Tuner Mode Portuguese Name Fav Program Language Before using the on screen menus select your menu language Press 1 h button to display the on screen menus Press 2 ï button untill Install is highlighted Press 3 u button to select Language The available languages for your TV will be displayed on the right panel Press 4 u button to highlight the first lan guage or ï to sel...

Page 9: ...ram will start scanning for channels automatically When scanning has completed the progress bar display will exit from the screen The first channel found will be displayed on the screen Press 6 h or EXIT button to exit the on screen menus TIP To cancel or interrupt auto searching press the h or EXIT button Only channels that were found before interruption will be stored Main Language Tuner Mode In...

Page 10: ...tall Press 4 ï button until Tuner Mode is highlighted Press 5 u button to select Tuner Mode Press 6 ï or Î button to select Auto Antenna or Cable Press 7 u button to select the option Press 8 h or EXIT button to exit the on screen menus Tuner Modes Automatic The TV will automatically detect whether or not cable signal input is present Antenna The TV will detect antenna signals and will search for ...

Page 11: ...n until Install is highlighted Press 3 u button to select Install Press 4 ï button until Manual is highlighted Press 5 u button to select Manual Press 6 u button to select System Press 7 ï or Î button to select Auto NTSC PAL M or PAL N Press 8 u button to select the option Press 9 h or EXIT button to exit the on screen menus TV Systems Automatic The TV will automatically detect the tuner system NT...

Page 12: ...ing the Fine Tune feature Switch to the channel number that you want to fine tune Press 1 h button to display the on screen menus Press 2 ï button until Install is highlighted Press 3 u button to select Install Press 4 ï button until Manual is high lighted Press 5 u button to select Manual Press 6 ï button until Fine Tune is highlighted Press 7 u button to select Fine Tune The Fine Tune level bar ...

Page 13: ...ton until Install is highlighted Press 3 u button to select Install Press 4 ï button until Name is highlighted Press 5 u button to select the first channel number on the list Press 6 u button to start naming the channel number Press 7 Æ button until a rectangular block cursor appears next to the channel number Press 8 ï or Î button to cycle through the list A Z 0 9 to select the characters or numb...

Page 14: ...2 ï button until Install is highlighted Press 3 u button to select Install Press 4 ï button until Fav Program is highlighted The list of channel numbers are displayed on the right panel All channel numbers will have a tick beside them to indicate as favorite chan nel by default Press 5 u button to select the first channel number on the list or ï button to move down the list Press 6 u button to rem...

Page 15: ...the Picture sub menu item Press 5 ï or Î button to adjust the set tings of the sub menu items Press 6 u button to select the Picture sub menu item Press 7 ï or Î button to adjust the settings of the sub menu items Depending on which Picture item you are adjusting some items will have the level indicator bar some with discreet settings such as Cool Warm and Normal or On and Off Press 8 h or EXIT bu...

Page 16: ...Depending on which Sound item you are adjusting some items will have the level indicator bar some with discreet settings such as Mono Spatial or On and Off Press 7 h or EXIT button to exit the on screen menus Sound settings Equalizer Adjust each individual fre quency tone Balance Adjust the left and right speaker sound level AVL Automatic Volume Leveler Control the sudden sound level increase when...

Page 17: ...Press 2 ï button until Features is highlighted Press 3 u button to select the Features Press 4 u button to select Timer Press 5 u button to select Sleep The right panel will display the sleep timer settings Off 15 30 45 60 90 120 180 and 240 minutes Press 6 ï or Î button to select the number of minutes remaining before the TV set automatically switches to standby mode Press 7 u button to confirm t...

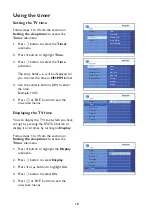
Page 18: ...r sub menu Press 2 ï button to highlight Time Press 3 u button to select the Time sub menu The entry fields will be displayed for you to enter the time in HH MM format Use the numeric buttons 0 9 to enter 4 the time Example 10 45 Press 5 h or EXIT button to exit the on screen menus Displaying the TV time You can display the TV time which you have set up by pressing the STATUS button or display it ...

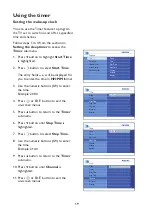
Page 19: ... from the section on Setting the sleeptimer to access the Timer sub menu Press 1 ï button to highlight Start Time is highlighted Press 2 u button to select Start Time The entry fields will be displayed for you to enter the time in HH MM format Use the numeric buttons 0 9 to enter 3 the time Example 20 00 Press 4 h or EXIT button to exit the on screen menus Press 5 Í button to return to the Timer s...

Page 20: ...Press 17 u button to select the option Press 18 h or EXIT button to exit the on screen menus Press 19 button on the remote control to switch the TV to standby mode Activate settings Off To cancel wake up clock Once To set wake up clock to activate once only Daily To set wake up clock to activate everyday at this time NOTE If the TV is still switched on after you have set the wake up clock the chan...

Page 21: ... u button to select Features Press 4 ï button until Child Lock is highlighted Press 5 u button to select Child Lock Press 6 ï or Î button to highlight On Press 7 u button to enable Child Lock Switch off the TV or put it on standby 8 mode NOTE Once Child Lock has been enabled you will not be able to access any TV channels with the CHANNEL buttons on the TV panel or operate any of its buttons The TV...

Page 22: ...ngs based on age and content Accessing Parental Lock Before you can use the Parental Lock features you need to access it by entering your Access Code Press 1 h button to display the on screen menus Press 2 ï button until Features is highlighted Press 3 u button to select Features Press 4 ï button until Parental Lock is highlighted Press 5 u button to select Parental Lock If you are using Parental ...

Page 23: ...ntry to the Parental Lock sub menu Press 1 ï button highlight Change Code Press 2 u button to select Change Code You will be prompted to enter your new access code Enter your new four digit access code 3 with the numeric 0 9 buttons You will be prompted to confirm the new access code Re enter your new access code 4 Once the system verifies your new code Confirmed will be displayed for a few second...

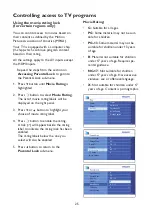
Page 24: ... Rating Block Options Change Code Cleared Lock Channel Lock All Yes Channel 2 Blocked By Channel Blocking Access Code Locking channels Use your current access code to gain entry to the Parental Lock sub menu Press 1 u button to select Lock Channel The list of all the available channels will be displayed on the right panel Press 2 ï button until Parental Lock is highlighted Press 3 u button to sele...

Page 25: ... Parental Lock to get into the Parental Lock sub menu Press 1 ï button until Movie Rating is highlighted Press 2 u button to select Movie Rating The list of movie rating labels will be displayed on the right panel Press 3 ï or Î button to highlight your choice of movie rating label Press 4 u button to enable the rating A tick will appear beside the rating label to indicate the rating lock has been...

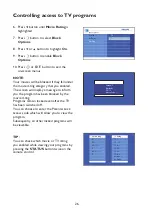
Page 26: ...s 10 h or EXIT button to exit the on screen menus NOTE Your movies will be blocked if they fall under the movie rating category that you enabled The screen will display a message to inform you the program has been blocked by the movie rating Programs remain locked even after the TV has been switched off You can choose to enter the Parental Lock access code which will allow you to view the program ...

Page 27: ... to highlight your choice of TV rating label Some of the age based ratings have con tent based sub ratings Refer to the table listing the age and content based ratings TV Y Suitable for all children Programs are not expected to frighten children TV Y7 For children 7 years or olderwho can tell make believe from reality Some mild fantasy violence or comedic violence Programs may frighten younger chi...

Page 28: ...ble one or more ontent based ratings highlight only those and press the u button Press 7 Í button to return to the Parental Lock sub menu Press 8 ï button until Block Options is highlighted Press 9 u button to select Block Options Press 10 ï or Î button to highlight On Press 11 u button to enable Block Options Press 12 h or EXIT button to exit the on screen menus NOTE Your programs will be blocked...

Page 29: ... Options Blocking other programs You can also block programs that are unrated such as documentaries director s cut edition or programs that have no advi sory data No Rating Repeat the steps from the section on Accessing Parental Lock to get into the Parental Lock sub menu Press 1 ï button until Block Options is highlighted Press 2 u button to select Block Options Press 3 ï or Î button to highlight...

Page 30: ...y signal conditions Press 1 h button to display the on screen menus Press 2 ï button until Features is highlighted Press 3 u button to select Features Press 4 ï button until Active Control is highlighted Press 5 u button to select Active Control Press 6 ï or Î button to highlight On Press 7 u button to enable Active Control Press 8 h or EXIT button to exit the on screen menus Turning off Active Co...

Page 31: ...lighting from the TV provides a more relaxed viewing experience The Ambilight colors changes automatically to match the TV images Turning on Ambilight Press 1 h button to display the on screen menus Press 2 ï button until Features is highlighted Press 3 u button to select the Features Press 4 ï button until Ambilight is highlighted Press 5 u button to select Ambilight Press 6 ï or Î button to high...

Page 32: ...brightness level Press 4 h or EXIT button to exit the on screen menus Selecting Ambilight modes Repeat the steps 1 to 5 from the section on Turning on Ambilight Press 1 ï button until Mode is highlighted Press 2 u button to select the Mode Press 3 ï or Î button to highlight the different modes available Press 4 u button to select the mode Press 5 h or EXIT button to exit the on screen menus Ambili...

Page 33: ...ing Ambilight color Repeat the steps 1 to 5 from the section on Turning on Ambilight Press 1 ï button until Color is highlighted Press 2 u button to select the Color Press 3 ï or Î button to highlight the color choices available Press 4 u button to select your color choice Press 5 h or EXIT button to exit the on screen menus Ambilight colors Warm white Cool white Blue Red Green Yellow Magenta Cust...

Page 34: ...e steps 1 to 5 from the section on Turning on Ambilight Press 1 ï button until Color is highlighted Press 2 u button to select the Color Press 3 ï until Custom is highlighted Press 4 u button to select Custom This will enable the Custom Color menu Press 5 Í button to highlight Color Press 6 ï button to highlight Custom Color Press 7 ï or Î button to highlight Palette or Saturation Press 8 u button...

Page 35: ...tness 100 0 5 0 Balance Setting Ambilight balance The Balance menu lets you adjust the color intensity of both sides fo the Ambilight light sources Repeat the steps 1 to 5 from the section on Turning on Ambilight Press 1 ï button until Balance is highlighted Press 2 u button to select Balance Press 3 ï or Î button to adjust the Balance levels Press 4 h or EXIT button to exit the on screen menus ...

Page 36: ...ng impaired Press 1 h button to display the on screen menus Press 2 ï button until Features is highlighted Press 3 u button to select Features Press 4 ï button until Closed Caption is highlighted Press 5 u button to select Closed Caption Press 6 ï or Î button to highlight CC Off CC1 CC2 or CC Mute Press 7 u button to select Closed Caption option Press 8 h or EXIT button to exit the on screen menus...

Page 37: ... black bands on the left and right of the screen 16 9 The picture is displayed in its original proportions as transmitted Superzoom Removes black bands on the sides of the screen of 4 3 format programs with minimal distortion Subtitle Zoom The 4 3 format pro gram is displayed on the entire screen leaving the subtitles area visible Some of the top of the picture is cropped off Movie Expand 14 9 The...

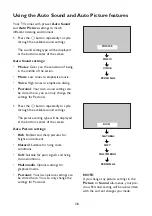
Page 38: ...rsonal Your own sound settings can be stored here you can only change the settings for Personal Press the 1 button repeatedly to cycle through the available sound settings The picture setting type will be displayed at the bottom center of the screen Auto Picture settings Rich Brilliant and sharp pictures for bright environment Natural Suitable for living room conditions Soft Suitable for poor sign...

Page 39: ...ould only see one channel number on the list This is the same channel number you are on Press 3 u button to select to add the channel to the Surf list You should see a tick beside the channel number to indicate that it has been stored in the Surf list Repeat steps 1 to 3 to add more channels to the Surf list Removing channels from Surf list Press the 1 SURF button to display the Surf list Press 2 ...

Page 40: ...to highlight your AV source Press 3 u button to select your AV source You should see the channel correspond ing to the AV source where your device is connected to Audio Video sources TV Normal TV broadcast via the 75 ohm antenna connector AV Composite video and audio output SIDE Headphone jack Composite video and audio and S Video input CVI 1 Component video Y Pb Pr with Component audio input CVI ...

Page 41: ...er to the TV via the VGA cable not supplied Press the AV button to display the audio 1 and video source list Press 2 ï or Î button until VGA is highlighted Press 3 u button to select VGA You should see your computer display on the TV screen Most of the Picture and Sound settings are the same as those in the TV mode Picture settings VGA mode Horizontal To adjust the picture to the left or right Ver...

Page 42: ... in the sub menu Press the 3 Î or ï button to highlight the settings and the Í or Æ button to adjust the settings Press the 4 Í button to return to the previous menu Press 5 h or EXIT button to exit the on screen menus Source List TV HDMI 2 AV SIDE CVI 2 CVI 1 VGA HDMI 1 Picture sub menu The Picture sub menu options are Brightness Color Contrast Sharpness Color Temp Contrast Horizontal Shift and V...

Page 43: ...on to select PC or HD modes Press 7 h or EXIT button to exit the on screen menus Using Native 1080 mode For 1080p TV models only When you connect HD equipment via HDMI or Y Pb Pr supporting resolution of 1080p the Native 1080 option in the Display sub menu will be available You can watch the original HD format which is the true resolution from the input signals Press the 1 h button to display the ...

Page 44: ...e Your Philips TV is HDMI compliant If you do not get a good picture it is not a defect of your TV set Please change the video format on your device DVD player cable set top box etc to a standard format For example you should select 480p 576p 720p 1080i or 1080p for DVD players Display On Off native 1080 Non 1080p models HD format 480p 576p 720p 1080i SD format 480i 576i 1080p models HD format 480...

Page 45: ... certain channels Check whether the correct TV system is selected No sound Verify that the volume is not set at minimum Check that the Mute is not enabled Check the connections between the optional equipment and the TV are correctly connected Sound interference Try switching off any electrical appliances to prevent interference Examples hairdryer vacuum cleaner Picture interference Try switching o...

Page 46: ...panel red light is lit Press the on the remote control VGA mode does not work Check VGA cable is connected securely Verify that the correct AV source is selected Press the button to display the source list and select the correct one Check whether you have configured the computer to a compatible display resolution Check the graphics card setting of the computer In S Video mode the colour be comes f...

Page 47: ...94 cm Resolution Computer formats 640 x 480 60 67 72 75Hz 800 x 600 56 60 72 75Hz 1024 x 768 60 70 75Hz 1280 x 768 60Hz Video Formats 640 x 480i 640 x 480p 720 x 576i 720 x 576p 1280 x 720p 1920 x 1080i Video Formats 1920 x 1080p Sound Output power 2 x 10 W Connectivity AV CVBS In Audio L R In S Video In CVI 1 Y Pb Pr Audio L R In CVI 2 Y Pb Pr Audio L R In HDMI 1 HDMI 2 PC PC VGA In PC Audio In A...

Page 48: ...Dimensions Set weight 11 2 kg 14 2 kg 23 kg 26 5 kg Set weight with stand 14 4 kg 17 kg 30 kg 33 5 kg Set dimensions W x H x D mm 697 5 x 494 8 x 246 8 805 x 546 5 x 210 934 x 625 6 x 264 5 1046 x 686 x 264 5 934 x 625 6 x 264 5 Set dimensions with stand Wx H x D mm 697 5 x 542 x 246 8 805 x 609 x 210 935 x 688 2 x 264 5 1048 x 748 6 x 264 6 935 x 688 2 x 264 5 Specifications subject to change wit...

Page 49: ......

Page 50: ......

Reviews: