background image


EN            14           
 

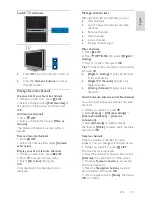
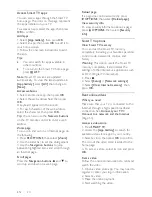
Hide channels


You can hide unwanted channels.   

1. While you watch TV, press 

 LIST

2. Select the channel to hide, then press   


OPTIONS

3. Select 

[Hide channel]

, then press 

OK

The channel is hidden. 


Lock a channel


You can prevent unauthorized access to 
channels by locking them. 

1. While you watch TV, press 

 LIST

The channel list is displayed. 
2. Select the channel to lock, then press   


OPTIONS

3. Select 

[Lock channel]

, then press 

OK

.  

4. If prompted, enter the pin code. 
The channel is marked with a lock icon in 
the channel list.     

Tip:

 To watch a locked channel, enter the 

pin code when prompted. 


Display channel logos


If channel logos are available from the 
broadcaster, you can display them in the 
channel list. 

1. While you watch TV, press 

 LIST

The channel list is displayed. 
2. Select a channel in the list, then press   


OPTIONS

3. Select 

[Channel logos] > [On]

, then press 

OK


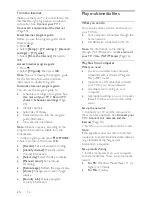
Watch connected devices 

Before you can watch a device, connect the 
device to the TV. See 

Connect your TV > 

Connect devices

 (Page 40). 

Select a device with SOURCE


1. Press 

 SOURCE

.  

2. Select a device, then press 

OK

Select a device from the Home menu


1. Press  . 
2. Select 

[Source]

, then press 

OK

3. Select the device, then press 

OK

To add or manage your connected devices, 
see 

Connect your TV > Watch connected 

devices > Change device settings

 (Page 51). 

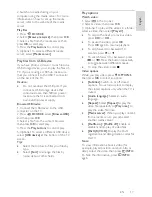
Use picture and sound presets 

Your TV comes with predefined picture and 
sound settings. You can apply these settings 
or customize them. 

Select your preferred picture presets


1. While you watch TV, press   

OPTIONS

2. Select 

[Picture and sound]

 in the top bar, 

then press 

OK

3. Select 

[Picture style]

, then press 

OK

4. Select an option, then press 

OK


[Personal]

: Apply your personalized 

picture settings. 


[Vivid]

: Rich and dynamic settings, ideal 

for daytime viewing. 


[Football]

: Ideal settings for football 

matches.  


[Standard]

: Default settings that suit 

most environments and types of video. 


[Movie]

: Ideal settings for movies. 


[Photo]

: Ideal settings for photos. 


[Energy saving]

: Settings that conserve 

the most energy.   


Select your preferred sound presets


1. While you watch TV, press   

OPTIONS

2. Select 

[Picture and sound]

 in the top bar, 

then press 

OK

.  

3. Select 

[Sound style]

, then press 

OK

4. Select an option, then press 

OK


[Personal]

: Apply your personalized 

sound settings. 


[Original]

: Settings that suit most 

environments and types of audio. 


[Movie]

: Ideal settings for movies.   


[Music]

: Ideal settings for listening to 

music. 


[Game]

: Ideal settings for games. 


[News]

: Ideal settings for spoken audio, 

such as the news. 


Summary of Contents for 32PFL35x8G

Page 1: ...EN User Manual Register your product and get support at www philips com welcome 32PFL35x8G 39PFL35x8G 42PFL35x8G 46PFL35x8G 32PFL45x8G 39PFL45x8G 42PFL45x8G 46PFL45x8G ...

Page 2: ...anguage settings 36 Universal access settings 37 Other settings 37 Update software 37 Reset all 38 5 Connect your TV 39 About cables 39 Connect antenna 40 Connect devices 40 Connect more devices 48 Watch connected devices 51 Set up EasyLink devices 52 Connect to a network and the Internet 54 6 Troubleshooting 58 General issues 58 Channel issues 58 Picture issues 59 Sound issues 59 Connection issue...

Page 3: ...of the TV must be disconnected When disconnecting the power always pull the power plug never the cord Ensure that you have full access to the power plug power cord and outlet socket at all times Risk of damage to the TV Two people are required to lift and carry a TV that weighs more than 25kg or 55lbs When stand mounting the TV use only the supplied stand Secure the stand to the TV tightly Place t...

Page 4: ...temperatures If the TV is transported in temperatures below 5 C or 41 F unpack the TV and wait until the TV temperature matches room temperature before connecting the TV to the power outlet Care Screen Risk of damage to the TV screen Never touch push rub or strike the screen with any object Unplug the TV before cleaning Clean the TV and frame with a soft damp cloth and wipe gently Never use substa...

Page 5: ...y Never attempt to repair the TV yourself Use the TV and accessories only as intended by the manufacturer The caution sign printed on the back of the TV indicates risk of electric shock Never remove the TV cover Always contact Philips Customer Care for service or repairs Any operation expressly prohibited in this manual or any adjustments and assembly procedures not recommended or authorized in th...

Page 6: ... 7 519 274 DivX DivX Certified and associated logos are trademarks of Rovi Corporation or its subsidiaries and are used under license DivX Certified to play DivX video up to HD 1080p including premium content ABOUT DIVX VIDEO DivX is a digital video format created by DivX LLC a subsidiary of Rovi Corporation This is an official DivX Certified device that plays DivX video Visit divx com for more in...

Page 7: ... to properly enforce restrictions on content usage content owners may require Microsoft to revoke the device s ability to consume PlayReady protected content Revocation should not affect unprotected content or content protected by other content access technologies Content owners may require you to upgrade PlayReady to access their content If you decline an upgrade you will not be able to access co...

Page 8: ... press then select Setup Watch demos Active Control demo Recycling Your product is designed and manufactured with high quality materials and components which can be recycled and reused When this crossed out wheeled bin symbol is attached to a product it means that the product is covered by the European Directive 2002 96 EC Please inform yourself about the local separate collection system for elect...

Page 9: ...lable in certain countries only Use the Philips connectivity guide An easy to use connectivity guide gives you guidance on how to connect your TV to other devices Visit http www connectivityguide philips com Search the TV forum Your question may have already been answered by the Philips TV community of users Visit www supportforum philips com Contact Philips You can contact Philips Consumer Care i...

Page 10: ...y Point the remote control at the sensor Make sure that the line of sight between the remote control and the TV is not blocked Remote control 4 5 3 2 1 1 Standby Switch the TV on or to standby 2 Play buttons Control playback of multimedia files 3 SOURCE Watch a connected device 4 CC Switch on or off closed captions For programs that support closed captions 5 TV Watch TV 9 7 6 8 6 Home Access the H...

Page 11: ...te control You can also control connected HDMI CEC enabled devices through other buttons that are available through the onscreen remote control Make sure that Easylink is switched on after connection Read more about Easylink in Connect your TV Set up Easylink devices Control devices Page 53 To access the onscreen remote control 1 While you watch a connected device press OPTIONS 2 Select Controls t...

Page 12: ...e not going to use the TV for an extended period of time disconnect the TV from the mains plug Automatic switch off You can save energy with this TV s energy efficiency settings which are enabled by default If there is no user interaction such as pressing a remote control button or a control on the TV for four hours the TV will automatically switch to standby To disable automatic switch off 1 Whil...

Page 13: ... channels Lock a channel Display channel logos Filter channels 1 Press LIST 2 Press OPTIONS then select Digital Analog 3 Select an option then press OK Tips To select the menu tabs in the channel list press Digital Analog Display all channels in the channel list Digital TV channels Display only digital channels Analog channels Display only analog channels Switch between antenna and cable channels ...

Page 14: ... press OK 3 Select the device then press OK To add or manage your connected devices see Connect your TV Watch connected devices Change device settings Page 51 Use picture and sound presets Your TV comes with predefined picture and sound settings You can apply these settings or customize them Select your preferred picture presets 1 While you watch TV press OPTIONS 2 Select Picture and sound in the ...

Page 15: ... on your broadcaster You can view program guides through one of two methods From the broadcaster From the Internet You cannot view a channel s program guide information if the age rating of the channel is equal or higher than the age rating set on your TV the channel is locked From the broadcaster Select broadcaster program guide Before you use the program guide check these settings 1 Press 2 Sele...

Page 16: ...ct the day to display Manual record Set a manual recording Reload page Refresh the page display Zoom Change zoom level of page display Security info Display program security information Play multimedia files What you can do You can play videos photos and music on your TV from Your computer connected through the home network A USB device connected to the TV Note For information on file sharing thro...

Page 17: ...of the TV screen Tips Select the top bar to filter your files by type Select Sort to arrange the files by name date or other fields Play options Watch video 1 Select in the top bar 2 Select a video then press OK 3 Optional To play all the videos in a folder select a video then select Play all To skip to the next or previous video press CH or CH To pause the video press OK Press OK again to resume ...

Page 18: ... on Enable or disable random display of pictures in the slideshow Repeat Select Repeat to watch a slideshow repeatedly or Play once to watch once Slideshow time Select the display time for each photo in the slideshow Slideshow transitions Select the transition from one photo to the next Media server When you play content from a media server you can select another media server Play DivX VOD Video O...

Page 19: ... view Certain websites may not display completely Functions that require plug ins may be unavailable TP Vision Netherlands B V bears no responsibility regarding the content and the quality of the content provided by the content service providers What you need 1 On your home network connect the TV to the Internet 2 On your TV configure Smart TV 3 Optional On your PC register with Philips to enjoy e...

Page 20: ... the Navigation buttons and to scroll up and down on a web page Reload page If a page does not load correctly press OPTIONS then select Reload page View security info To view security information about a page press OPTIONS then select Security info Smart TV options Clear Smart TV memory You can clear the Smart TV memory completely including your favorites parental control code passwords cookies an...

Page 21: ...V programs Join a quiz or contest Play games Shop online Pay for a video on demand VOD program Vote Chat What you need To enjoy this service you need Digital channels with interactive services A wired or wireless home network connected through a Universal Plug and Play router uPnP For network connection see Connect your TV Connect to a network and the Internet Page 54 Access interactive TV You can...

Page 22: ...nected USB hard drive The USB hard drive is formatted exclusively for this TV Keep it permanently connected to the TV You cannot access the contents of the USB hard drive from another TV or PC Do not overload the USB port If you connect a USB hard drive device that consumes more than 500mA power make sure that it is connected to its own external power supply Note Make sure that the TV and the USB ...

Page 23: ...n record both current TV programs as well as future TV programs Note Recording is only supported in countries with Internet program guides What you need Tune your TV to receive digital TV channels such as DVB broadcasts See Change your TV settings Channels Automatic installation Page 35 Connect a USB 2 0 compatible hard drive with a minimum capacity of 32 GB and a minimum transfer speed of 30 mega...

Page 24: ... Start recording One touch recording You can record the program you are currently watching with a single button 1 While you watch TV press Recording starts immediately A pop up window is displayed indicating the end time of the program 2 Optional Use the Navigation buttons to mark the end time of the recording 3 Select Confirm then press OK 4 To stop recording press Note While recording you cannot...

Page 25: ...recordings is displayed 3 Select the recording then select Remove The schedule recording is canceled Watch recordings 1 Press 2 Select Recordings then press OK A list of recordings is displayed 3 Select a recording from the list then press OK The recording starts to play Sort recordings 1 Press 2 Select Recordings then press OK A list of recordings is displayed 3 Press OPTIONS 4 Select an option t...

Page 26: ...rk settings Wi Fi Miracast 3 Select Off then press OK Share a screen on TV 1 On your device enable Wi Fi Miracast Wi Fi Direct or similar for example screen mirroring The device starts scanning for other Miracast devices 2 In the list of found devices select your TV to connect to it 3 A prompt appears on the TV asking for permission to connect to the device Press OK to connect When pairing is succ...

Page 27: ... TV comes with Skype pre installed on it and ready to use You do not need to install or download any files for using Skype Simply connect a Philips TV video camera to use Skype What you need A Philips TV video camera PTA317 00 sold separately with built in microphone See Connect your TV Connect more devices Video call camera Page 50 An Internet connection A wired or wireless home network For netwo...

Page 28: ... OK 4 Follow the onscreen instructions to edit the information Block a contact 1 In the Skype menu select Contacts then press OK 2 Select the contact then press OPTIONS 3 Select Block then press OK When prompted select Yes then press OK Unblock a contact 1 In the Skype menu select Settings Blocked Contacts 2 Select the blocked contact then press OK 3 Follow the onscreen instructions to unblock the...

Page 29: ... Mute the microphone Stop My Video Stop the video feed to your contact s screen Call a phone With Skype you can call land line phones and mobile phones Note No emergency calls with Skype Skype is not a replacement for your telephone and cannot be used for emergency calls Before you can make a call you will need to purchase Skype Credits or buy a Skype subscription on your computer For more informa...

Page 30: ...f Skype Credit you purchase will appear when you log in to your Skype account on your TV Automatic sign in 1 In the Skype menu select Settings and then press OK 2 Select General settings Sign me in when Skype starts then press OK Change your profile picture 1 In the Skype menu select your Skype name then press OK 2 Select Profile picture then press 3 Choose a picture select Apply and then press OK...

Page 31: ...K Change the time zone In countries with clock transmission data you can change the time zone if Auto clock mode Automatic is selected 1 In the Clock menu select Time zone 2 Select your time zone then press OK Set the clock manually You can set the date and time manually Before you start set the clock mode to Manual 1 In the Clock menu select Date or Time then press OK 2 Set the time or date with ...

Page 32: ...nter the child lock code with the Numeric buttons 5 Select an age rating then press OK All programs above the selected age rating are blocked For information on child lock codes see Use more of your TV Set locks and timers Child lock Content rating You can block programs with objectionable content 1 Press 2 Select Setup Channel settings 3 Select Child lock Content ratings lock You are prompted to ...

Page 33: ...and produce a brilliant high definition image HD Natural Motion Remove motion judders Advance sharpness Enable superior sharpness especially on lines and contours in the picture Dynamic contrast Dynamically enhance the details in the dark medium and light areas of the picture Dynamic backlight Select a backlight level to optimize dynamic power consumption and picture contrast Color enhancement Dyn...

Page 34: ...output Page 53 Clear sound Enhance sound quality Audio Out format Select the type of audio output through the digital audio output connector Choose between Multichannel and Stereo Audio Out levelling Set the output level for stereo audio Select More for higher output level Medium for medium output level and Less for lesser output level HDMI 1 ARC Enable audio output from the ARC compliant device c...

Page 35: ...tons to enter the channel frequency 5 Select Search then press OK 6 When the channel is found select Store then press OK Update channel list 1 Press 2 Select Setup Search for channels Update channels then press OK 3 Follow the onscreen instructions to update the channels Copy channels ATTENTION This feature is intended for dealers and service personnel You can copy channel lists from one Philips T...

Page 36: ... to the second TV 12 Disconnect the USB storage device Language settings Menu language 1 While you watch TV press 2 Select Setup TV settings General settings Menu language 3 Select a menu language from the list then press OK Audio language If the TV channel broadcasts multiple or dual audio languages you can select your preferred audio language 1 While you watch TV press OPTIONS 2 For digital chan...

Page 37: ...he TV Update software Check version 1 Press 2 Select Setup Software settings Current software info then press OK The current software version is displayed Caution Do not install a lower version of software than the current version installed on your product Update the software through one of these methods update with USB storage device update from digital broadcast update from the Internet Update w...

Page 38: ...en back on again The upgrade is complete 5 To prevent accidental updates to the TV software reconnect the USB flash drive to your computer and delete autorun upg Update from digital broadcast When available the TV can receive software updates through digital broadcasts When a software update is received you are prompted to update the software We strongly recommend that you update the software when...

Page 39: ...signals Connect HDMI for high definition HD TV signals and to switch on EasyLink An HDMI Audio Return Channel ARC connector allows output of TV audio to an HDMI ARC compliant device Connect HDMI cables shorter than 5 meters 16 4 feet HDMI Y Pb Pr Component video Y Pb Pr only transmits video For sound also connect to Audio Left Right The Y Pb Pr connection can handle high definition HD TV signals M...

Page 40: ...ntenna to the TV TVANTENNA Connect devices Blu ray or DVD disc player Connect the disc player with an HDMI cable to the TV HDMI Connect the disc player with a component video cable Y Pb Pr and an audio L R cable to the TV AUDIO L R YPbPr ...

Page 41: ...player with a composite cable CVBS and an audio L R cable to the TV CVBS AUDIO IN TV receiver Connect the digital TV receiver with an antenna cable to the TV TVANTENNA Connect the digital TV receiver with an HDMI cable to the TV HDMI ...

Page 42: ...video cable Y Pb Pr and an audio L R cable to the TV AUDIO L R YPbPr Connect the digital TV receiver with a composite cable CVBS and an audio L R cable to the TV CVBS AUDIO IN Video recorder Connect the recorder with an antenna cable to the TV REC TVANTENNA ...

Page 43: ...HDMI cable to the TV HDMI ARC REC Connect the recorder with a component video cable Y Pb Pr and an audio L R cable to the TV REC AUDIO L R YPbPr Connect the recorder with a composite cable CVBS and an audio L R cable to the TV REC CVBS AUDIO IN ...

Page 44: ... with an HDMI cable to the TV HDMI Connect the game console with a component video cable Y Pb Pr and an audio L R cable to the TV AUDIO L R YPbPr Connect the game console with a composite cable CVBS and an audio L R cable to the TV CVBS AUDIO IN ...

Page 45: ...e theater with an HDMI cable to the TV HDMI ARC Connect the home theater with an HDMI cable and a coaxial audio cable to the TV HDMI Digital Audio Out Connect the home theater with a component video cable Y Pb Pr and an audio L R cable to the TV AUDIO L R YPbPr ...

Page 46: ...EN 46 Connect the home theater with a composite cable CVBS and an audio L R cable to the TV CVBS AUDIO IN Digital camera Connect the digital camera with a USB cable to the TV USB ...

Page 47: ...rder with an HDMI cable to the TV HDMI Connect the digital camcorder with a component video cable Y Pb Pr and an audio L R cable to the TV AUDIO L R YPbPr Connect the digital camcorder with a composite cable CVBS and an audio L R cable to the TV CVBS AUDIO IN ...

Page 48: ...EN 48 Connect more devices USB storage device USB Connect the USB hard drive with a USB cable to the TV USB Connect the USB flash drive with a USB cable to the TV ...

Page 49: ...t the computer with an HDMI cable to the TV HDMI Connect the computer with a DVI HDMI cable and an audio cable to the TV AUDIO IN DVI VGA HDMI Connect the computer with a VGA cable and an audio cable to the TV AUDIO IN DVI VGA VGA ...

Page 50: ...Make sure that you connect the USB hub to the USB 1 connector on the back of the TV You can also connect the USB mouse to a connected USB keyboard Connect the keyboard and mouse with a USB cable to the TV USB USB When the TV detects the keyboard you can select the keyboard layout and test your selection 1 Press 2 Select Setup TV settings General settings USB keyboard settings 3 Change the keyboard...

Page 51: ...HDMI device to the TV the device is detected automatically and added to the Source menu Select a device with SOURCE 1 Press SOURCE 2 Select a device then press OK Select a device from Home menu 1 Press 2 Select Source then press OK 3 Select a device then press OK Update the source list If you add or remove a device update the source list 1 Press SOURCE 2 Press OPTIONS 3 Select Scan connections the...

Page 52: ...e to hear the TV audio from those speakers instead of the TV speakers Retain picture quality If your TV picture quality is affected by the picture processing features of other devices you can switch on Pixel Plus Link to retain picture quality Maximize display for subtitled video Some video subtitles can create a separate subtitle bar under the video which limits the video display area To maximize...

Page 53: ...hen press OK On Hear the TV audio through the connected HDMI ARC compliant device Off Hear the TV audio through the TV speakers or through a device connected through the digital audio out connector Note Make sure that all HDMI CEC settings are properly set up on the connected device Set up TV speakers 1 Press 2 Select Setup TV settings Sound Advanced TV speakers 3 Select an option then press OK Of...

Page 54: ...network with an Internet connection you can browse Smart TV Smart TV offers Internet services and websites tailored to your TV Play music and videos consult infotainment rent movies and much more See Use your TV Smart TV Page 19 What you need Warning This TV complies with the EMC directive only when you use a shielded Cat5 Ethernet cable A computer network that includes a A universal plug and play...

Page 55: ...may differ according to the operating environment of your wireless home network Start wireless setup 1 Switch on your wireless network router 2 Connect the Philips USB adapter PTA127 to a USB connector on the TV The wireless installation starts automatically 3 Follow the onscreen instructions Tip Keep the wireless USB adapter connected to the TV WPS Wi Fi Protected Setup 1 If your router supports ...

Page 56: ...ou can connect your TV to your home network wirelessly Note The wireless network operates in the same 2 4 GHz frequency spectrum as common household devices such as Dect phones microwave ovens or Bluetooth devices which can cause Wi Fi interference Move these devices away from the TV For optimum Wi Fi performance place the TV at a distance of less than 10 m from the wireless router Avoid obstructi...

Page 57: ...te control 1 To enter the encryption key manually select Standard and press OK 2 To access the onscreen keyboard select the text entry field then press OK Set secured connection with WEP encryption If your router has WEP security the TV asks for the WEP encryption key in hexadecimal numbers 1 Locate the hexadecimal key in the router software on your PC and make a note of of the first key in the WE...

Page 58: ...on the remote control or press any key on the TV The standby light on the TV blinks red Disconnect the power cable from the power outlet Wait until the TV cools down before you reconnect the power cable If the blinking reoccurs contact Philips Consumer Care The TV audio is in the wrong language Change your audio language by pressing OPTIONS then select Audio language or Alternate audio The TV or S...

Page 59: ...Picture signals from some devices may not fit the screen correctly Check the signal output of the device An e sticker banner displaying information appears on the TV display The TV is in Shop mode To remove the e sticker set the TV to Home mode then restart the TV See Change your TV settings Other settings Home mode Page 37 The computer display on the TV is not stable Make sure that your PC uses t...

Page 60: ...d picture file formats are supported by the TV Audio and picture files on your USB storage device do not play or display smoothly The transfer performance of the USB storage device may limit the data transfer rate to the TV which causes poor playback Network issues You want to establish a wireless connection between your TV and home network For PFL35x8 refer to Connect your TV Connect to a network...

Page 61: ...ury irreparable damage to your TV or void your warranty If are not able to resolve your problem refer to the frequently asked questions FAQs for this TV at www philips com support You can also consult and contribute to the Philips TV community at www supportforum philips com If you wish to speak with or email a Philips representative contact the Philips Consumer Care in your country You can find t...

Page 62: ... Rate PMR For PFL35x8 series 120 Hz For PFL45x8 series 300 Hz Sound Output power RMS 20 W 10 THD Incredible Surround Clear Sound Mono Stereo Display resolutions Computer formats HDMI Resolution refresh rate 640 x 480 60 Hz 800 x 600 60 Hz 1024 x 768 60 Hz 1280 x 1024 60 Hz 1360 x 768 60 Hz 1920 x 1080 60 Hz Computer formats VGA Resolution refresh rate 640 x 480 60 Hz 800 x 600 60 Hz 1024 x 768 60 ...

Page 63: ...lus Dolby Pulse Yes Yes No No No 1920x1088 30 Yes Yes No No No MPEG 2 MPEG 4 ASP H 264 MVC MPEG 2 MPEG 4 ASP H 264 1920x1088 25p 30p 50i 60i 25p 30p 50i 60i 25p 30p 50p 60p 60i 25p 30p 50i 60i 25p 30p 50i 60i 25p 30p 50p 60p 60i 30 Yes Yes No No No Supported audio video formats File Extensions Container Maximum resolution Audio codec USB CE HTML HTML5 YouTube Max Bit Rate Mbps Video codec Max Fram...

Page 64: ...P AAC HE AAC v1 v2 AMR Yes Yes No No No MPEG 4 ASP H 264 1920x1088 1920x1088 25p 30p 50i 60i 25p 30p 50p 60p 60i 30 30 Yes Yes No No No Supported audio formats File Extensions Container Maximum resolution Audio codec USB CE HTML HTML5 YouTube Max Bit Rate Mbps Video codec Frequency kHz Media server mp3 MP3 48 384 MPEG 1 2 2 5 L3 Yes Yes Yes Yes No wma asf WMA V2 up toV9 2 WMA Pro 48 192 WMA Yes Ye...

Page 65: ...s Twonky Media Microsoft Windows Mac OS X Sony Vaio Media Server Microsoft Windows TVersity Microsoft Windows Nero MediaHome DiXiM Microsoft Windows XP Macrovision Network Media Server Microsoft Windows Fuppes Linux uShare Linux Connectivity Rear NETWORK Ethernet LAN RJ 45 AUDIO IN DVI VGA stereo 3 5mm mini jack VGA PC input SERV U Service port CVBS Y Pb Pr Component Composite video L R Component ...

Page 66: ...connect disc player 40 connect external hard disk 48 connect game console 44 connect home network 54 connect home theater 45 connect Internet 54 connect keyboard 50 connect mouse 50 connect recorder 42 connect TV receiver 41 connect USB device 48 connect video call camera 50 connected device rename 51 connectivity 65 connectivity guide 9 connectors 39 contact Philips 9 content rating 32 controls 1...

Page 67: ... media server program 16 Miracast 26 mode home or shop 37 Multimedia Home Platform MHP 21 multimedia play files 16 multimedia play options 17 multimedia supported formats 62 N network settings 57 network connect 54 network TV name 57 O online forum 9 online video rent 20 P pause TV 22 pause TV USB hard drive 22 PC display resolutions 62 Philips video camera 50 picture format 15 picture settings 33...

Page 68: ...call 28 Skype settings 30 Skype setup 27 Skype sign in 27 Skype video call 28 Skype voice call 28 Skype voicemails 30 sleep timer 31 Smart TV 19 Smart TV apps 20 Smart TV browse 19 Smart TV network 54 Smart TV start 19 smartphone control 11 software check version 37 software digital update 38 software Internet update 38 software USB update 37 sound settings 34 sound settings reset 34 sound specifi...

Page 69: ...EN 69 English V VGA 39 video call camera 50 video store 20 volume 12 W Wi Fi integrated setup 56 Wi Fi ready setup 55 wireless USB adapter 55 Y YouTube 19 YPbPr component video 39 ...

Page 70: ... 0 1 2 3 Lista de Postos Autorizados Envision Brasil ...

Page 71: ...tos ou de força maior bem como aqueles causados por DJHQWHV GD QDWXUH D H DFLGHQWHV FOXHP VH LJXDOPHQWH GHVWD JDUDQWLD GHIHLWRV GHFRUUHQWHV do uso dos produtos em serviços não domésticos residendais regulares ou em desacordo com o uso recomendado ESTÃO EXCLUÍDAS DA GARANTIA ADICIONAL AS PILHAS OU 7 5 6 251 6 8172 20 2 21752 5 0272 1RV PXQLFtSLRV RQGH QmR H LVWD DVVLVWrQFLD WpFQLFD DXWRUL DGD QYLVL...

Page 72: ...All registered and unregistered trademarks are the property of their respective owners www philips com ...

Reviews: