background image

3139 246 16611

English

21

Operations for video playback
(DVD/VCD/SVCD)

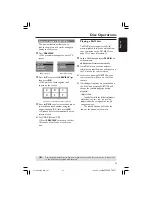
Using the Disc Menu

Depending on the disc, a menu may
appear on the TV screen once you load in
the disc.

To select a playback feature or item

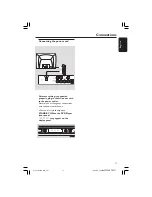
Use 

1


2


3


4

 keys or 

numeric keypad

(0-9)

 on the remote, then press 

OK 

to

start playback.

To access or remove the menu

Press 

DISC MENU 

on the remote.

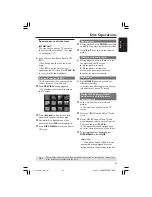
Zooming in

This function allows you to enlarge the
picture on the TV screen and to pan
through the enlarged picture.

1

During playback, press 

ZOOM

repeatedly to display the picture with
different scales.

Use 

1


2


3


4

 keys to pan through the

enlarged picture.

Playback will continue.

2

Press 

ZOOM

 repeatedly to return to

the original size.

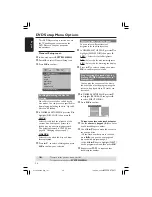
Using the OSD menu

OSD menu shows the disc playback
information (for example, title or chapter
number, elapsed playing time, audio/
subtitle language), a number of operations
can be done without interrupting disc
playback.

1

During playback, press 

DISPLAY

.

A list of available disc information

appears on the TV screen.

Menu

Bitrate    61 

Title Remain    0:48:59 

Title 01/01
Chapter 09/12
Audio 2CH  Chinese
Subtitle Off

Menu

Bitrate    71 

Total Elapsed    0:01:32 

Track 01/01
Disc Time 

0:48:53

Track Time  0:48:53 
Repeat Off

2

Press 

3


4

 to view the information and

press 

OK

 to access.

3

Press 

2

 or 

OK

 to select an option.

4

Use the 

numeric keypad (0-9)

 to input

the number/time or press 

3


4

 to make

the selection, then press 

OK

 to confirm.

Playback will change to the chosen

time or to the selected title/chapter/
track.

TIPS:

The operating features described here might not be possible for certain discs.   Always refer
to the instructions supplied with the discs.

Disc Operations

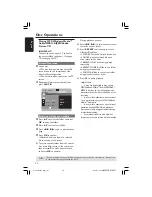
Resuming playback from the last
stopped point

Resume playback of the last 5 discs is
possible, even if the disc was ejected or
the power switched off.

Load one of the last 5 discs.

 “

LOAD

” appears.

Press 

PLAY 

B

 and the disc will be played

back from the last point.

To cancel resume mode

In stop mode, press 

STOP 

9

 again.

Slow Motion

1

Press 

3


4


during playback to select the

required speed: 1/2, 1/4, 1/8 or 1/16
(backward or forward).

Sound will be muted.

2

To return to normal speed, press 

PLAY 

B

.

Helpful Hint:

Slow backward is not possible on VCDs.

01-39 xDV434_Eng_191

13/04/05, 1:49 PM

21

Summary of Contents for 434

Page 1: ...3139 246 16611 Model 434 DVD VIDEO PLAYER User Manual Manuel D utilisation Manual de Instrucciones Manual do Utilizador Gebruikershandleiding 01 39 xDV434_Eng_191 13 04 05 1 48 PM 1 ...

Page 2: ...erminal marked L or coloured red Do not connect either wire to the earth terminal in the plug marked E or e or coloured green or green and yellow Before replacing the plug cover make certain that the cord grip is clamped over the sheath of the lead not simply over the two wires Copyright in the U K Recording and playback of material may require consent See Copyright Act 1956 and The Performer s Pr...

Page 3: ...an Laite ei saa olla alttiina tippu ja roiskevedelle Huom Toiminnanvalitsin on kytketty toisiopuolelle eikä se kytke laitetta irti sähköverkosta Sisäänrakennettu verkko osa on kytkettynä sähköverkkoon aina silloin kun pistoke on pistorasiassa CONSUMERS SHOULD NOTE THAT NOT ALL HIGH DEFINITION TELEVISION SETS ARE FULLY COMPATIBLE WITHTHIS PRODUCT AND MAY CAUSE ARTIFACTS TO BE DISPLAYED IN THE PICTU...

Page 4: ...n located at the rear of your DVDVIDEO player and enter below the Serial No Retain this information for future reference Model No xDV434 19 01 Serial No _______________ Environmental Information All unnecessary packaging has been omitted The packaging has been made easy to separate into two materials cardboard box buffer and polyethylene bags protective foam sheet Your DVD player consists of mater...

Page 5: ...ING SYNLIG OCH OSYNLIG LASERSTRÅLNING NÄR DENNA DEL ÄR ÖPPNAD BETRAKTA EJ STRÅLEN VARO AVATTAESSA OLET ALTTIINA NÄKYVÄLLE JA NÄKYMÄTTÖMÄLLE LASER SÄTEILYLLE ÄLÄ KATSO SÄTEESEEN VORSICHT GEFAHRVON SICHTBARER UND UNSICHTBARER LASERSTRAHLUNG BEI GEÖFFNETEM GEHÄUSE ATTENTION RAYONNEMENT LASERVISIBLE ET INVISIBLE EN CAS D OUVERTURE EXPOSITION DANGEREUSE AU FAISCEAU English 6 Français 40 01 39 xDV434_En...

Page 6: ...onds to your TV 17 Step 3 Setting language preference 18 Setting the OSD Language 18 Setting the Audio Subtitle and Disc menu language 18 Disc Operations Playable Discs 19 Region Codes 19 Playing discs 19 Basic playback controls 20 Selecting various repeat shuffle functions 20 Repeat play mode 20 Repeating a section within a chapter track 20 Operations for video playback 21 Using the Disc Menu 21 ...

Page 7: ...tup 28 Sound Mode 29 CD Upsampling 29 Night Mode turning on off 29 Video Setup Menu 30 32 TV Type 30 Setting the TV Display 30 Progressive turning on off 31 Picture Setting 31 32 Switching theYUV RGB 32 Preference Page 33 35 Audio Subtitle Disc Menu 33 Restricting playback by Parental Control 33 PBC 34 MP3 JPEG Menu turning on off 34 Changing the Password 34 Setting the DivX Subtitle 35 Restoring ...

Page 8: ...isc Leave the player in the warm environment until the moisture evaporates Do not block the vents Do not operate the DVD Player in an enclosed cabinet allow about 10 cm 4 inch of free space all around the player for adequate ventilation 10 cm 4 inches 10 cm 4 inches 10 cm 4 inches PHILIPS Care of the cabinet Use a soft cloth slightly moistened with a mild detergent solution Do not use a solution c...

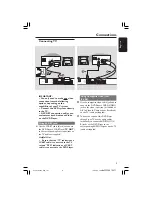
Page 9: ...n the TV cable not supplied Helpful Hint Ensure that the TV indication on SCART cable is connected to theTV set and DVD indication on SCART cable is connected to the DVD Player AUDIO IN S VIDEO IN VIDEO IN TV IN AUDIO IN S VIDEO IN VIDEO IN TV IN 2 1 Using CompositeVideo jacks CVBS 1 Use the composite video cable yellow to connect the DVD Player s CVBS VIDEO jack to the video input jack or labeled...

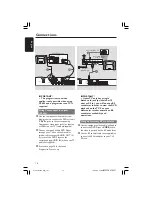
Page 10: ... AUDIO OUT L R jacks of the DVD Player to the corresponding AUDIO IN jacks on the TV cable not supplied 3 Proceed to page 16 for detailed Progressive Scan set up IMPORTANT If yourTV only has a single Antenna In jack or labeled as 75 ohm or RF In you will need an RF modulator in order to view the DVD playback on theTV See your electronics retailer odetails on RF modulator availability and operation...

Page 11: ... in the AC power cord to the power outlet Never make or change any connections with the power switched on When no disc is loaded press STANDBY ON on the DVD Player front panel NO DISC may appear on the display panel OPEN CLOSE OPEN CLOSE MIC LEVEL STOP STOP PLAY PLAY PAUSE PAUSE TANDBY ON Connecting the power cord NO DISC 01 39 xDV434_Eng_191 13 04 05 1 49 PM 11 ...

Page 12: ...Receiver Receiver has a PCM Dolby Digital or MPEG2 decoder 1 Select one of the video connections CVBSVIDEO IN SCART or COMPONENTVIDEO IN depending on the options available on your TV 2 Connect the COAXIAL jack of the DVD Player to the corresponding Digital Audio In jack on your Receiver cable not supplied 3 Set the DVD Player s Digital Output to PCM ONLY or ALL depending on the capabilities of you...

Page 13: ...bPr Component Video Out Connect toYPbPr input of aTV Caution Do not touch the inner pins of the jacks on the rear panel Electrostatic discharge may cause permanent damage to the unit OPEN CLOSE OPEN CLOSE MIC LEVEL STOP STOP PLAY PLAY PAUSE PAUSE STANDBY TANDBY ON ON IR Sensor Point the remote control towards this sensor 2 PLAY PAUSE To start or interrupt playback 9 STOP To stop playback STANDBY O...

Page 14: ...y REPEAT Selects various repeat modes REPEAT A B Repeats playback a specific section on a disc AUDIO To access audio language system menu PREVIEW To search chapter track during playback MUTE Disables or enables sound output DISPLAY Displays information onTV screen during playback T To search or select next chapter or track PAUSE To pause playback temporarily frame by frame playback 1 2 3 4 Selects...

Page 15: ...p 2 Setting up theTV IMPORTANT Make sure you have completed all the necessary connections See pages 9 10 ConnectingTV 1 Turn on the TV and set to the correct video in channel You should see the DVD background screen on the TV 2 Usually these channels are between the lowest and highest channels and may be called FRONT A V IN orVIDEO See your TV manual for more details Or you may go to channel 1 on ...

Page 16: ...edly to select VIDEO SETUP PAGE Set P SCAN On Off Video Setup Page TV Type TV Display Progressive On Picture Setting Off Component 7 Select PROGRESSIVE to ON then OK to confirm The instruction menu appears on the TV 1 ENSURE YOUR TV HAS PROGRESSIVE SCAN 2 CONNECT USING YPBPR GBR VIDEO CABLE 3 IF THERE IS A DISTORTED PICTURE WAIT Cancel OK ACTIVATING PROGRESSIVE 15 SECONDS FOR AUTO RECOVERY 8 Press...

Page 17: ...cordance with the video signal of the disc 5 Select an item and press OK Helpful Hints Before changing the currentTV Standard setting ensure that yourTV supports the selectedTVType system If there is no proper picture on yourTV wait for 15 seconds for auto recovery CHANGING PAL TO NTSC 1 ENSURE THAT YOUR TV SUPPORTS NTSC STANDARD 2 IF THERE IS A DISTORTED PICTURE DISPLAYED ON THE TV WAIT 15 SECOND...

Page 18: ...r soundtrack from audio subtitles and disc menu languages If the language selected is not available on the disc the disc s default language will be used instead Set Preference To English Audio English Subtitle Chinese Disc Menu French Parental Spanish PBC Portuguese MP3 Jpeg Nav Polish Password Italian Preference Page 1 Press STOP twice then press SYSTEM MENU 2 Press 2 repeatedly to select PREFERE...

Page 19: ...gions or Region 2 in order to play on this Player You cannot play Discs that are labeled for other regions Helpful Hints It may not be possible to play CD R RW or DVD R RW in all cases due to the type of disc or condition of the recording If you are having trouble playing a certain disc remove the disc and try a different one Improper formatted disc will not play on this DVD Player TIPS The operat...

Page 20: ...ble for certain discs Always refer to the instructions supplied with the discs Selecting various repeat shuffle functions Repeat play mode While playing a disc press REPEAT continuously to choose a Play Mode CHAPTER DVD to repeat playback of the current chapter TRACK TITLE CD SVCD VCD DVD to repeat playback of the current track CD SVCD VCD title DVD ALL to repeat playback of all the disc and all t...

Page 21: ...u Bitrate 61 Title Remain 0 48 59 Title 01 01 Chapter 09 12 Audio 2CH Chinese Subtitle Off Menu Bitrate 71 Total Elapsed 0 01 32 Track 01 01 Disc Time 0 48 53 Track Time 0 48 53 Repeat Off 2 Press 3 4 to view the information and press OK to access 3 Press 2 or OK to select an option 4 Use the numeric keypad 0 9 to input the number time or press 3 4 to make the selection then press OK to confirm Pl...

Page 22: ...ress SUBTITLE repeatedly to select different subtitle languages SpecialVCD SVCD Features Playback Control PBC ForVCD with Playback Control PBC feature version 2 0 only Press DISC MENU to toggle between PBC ON and PBC OFF If you select PBC ON the disc menu if available will appear on theTV Use the S T or the numeric keypad 0 9 to select a play option During playback pressing RETURN TITLE will retur...

Page 23: ...ions TIPS The operating features described here might not be possible for certain discs Always refer to the instructions supplied with the discs DVD example Video CD example Playing a DivX disc This DVD player supports the DivX movie playback that you download from your computer onto a CD R RW see page 27 for more information 1 Load a DivX disc and press PLAY B to select a movie Playback will star...

Page 24: ...layback will start automatically If not press PLAY B 01 42 04 40 001 020 Coco Before Coco I love Coco Jazz Before ALBUM 2002 Coco Lee MP3 MP3 MP3 During playback you can Press S T to select another track file in the current folder Press REPEAT continuously to access different Play Mode FOLDER files will be played back once SINGLE play the selected file once then return to the menu REPEAT ONE one f...

Page 25: ...picture Playback with multi angles During playback press 3 4 1 2 to rotate the picture on the TV screen 3 flip the picture vertically 4 flip the picture horizontally 1 rotate the picture anti clockwise 2 rotate the picture clockwise Scan Effect Press ANGLE repeatedly to choose different scan effect Various scan effect appears on the top left hand corner on the TV screen Special picture disc featur...

Page 26: ...ting then press OK to confirm your selection Dimming player s display panel You can select different levels of brightness for the display screen 1 In GENERAL SETUP PAGE press 3 4 to highlight DISPLAY DIM then press 2 100 Select this for full brightness 70 Select this for medium brightness 40 Select this for dimming the display 2 Press 3 4 to select a setting then press OK to confirm your selection...

Page 27: ...lect a setting then press OK to confirm your selection Sleep Sleep function allows you to turn off the DVD Player automatically after a preset time 1 In GENERAL SETUP PAGE press 3 4 to highlight SLEEP then press 2 15 Mins Turn off the DVD Player after 15 minutes 30 Mins Turn off the DVD Player after 30 minutes 45 Mins Turn off the DVD Player after 45 minutes 60 Mins Turn off the DVD Player after 6...

Page 28: ...TUP PAGE press 3 4 to highlight DIGITAL AUDIO SETUP then press 2 2 Press the 3 4 keys to highlight an option 3 Enter its submenu by pressing 2 4 Press 3 4 to select a setting then press OK to confirm your selection Digital Output Set the Digital output according to your optional audio equipment connection Off Turn off the digital output All If you have connected your DIGITAL AUDIO OUT to a multi c...

Page 29: ...usic CD to a higher sampling rate using sophisticated digital signal processing for better sound quality If you have activated the upsampling the player will automatically switch to stereo mode 1 In AUDIO SETUP PAGE press 3 4 to highlight CD UPSAMPLING then press 2 OFF Select this to disable CD upsampling 88 2 kHz X2 Select this to convert the sampling rate of the CDs twice higher than the origina...

Page 30: ...he DVD Player according to the TV you have connected The format you select must be available on the disc If it is not the setting for TV display will not affect the picture during playback 1 In VIDEO SETUP PAGE press 3 4 to highlight TV DISPLAY then press 2 2 Press 3 4 to highlight one of the options below 4 3 PAN SCAN Select this if you have a normalTV and want both sides of the picture to be tri...

Page 31: ...ss 3 4 to select a setting then press OK to confirm your selection Follow the instructions shown on the TV to confirm the selection if any If a distorted picture appears on the TV screen wait for 15 seconds for auto recovery Picture Setting This DVD Player provides three predefined sets of picture colour settings and one personal setting which you can define yourself 1 In VIDEO SETUP PAGE press 3 ...

Page 32: ...r vice versa Choose zero 0 for average setting COLOUR Increase the value will enhance the colour in your picture or vice versa Choose zero 0 to balance the colour 5 Press 1 2 to adjust the setting that best suit your personal preference 6 Repeat steps 4 5 for adjusting other colour features 7 Press OK to confirm Switching theYUV RGB This setting allows you to toggle the output of the video signal ...

Page 33: ...ibit the playing of certain discs that are not suitable for your children or have certain discs played with alternative scenes 1 In PREFERENCE PAGE press 3 4 to highlight PARENTAL then press 2 Set KID SAFE Audio 1 KID SAFE Subtitle 2 G Disc Menu 3 PG Parental 4 PG 13 PBC 5 PGR Mp3 Jpeg Nav 6 R Password 7 NC17 Preference Page 2 Press 3 4 to highlight a rating level for the disc inserted and press O...

Page 34: ... this to display only the folder menu of the MP3 Picture CD 2 Press 3 4 to select a setting then press OK to confirm your selection Changing the Password The same password is used for both Parental Control and Disc Lock Enter your six digit password when prompted on the screen The default password is 136 900 1 In PREFERENCE PAGE press 3 4 to highlight PASSWORD then press 2 to select CHANGE Old Pas...

Page 35: ...D system 2 Press 3 4 to select a setting then press OK to confirm your selection DVD Setup Menu Options TIPS To return to the previous menu press 1 To remove the menu press SYSTEM MENU Restoring to original settings Setting the DEFAULT function will reset all options and your personal settings to the factory defaults except your password for Parental Control and Disc Lock 1 In PREFERENCE PAGE pres...

Page 36: ... the progressive scan feature as below 1 Turn off yourTV progressive scan mode or turn on to interlaced mode 2 Press OPEN CLOSE to open the disc tray 3 Press numeric keypad 1 on the remote control for few seconds Distorted picture Sometimes a small amount of picture distortion may appear depending on the disc being played back This is not a malfunction Completely distorted picture or Connect DVD P...

Page 37: ...as indicated Buttons do not work To completely reset the player unplug the AC cord from the AC outlet for 5 10 seconds Player does not respond to some Operations may not be permitted by the disc operating commands during playback Refer to the instructions of the disc jacket DVD Player cannot read Use a commonly available cleaning CD DVD to CDs DVDs clean the lens before sending the DVD Player for ...

Page 38: ...Stereo Dolby Surround compatible downmix from Dolby Digital multi channel sound Specifications AUDIO PERFORMANCE DA Converter 24 bit 192 kHz DVD fs 96 kHz 4Hz 44kHz fs 48 kHz 4Hz 22kHz SVCD fs 48 kHz 4Hz 22kHz fs 44 1kHz 4Hz 20kHz CD VCD fs 44 1kHz 4Hz 20kHz Signal Noise 1kHz 95 dB Dynamic range 1kHz 85 dB Crosstalk 1kHz 90 dB Distortion noise 1kHz 80 dB MPEG MP3 MPEG Audio L3 CONNECTIONS Scart Ou...

Page 39: ... A still picture data compression system proposed by the Joint Photographic Expert Group which features small decrease in image quality in spite of its high compression ratio MP3 A file format with a sound data compression system MP3 is the abbreviation of Motion Picture Experts Group 1 or MPEG 1 Audio Layer 3 By using MP3 format one CD R or CD RW can contain about 10 times as much data volume as ...

Reviews: