10
EN
6 Troubleshooting
Warning
•
Never remove the casing of this apparatus.
To keep the warranty valid, never try to repair
the system yourself.
If you encounter problems when using this
apparatus, check the following points before
requesting service. If the problem remains
unsolved, go to the Philips web site (www.
philips.com/welcome). When you contact
Philips, ensure that the apparatus is nearby
and the model number and serial number are
available.
No power to the wireless microphone
•
The batteries may be installed incorrectly
or drained. Install or replace the batteries
properly (see 'Install/replace microphone
batteries' on page 6).
•
As a power-saving feature, the microphone
switches to standby mode automatically
after staying disconnected from the
speaker for more than 15 minutes. To
switch it on again, you need to slide the
ON/OFF
switch on the microphone to the
OFF
position and then back to the
ON
position.
No sound or poor sound
•
Adjust volume on the audio system
connected to the wireless receiver.
•
Make sure that you have selected the
correct source on the connected audio
system.
•
Make sure that you have connected the
wireless receiver to the audio system
securely.
•
Check whether you have connected the
iPad securely.
•
Check whether you have started music
play on the iPad.
Failed to set up connection between the
microphone and receiver
•
Check whether both the wireless
microphone and wireless receiver are
switched on. The wireless receiver is
switched on automatically when it is
connected to an iPad.
•
Make sure that the wireless
microphone and wireless receiver
are within the the effective operation
range, that is, approximately 10 meters
(30 feet).
Howling or echo from the wireless
microphone
•
Adjust volume on the existing audio
system connected to the wireless
receiver.
•
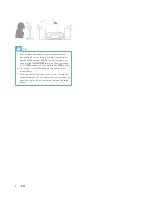
Increase the distance between the
microphone and audio system or
adjust the angle of the microphone
towards the audio system.
Summary of Contents for AEA3000/07
Page 2: ......
Page 7: ...5 EN Note The type plate is located on the back of the unit ...
Page 14: ......


