8
ENGLISH
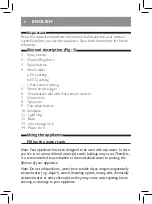
Note: Make sure that the base sits on a stable and level surface. It is
recommended to place the base on the soft part of the ironing board.
4
The light ring starts to flash blue light, indicating the iron is heating
up. (Fig. 7)
5
When the blue light turns steady, you can start ironing. (Fig. 8 )
Operation of Smart Charging base
The iron is equipped with Smart Charging base. The light will indicate
the status of the iron, and remind you to charge the iron after 20 to
25 seconds to ensure a good wrinkle removal performance. Please
refer to table 2 for the operation of the base.
Note: to ensure good wrinkle removal performance, always put the iron on
its base during the resting period. Do not place the iron on its heel. (Fig.9)
Table 2
Light status
Iron status
Instructions
Flashing blue
Heating up
Wait for iron to be ready.
Steady blue
Ready for use
You can start ironing.
Flashing orange
The iron needs to
be charged now
Put the iron back to the
base to charge it.
Slow breathing
blue (specific
types only)
Safety auto-off has
been activated
Refer to Chapter
“Features”, section “safety
auto-off”.
Features
Spray function
-
Press the spray button to moisten the garment to be ironed. This
helps remove stubborn creases (Fig. 10).


