Installation
8-42
CardioMD Service Manual
1MAN0158-H11 04-2005 CSIP Level 1
8.3.3.22
Assembling the Laptop PC Mounting Option
Three different mounting options are provided for the laptop acquisition PC. These are:
•
A cart-mount option
•
A wall-mount option
•
A desk-mount option.
The following sections describe the installation of each of the three options, including the
connection of the laptop PC to the gantry.
Note
. The laptop installation kit includes 3 m (10 ft.) of rubber cable protector for routing of
cables through traffic areas. Before starting the installation, remove the cable protector from the
packaging and place it flat on the floor out of the way, allowing ‘curl’ to relax.
Cart-mount Option
Installing the cart comprises the following steps:
1.
Unpacking the cart
2.
Connecting the cable from the cart to the gantry
3.
Mounting the laptop power supply in the cart stand
4.
Connecting the laptop PC.
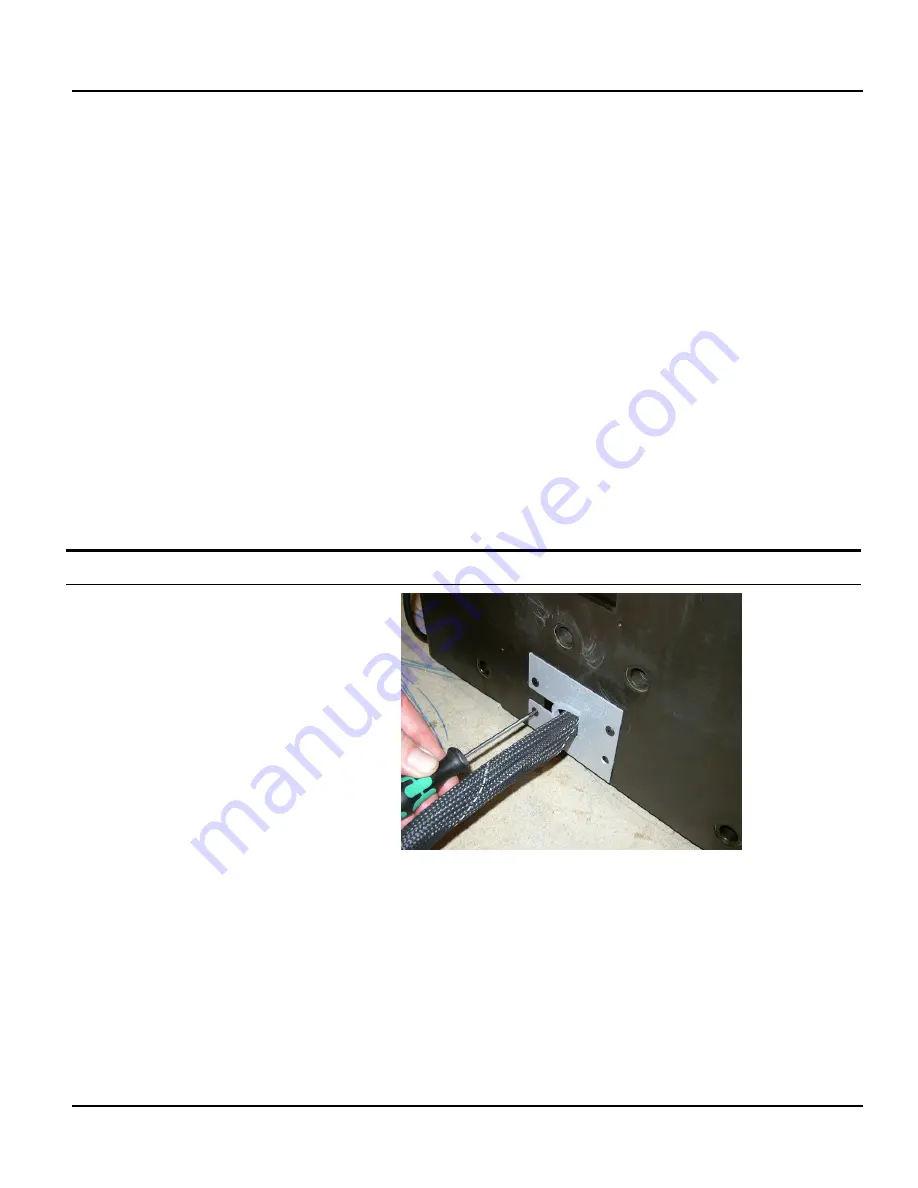
After the cart is unpacked, follow these steps to connect the cable to the gantry:
Procedure Details
1.
Push the cable from the cart through the
entry hole in the gantry.
2.
Fasten the plate to the gantry using the
M4 x 8 screws.
Summary of Contents for CARDIOMD
Page 1: ...CARDIOMD SERVICE MANUAL 1MAN0158 H11 04 2005 CSIP Level 1 ...
Page 10: ...Introduction x CardioMD Service Manual 1MAN0158 H11 04 2005 CSIP Level 1 ...
Page 16: ...Safe Operating Practices 1 6 CardioMD Service Manual 1MAN0158 H11 04 2005 CSIP Level 1 ...
Page 164: ...Detector Calibration Files 5 60 CardioMD Service Manual 1MAN0158 H11 04 2005 CSIP Level 1 ...
Page 328: ...Installation Procedures 9 38 CardioMD Service Manual 1MAN0158 H11 04 2005 CSIP Level 1 ...
Page 348: ...Planned Maintenance Procedures 11 6 CardioMD Service Manual 1MAN0158 H11 04 2005 CSIP Level 1 ...
Page 465: ......


