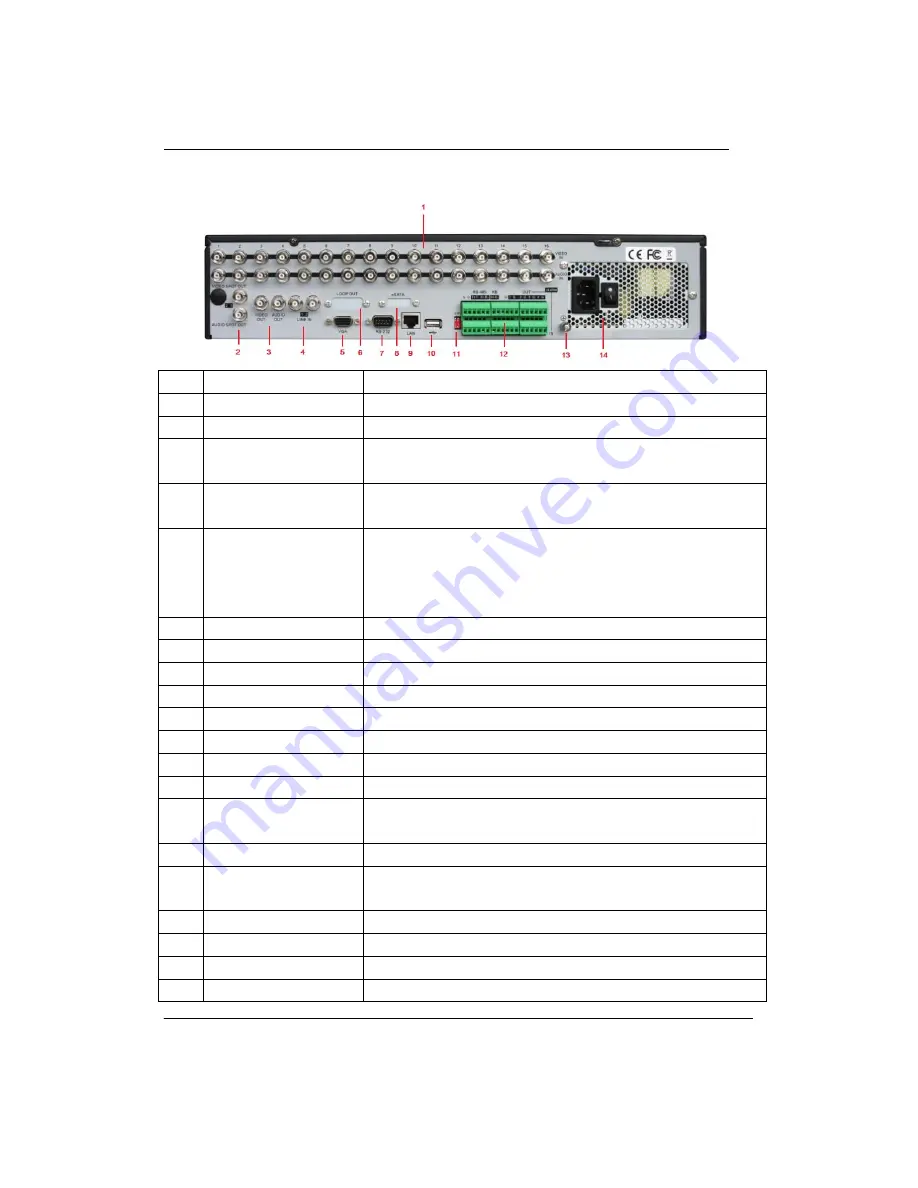
2 Installation Guide
- DS-9000 / DS-9100 Series DVR
Rear Panel Diagram
No.
Item
Description
1
VIDEO IN
BNC connectors for analog video input.
AUDIO IN
BNC connectors for analog audio input.
2
VIDEO SPOT OUT
BNC connector for monitor. If VGA is connected, it is for video output only. If VGA
is not connected, it is for video output, playback and showing PTZ controls.
AUDIO SPOT OUT
BNC connector for audio output. If VGA is connected, audio is synchronized with
VGA. If VGA is not connected, audio is synchronized with VIDEO SPOT OUT.
3
VIDEO OUT
BNC connector for video output. If VGA is connected, it is used for spot output only
with local video display, playback, recording and PTZ controls. If VGA is not
connected, it is used as the main video output with local video display and menu
operations.
AUDIO OUT
BNC connector for audio output. This connector is synchronized with VIDEO OUT.
4
LINE IN
BNC connector for audio input.
5
VGA
DB9 connector for VGA output. Display local video output and menu.
6
Loop Out (Optional)
DB15 interface for connection video matrix and monitor.
7
RS-232 Interface
Connector for RS-232 devices.
8
eSATA (Optional)
Connects external SATA HDD, CD/DVD-RM or disk array.
9
LAN Interface
Connector for LAN (Local Area Network).
10
USB Interface
Connector for USB devices.
11
Termination Switch
RS-485 termination switch.
Up position is not terminated. Down is 120
Ω
termination.
12
RS-485 Interface
Connector for RS-485 devices. T+, T- pin connects to PTZ.
Controller Port
D+, D- pin connects to Ta, Tb pin of controller. For cascading devices, the first
DVR’s D+, D- pin should be connected with the D+, D- pin of the next DVR.
ALARM IN
Connector for alarm input (up to 16 channels).
ALARM OUT
Connector for alarm output (4 channels).
13
GROUND
Ground(needs to be connected when DVR startup)
14
POWER
AC 110V ~ 220V


