background image

6

DVD VIDEO PLAYER

90 Days Free Labor

One Year Exchange Warranty on Parts

This product must be carried in for repair.

LIMITED WARRANTY

WHO IS COVERED?

You must have proof of purchase to receive warranty service. A sales
receipt or other document showing that you purchased the product is
considered proof of purchase.

WHAT IS COVERED?

Warranty coverage begins the day you buy your product.

For 90 days

thereafter

, all parts will be repaired or replaced, and labor is free.

From

90 days to one year from the day of purchase,

all parts will be repaired or

replaced, but you pay for all labor charges.

After one year from the day

of purchase,

you pay for the replacement or repair of all parts, and for

all labor charges.

All parts, including repaired and replaced parts, are covered only for
the original warranty period.When the warranty on the product
expires, the warranty on all replaced and repaired parts also expires.

WHAT IS EXCLUDED?

Your warranty does not cover:

labor charges for installation or setup of the product, adjustment of
customer controls on the product, and installation or repair of
antenna systems outside of the product.

product repair and/or part replacement because of misuse, accident,
unauthorized repair or other cause not within the control of Philips
Consumer Electronics.

reception problems caused by signal conditions or cable or antenna
systems outside the unit.

a product that requires modification or adaptation to enable it to
operate in any country other than the country for which it was
designed, manufactured, approved and/or authorized, or repair of
products damaged by these modifications.

incidental or consequential damages resulting from the product.
(Some states do not allow the exclusion of incidental or consequen-
tial damages, so the above exclusion may not apply to you.This
includes, but is not limited to, prerecorded material, whether copy-
righted or not copyrighted.)

a product that is used for commercial or institutional purposes
(including but not limited to rental purposes).

WHERE IS SERVICE AVAILABLE?

Warranty service is available in all countries where the product is offi-
cially distributed by Philips Consumer Electronics. In countries where
Philips Consumer Electronics does not distribute the product, the local
Philips service organization will attempt to provide service (although
there may be a delay if the appropriate spare parts and technical manu-
al(s) are not readily available).

MAKE SURE YOU KEEP...

Please keep your sales receipt or other document showing proof of
purchase. Attach it to this owner’s manual and keep both nearby. Also
keep the original box and packing material in case you need to return
your product.

BEFORE REQUESTING SERVICE...

Please check your owner’s manual before requesting service.
Adjustments of the controls discussed there may save you a service
call.

TO GET WARRANTY SERVICE IN U.S.A.,
PUERTO RICO OR U.S. VIRGIN ISLANDS...

Take the product to a Philips factory service center (see enclosed list)
or authorized service center for repair.When the product has been
repaired, you must pick up the unit at the center. Centers may keep
defective parts.

(In U.S.A., Puerto Rico and U.S.Virgin Islands, all implied warranties,
including implied warranties of merchantability and fitness for a particu-
lar purpose, are limited in duration to the duration of this express war-
ranty. Because some states do not allow limitations on how long an
implied warranty may last, this limitation may not apply to you.)

TO GET WARRANTY SERVICE IN CANADA...

Please contact Philips at:

1-800-661-6162 (French Speaking)
1-800-363-7278 (English Speaking)

(In Canada, this warranty is given in lieu of all other warranties. No
other warranties are expressed or implied, including any implied war-
ranties of merchantability or fitness for a particular purpose. Philips is
not liable under any circumstances for any direct, indirect, special, inci-
dental or consequential damages, howsoever incurred, even if notified
of the possibility of such damages.)

REMEMBER...

Please record the model and serial numbers found on the product
below. Also, please fill out and mail your warranty registration card
promptly. It will be easier for us to notify you if necessary.
MODEL # ___________________________________________
SERIAL #

___________________________________________

EL6191E003 / MAC 6058  / 12-98

This warranty gives you specific legal rights.You may have other rights which vary from state/province to state/province.

Philips Service Solutions Group, P.O. Box 2976, Longview,Texas 75606,

(903) 242-4800

L

IMITED

 W

ARRANTY

Summary of Contents for DVD941

Page 1: ...1 DVDVideo player DVD941 Toll Free Help Line Ligne d assistance en service libre Linea de ayuada telefónica sin cargo 800 531 0039 ...

Page 2: ...rms your right to maximum protection under the terms and conditions of your Philips warranty Owner Confirmation Your completed Warranty Registration Card serves as verification of ownership in the event of product theft or loss Model Registration Returning your Warranty Registration Card right away guarantees you ll receive all the information and special offers which you qualify for as the owner ...

Page 3: ...patents and other intellectual property rights owned by Macrovision Corporation and other rights owners Use of this copyright protection technology must be authorized by Macrovision Corporation and is intended for home and other limited viewing uses only unless otherwise authorized by Macrovision Corporation Reverse engineering or disassembly is prohibited LASER SAFETY This unit employs a laser Du...

Page 4: ... warns the user that uninsulated voltage within the unit may have sufficient magnitude to cause electric shock Therefore it is dangerous to make any kind of contact with any inside part of this unit This symbol alerts the user that important literature concerning the operation and maintenance of this unit has been included Therefore it should be read carefully in order to avoid any problems CAUTIO...

Page 5: ...e polarized or grounding type plug A polarized plug has two blades with one wider than the other A grounding type plug has two blades and a third grounding prong The wide blade or the third prong are provided for your safety When the provided plug does not fit into your outlet consult an electrician for replacement of the obsolete outlet 10 Protect the power cord from being walked on or pinched pa...

Page 6: ...nics In countries where Philips Consumer Electronics does not distribute the product the local Philips service organization will attempt to provide service although there may be a delay if the appropriate spare parts and technical manu al s are not readily available MAKE SUREYOU KEEP Please keep your sales receipt or other document showing proof of purchase Attach it to this owner s manual and kee...

Page 7: ...13 NTSC PAL Settings 13 General explanation 13 Menu bar Status window 14 Temporary feedback field icons 14 Personal Preferences 14 15 Operation Loading discs 16 Playing a DVD Video andVideo CD disc 16 General Features 16 18 Special DVD features 19 SpecialVCD features 19 Playing an Audio CD 19 20 FTS Program 20 Access Control Access Control child lock 21 Access Control parental control 21 22 Before...

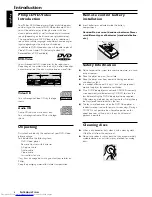
Page 8: ...d Audio cable Video cable Instructions for use If any item is damaged or missing contact your retailer or Philips Keep the packaging material for future transportation Remote control battery installation Insert batteries as indicated inside the battery compartment Caution Do not mix old and new batteries Never mix different types of batteries standard alkaline etc Safety Information Do not expose ...

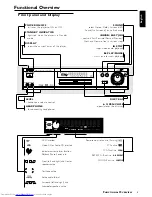
Page 9: ...D Sound TruSurround or multi channel ST EASY JOG controls Fast Forward Rewind Previous Next and Slow motion in various steps 9 STOP stops video audio playback 2 PLAY PAUSE starts or interrupts playback LEVEL headphone volume control HEADPHONE for connecting headphones TRACK TITLE SCAN TIME TRACK TOTAL CHAPTER CD SHUFFLE CHAPTER TITLE TRACK V REPEAT B A DVD inserted CD V Video CD or Audio CD insert...

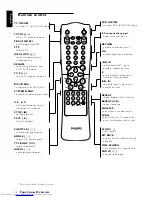
Page 10: ...election STOP 9 to stop playback PLAY 2 to start playback SUBTITLE Z subtitle language selector ANGLE select DVD camera angle TTL CHAP T C select title chapter AUDIO Y audio language selector DVD ON OFF switches DVD to ON OFF mode 0 9 numerical key pad direct numerical inputs RETURN go back to previous menu OK acknowledge menu selection Q O search backward go to previous chapter or track pause pla...

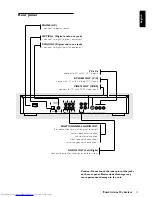
Page 11: ...equipment Y CB CR connect to TV with Y CB CR inputs S VIDEO OUT Y C connect to TV with S Video Y C inputs VIDEO OUT CVBS connect to TV with CVBS video inputs MULTICHANNEL AUDIO OUT For connection to a multichannel receiver center speaker connection subwoofer connection front speakers connections surround speakers connections AUDIO OUT Left Right connect to amplifier receiver or stereo system Cauti...

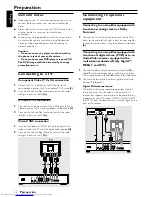
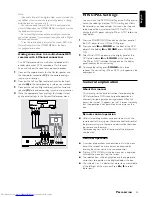
Page 12: ...out jacks to the audio left right in jacks on theTV A TV Y X A Z COAXIAL OPTICAL DIGITAL AUDIO OUT PCM MPEG2 AC3 DTS SUB WF SURROUND FRONT CENTER MULTICHANNEL AUDIO OUT SURROUND FRONT L R CVBS AUDIO OUT S VIDEO Y CB CR VIDEO OUT 1 2 MAINS L R L R Connecting to optional equipment Connecting to an amplifier equipped with two channel analog stereo or Dolby Surround 1 Connect the Left and Right audio ...

Page 13: ...only affects the television s on screen display that shows the stop and setup modes You may select either NTSC or PAL To change the DVD player setting to PAL or NTSC follow the steps below 1 Press the POWER ON OFF button on the front panel of the DVD player to turn OFF the DVD player 2 Press and hold 9 and SOUND on the front of the DVD player While holding 9 and SOUND press POWER ON OFF 3 After PA...

Page 14: ...ubmenus and submenu options When a menu item is selected the cursor keys on the remote control needed to operate the item are displayed next to the item Press OK to confirm your selection and return to the main menu The following items can be adapted Picture TV Shape If you have a wide screen 16 9 TV select 16 9 If you have a regular 4 3 TV select 4 3 If you have a 4 3TV you can also select betwee...

Page 15: ...g Multi Channel Output See appendix Karaoke vocal Put this setting to ON only when a multi channel karaoke DVD is being played The karaoke channels on the disc will then be mixed into a normal stereo sound Language Select the required Menu Audio and Subtitle language Audio language and Subtitle language can also be adapted using the Menu bar Features Access Control Access Control contains the foll...

Page 16: ... play discs that are labeled with a region code different from your player General features Note Unless stated all operations described are based on remote control use Some operations can be carried out using the menu bar on the screen Moving to another title track When a disc has more than one title or track you can move to another title as follows PressT C TTL CHAP then press P or O briefly duri...

Page 17: ...point A B REPEAT appears briefly on the display and the repeat sequence begins A B REPEAT is displayed on the front panel of the player To exit the sequence press REPEAT A B Shuffle DVD Video discs This shuffles the playing order of chapters within a title if the title has more than one chapter Press SHUFFLE during playback SHUFFLE appears on the screen for about two seconds To return to normal pl...

Page 18: ...ite tracks and indexes VCD for a particular disc in the player memory FTS program can contain 20 items titles chapters A programmed FTS will be placed on top of the list when playback is activated When the list is full a new program will replace the last program on the list The selections can be chosen and played at any time Storing a FTS Video Program When playback is stop select VIDEO FTS c in t...

Page 19: ...eo CD with PBC and press 2 Go through the menu with the keys indicated on theTV screen until your chosen passage starts to play If a PBC menu includes titles you can select a title directly Enter your choice with the numerical keys 0 9 Press RETURN to go back to the previous menu You may also set to PBC OFF under Personal Preferences Playing an audio CD After loading the disc playback starts autom...

Page 20: ...o go to the list of available tracks 3 Use u or t to select tracks from the list To go directly to any track enter the track number using the numerical keys 0 9 4 Store each track by pressing OK The track numbers will be added to the list The number of tracks and the playing time of the program will be shown on the screen and the player display When your FTS Program is complete press 2 to start pl...

Page 21: ...lways be played even if the Child Lock is set to ON Notes The player memory maintains a list of 120 authorized Child safe disc titles A disc will be placed in the list when Playback Always is selected in the child protect dialog Each time a child safe disc is played it will be placed on top of the list When the list is full and a new disc is added the last disc in the list will be removed from the...

Page 22: ...xit the menu Changing the 4 digit code 1 When disc playback is stopped select ACCESS CONTROL in the features menu using the w v keys 2 Enter the old code 3 Move to CHANGE CODE using the w key 4 Press the u key 5 Enter the new 4 digit code 6 Enter the code a second time and reconfirm by pressing OK 7 Press t to exit the menu If you forget your 4 digit code 1 Press 9 to exit Child Protect screen 2 S...

Page 23: ...ections If you are using a HiFi amplifier try another sound source Distorted sound from HiFi Check to make sure that no audio connections are made to the amplifier amplifier phono input No audio at digital output Check the digital connections Check the settings menu to make sure the digital output is set to ALL or PCM Check if the audio format of the selected audio language matches your receiver c...

Page 24: ...ly synchronized Digital Surround Sound in a listening area where the surround speakers are about 150cm nearer to the listening position than the front speakers and the center speaker is in line with the front speakers To adjust for other listening area arrangements adapt delay times according to the following instructions Digital Surround Measure the distances in centimeters from the front speaker...

Page 25: ...poken languages and 3 subtitle languages CONNECTIONS Y Output Cinch green CB U Output Cinch blue CR V Output Cinch red S Video Output Mini DIN 4 pins Video Output Cinch yellow Audio L R output Cinch white red 6 Channel Analog Output Audio Front Left Right Cinch white red Audio Surround Left Right Cinch white red Audio Center Cinch blue Audio Subwoofer Cinch black Digital Output 1 coaxial 1 optical...

Reviews: