background image

2

3

Easy

Key

易锁

User Manual

Quick Start 

Guide

Easy

Key

易锁

Easy

Key

易锁

Warranty 

Card

Easy

Key

易锁

合格证

0

10

20

30

40

50

60

80
70

90

100

110

120

130

140

150

160

170

180

200

210

190

15

25

225

24

1

10
20
30
40
50
60

80

70

90

100
110
120
130
140
150
160
170

202

42

72

15

0

执手中心线

执手中心线

80

38

70

6200-824-60-1S

T7260

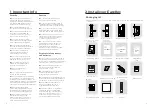
1  Important info

2.Install your EasyKey

⑨Certificate of 

Quality


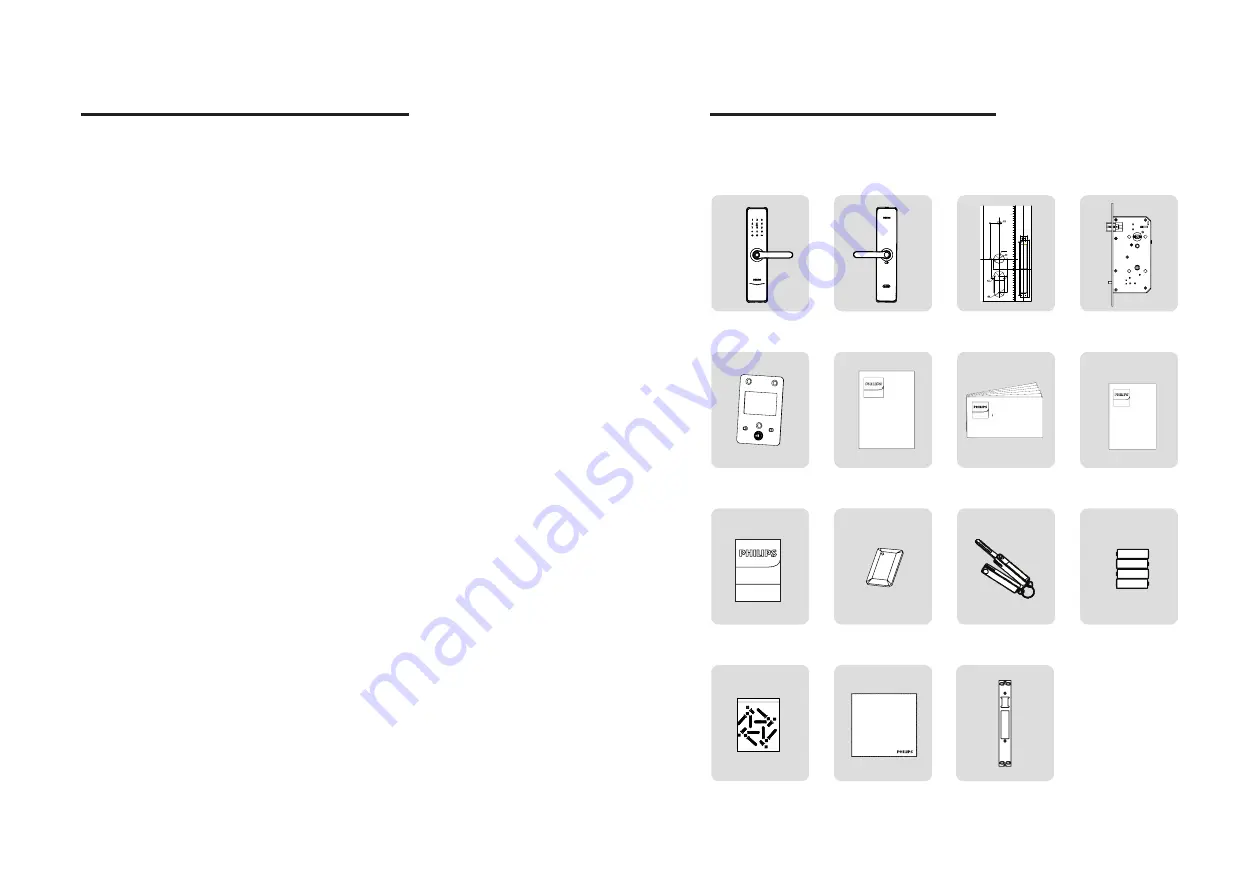
 Installation kit

Scouring pad

Striker

Smart door card x2

Mechanical 

key x2

Batteries

⑤Mounting plate

⑥User manual

⑦Quick start guide

⑧Warranty 

card

 ①

Outside 

escutcheon (including 

silicone pad)

Inside escutcheon 

(including 

silicone pad)

③Drilling template

④Mortise

Packaging list

This packaging list is for reference only. Please refer to the actual packaging 
contents.

Security

Before using Philips EasyKey, 

please read and understand all 

instructions. Damage caused by non-

compliance with the instructions 

will not be covered by warranty.

Use only the manufacturer-

specified accessories/components.

Use only the alkaline batteries 

the product is equipped with, 

or use the same specification 

type of alkaline batteries.

Do not forcibly disassemble 

this product to avoid triggering an 

alarm or damaging the product.

Do not scrape the fingerprint 

sensor with sharp objects, otherwise 

it may cause permanent damage.

Do not expose products to 

environments where there is 

water leakage or splashing.

Do not expose the product to 

corrosive substances to prevent  

damaging the protective cover.

Do not hang objects on the 

handle, in case it might affect 

the normal use of the lock.

Pleae clean the product 

with a soft cloth.

Do not remove the battery during 

setting up and operating.

Please let a professional technician 

to install the door lock and follow the 

installation guidelines provided.Do not 

disassemble the lock by yourself. Keep the 

relevant sealed stickers properly. Do not 

easily disclose the password information.

Please modify the default 

master PIN code immediately after 

installation and configuration, and 

keep the mechanical key properly.

Please replace all the batteries 

immediately if there is a low 

battery alarm. Please make sure 

to correctly match the poles (+/-) 

when installing the batteries.

Caution

Do not place the battery near 

a fire to avoid an explosion. 

Do not use any emergency power 

supply that does not meet the safety 

requirements to power up the product.

Do not connect the 2 poles of the 

batteries with metals to avoid short 

circuit which may lead to an explosion.

Please make sure any component 

replacement is executed by Philips, 

Philips authorized service center 

or professional technicians.

Do not use accessories or parts 

that have been produced by other 

manufacturers or have not been 

specifically recommended by 

Philips. Use of such accessories and 

parts may void your warranty.

Disposal of used products 

and batteries

You can have your locks reclaimed at 

Philips authorized service centers. You 

will receive corresponding compensation 

if your products meet our conditions.


Please learn by yourself the local 

electronic product classification 

and collection system.

Please abide by local regulations 

and do not mix used products 

with ordinary domestic waste.

Proper disposal of used products can 

help to avoid potential negative impacts 

on the environment and human health.


This product contains batteries 

which can not be disposed of 

together with domestic waste.

Please learn the local regulations 

concerning battery classification 

and collection by yourself. Proper 

disposal of used batteries can 

help to avoid negative impacts on 

environment and human health.

Summary of Contents for EasyKey 7300

Page 1: ......

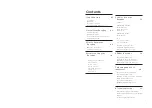
Page 2: ...ction Door lock status indicator Low battery indicator Outside forced lock mode indicator Mute mode indicator System lock indicator CLOSE button indicator Alarm types and alarm modes How to apply an emergency power supply How to replace batteries Modify master PIN code User settings Delete a user System settings Extended functions System query Local query Unlock Unlock from outside With PIN code W...

Page 3: ...nstall the door lock and follow the installation guidelines provided Do not disassemble the lock by yourself Keep the relevant sealed stickers properly Do not easily disclose the password information Please modify the default master PIN code immediately after installation and configuration and keep the mechanical key properly Please replace all the batteries immediately if there is a low battery a...

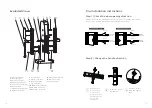
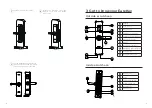
Page 4: ...lation instructions Step 1 Check the door opening direction This product can be installed on doors of 4 types of opening directions left out pull right in push right out pull and left in push Left in push Right in push Indoor Indoor Indoor Indoor Outdoor Outdoor Outdoor Outdoor Left out pull Right out pull Left handle open Right handle open Step 2 Change the handle direction Remove the 2 cross rec...

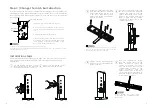
Page 5: ...ents 1 Use the drilling template to drill the needed holes on the door and mount the mortise into the door Tighten up the 4 fixed screws when inserting the mortise 2 Install the connecting screw tube and place the square shaft and compressed spring into the hole of the lever The square shaft compressed spring must be put towards the lever Tighten up the mounting plate with 3 anchor screws against ...

Page 6: ...key hole Battery cover Lever Safe handle switch A M mode switch Reset button Close button 1 1 2 2 3 3 4 4 5 5 6 6 7 8 9 10 11 Tighten the 2 anchor screws Try the inside and outside levers the mechanical key and check if all components are well connected Install the batteries then the battery cover and the inside lower cover 3 Get to know your EasyKey Outside escutcheon Inside escutcheon ...

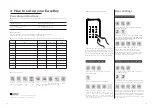
Page 7: ...r master PIN code and confirm with Then you are in master mode Enter the new master PIN code and confirm with Re enter the new master PIN code and confirm with After hearing a voice prompt of Succeeded press several times until you exit master mode Press 1 to modify master PIN code 1 Press enter master PIN code and confirm with Modify master PIN code User settings Press enter master PIN code and c...

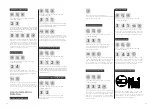
Page 8: ...rompt of Succeeded press several times until you exitmastermode 3 删除一次性用户密码 2 Delete a one time user PIN code Press enter master PIN code and confirm with Press 3 to enter user deletion then press 2 to enter one time user PIN code deletion After hearing a voice prompt of Succeeded press several times until you exit master mode 3 3 1 Delete a fingerprint Press enter master PIN code and confirm with...

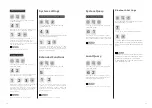
Page 9: ... settings Press enter master PIN code and confirm with Press 4 to enter system settings then press 2 to enter volume settings Adjust the volume as needed For higher volume press 1 for lower volume press 2 for mute mode press 3 After hearing a voice prompt of Succeeded press several times until you exit master mode The default volume is higher volume Attention or 2 1 Press enter master PIN code and...

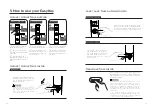
Page 10: ... or mechanical key opening is required to unlock the door from deadlock mode 5 How to use your EasyKey Unlock Unlock from outside With User PIN code Touch keypad Enter a PIN code Press the handle With fingerprint With card Finger print Press the handle Card reader Press the handle 1 Touch the keypad to wake up the system 2 Enter the registered user PIN code and confirm with 3 Afterhearingavoice pr...

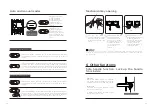
Page 11: ...r will make the dead bolt automatically pop up and there will be a voice prompt of Door closed Under Manual Mode the dead bolt won t pop up automatically after shutting the door Only fingerprint card or PIN code verification can make it automatically pop up After the door is locked you will hear a voice prompt of Door closed You can wake up the outside escutcheon to unlock and open the door after ...

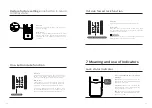
Page 12: ...e of indicators 门 锁 状 态 提 示 灯 Mute button Outside forced lock button Function Use only one button to mute the lock by turning off the voice guide Applicable to the scenes where you don t want to disturb your family How to use 1 Mute When the system is awake long press the Mute button for 2 seconds to enter one time mute mode The button will glow green 2 Unmute When the system is awake long press t...

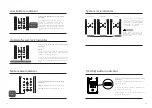
Page 13: ...em wakes up indicating this function is in use Low battery indicator Colors of the light and the corresponding meanings After waking up the system will run an automatic examination on the battery voltage If the voltage is too low the light will flash in red and there will be a voice prompt of Low battery Please replace all batteries when the door is open Outside forced lock indicator Colorsoftheli...

Page 14: ...ss the Reset button and then release to let it restart automatically Types of alarms and alarm modes Triggering After waking up the system will run an automatic examination on the battery voltage If the voltage is too low the lock give an alarm and a voice prompt of Low battery Please replace all batteries Alarm mode A voice prompt of Low battery Please replace all batteries during unlocking Turni...

Page 15: ...station inside the battery case Eight batteries can be put in to extend the battery life and reduce battery replacement frequency The battery case is located at the upper end of the inside escutcheon By pushing the button at the top of the inside escutcheon you could take out the battery cover and the batteries inside ...

Page 16: ...klijke Philips N V and are used under license This product has been manufactured by and is sold under the responsibility of Shenzhen Conex Intelligent Technology Co Ltd and Shenzhen Conex Intelligent Technology Co Ltd is the warrantor in relation to this product Version 2 0 ...

Reviews: