6
7
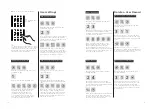
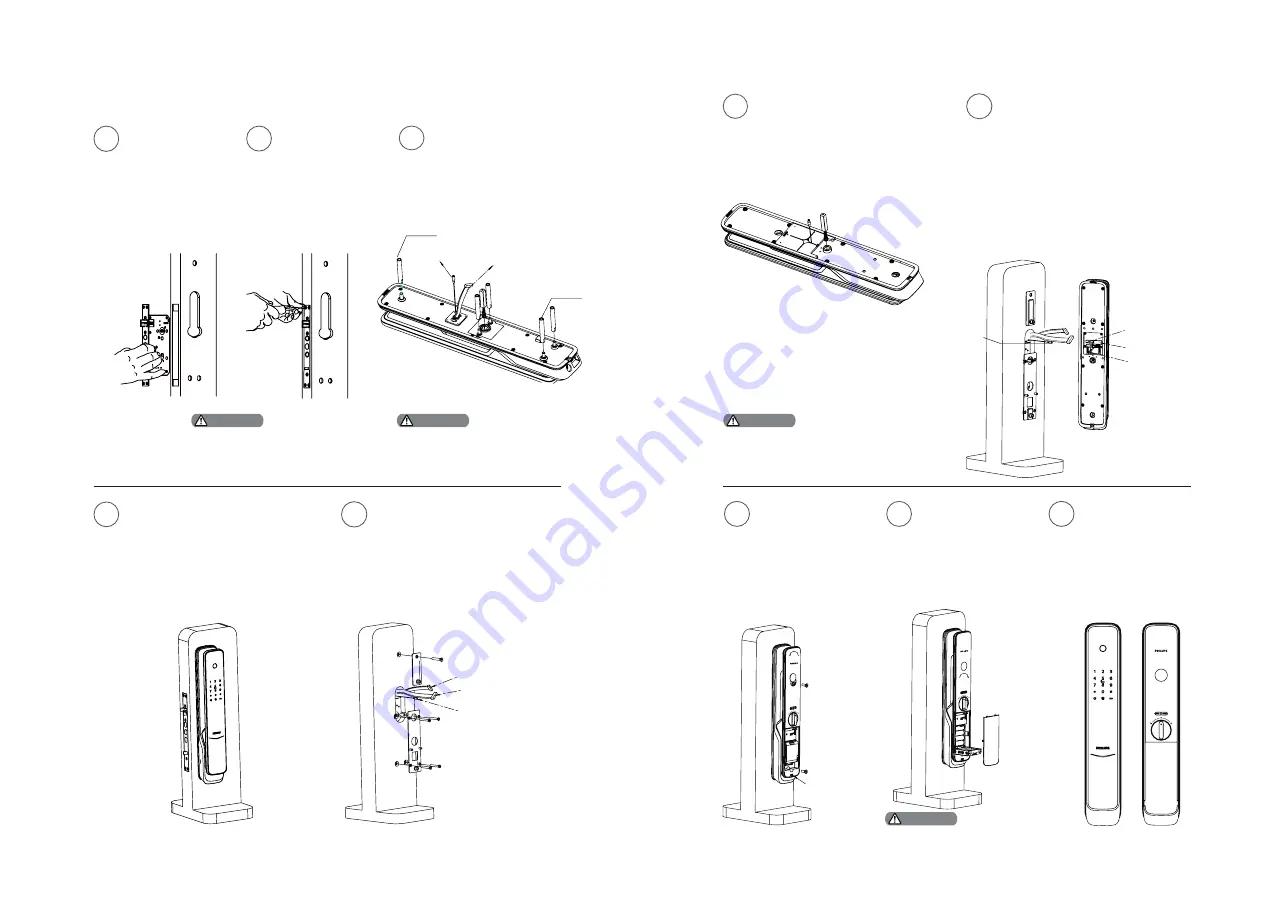
First fix the mounting plate
against the inner surface of the
door, and fasten it with 4 M5
connecting screws, and then fix the
upper mounting plate with M6
connecting screws.
Fasten the 4 anchor
screws in the
mortise.
The latch bolt can’t be poped
up during installation.
2
Pass the connecting cable through
the hole above the door. Align
the square shaft of the outside
escutcheon with the two rotary
holes on the mortise, then
insert the square shaft into the
rotary holes, so that the outside
escutcheon is close fit in the outside
door.
4
5
Installation Steps
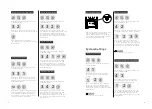
Please use the appropriate
square shaft and connecting
tubes with proper length.
To install the connecting
screw tubes on the outside
escutcheon, and put the
compressed spring and
square shaft accordingly
into the square shaft
holes.
3
1
To drill the needed
holes in the door
as per the drilling
template,then mount
the mortise on the
door frame.
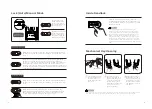
Unscrew the deco
cover by turning it
counterclockwise, and
press the battery cover
button to remove the
battery cover. Then
the two M6 mounting
screws can be installed
to fasten the inside
escutcheon.
After completing the installation
of the strike,please check whether
the smart lock can be used
normally.
Turn clockwise to
install the deco cover,
install the battery, put
the battery cover back,
and after attach the
strike, the installation
of the smart lock is
complete.
To check whether
if the rotary knob,
mechanical keys,
and all other
components could
be used normally.
8
9
10
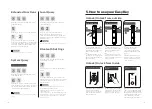
Insert the outside escutcheon
connection cable and the motor
cable into the corresponding
sockets on the inside escutcheon,
and then connect the front and
rear Bluetooth connecting cables,
and then align the square shaft
of the inside escutcheon with the
two rotary holes on the mortise,
then insert the square shaft into
the rotary holes, so that the inside
escutcheon is close fit in the inside
door.
Put the compressed spring and
square shaft into the square shaft
hole of the inside escutcheon
accordingly.
6
7
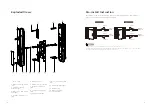
Be sure to hide the extra mortise and the
escutcheon connecting cables in the door hole,
and also hide the extra Bluetooth connecting
cable in the inside escutcheon.
M6 Connecting
Screw Tube
Mortise Connecting
Cable
Escutcheon
Connecting Cable
Battery cover
button
Front Bluetooth
Connecting Cable
M5 Connecting
Screw Tube
Front Bluetooth
Connecting Cable Escutcheon
Connecting Cable
Front Bluetooth
Connecting Cable
Mortise Connecting
Cable Socket
Escutcheon Connecting
Cable Socket
Rear Bluetooth
Connecting Cable
Attention
Attention
Attention
Attention
Summary of Contents for EasyKey 9000 Series
Page 1: ......


