background image

18

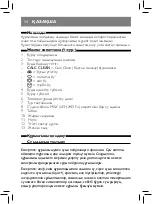
 3 


 (


.


.

:   


.


 Calc-

Clean (


(


), Calc-Clean (


.

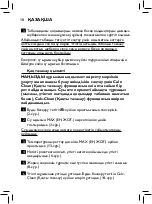
 1 


.  


(2-

.)

 2 


 MAX (  

.) 


. (3-

.)


.

 3 


 MAX (  

.) 


. (13-

.)

 4 


. (6-

.)

 5 


(8-

.)

 6 


 Calc-

Clean (


. (14-

.)

Summary of Contents for EasySpeed Plus Cordless GC2088/30

Page 1: ...Always there to help you EasySpeed Plus Cordless GC2078 GC2089 series Specifications are subject to change without notice 2014 Koninklijke Philips N V All rights reserved User manual 4239 000 93321 ...

Page 2: ...ENGLISH c d g h i e f b a m j k l 2 3 4 5 9 7 8 6 10 11 12 13 14 15 16 17 18 ...

Page 3: ...EasySpeed Plus Cordless GC2078 GC2089 series ENGLISH 6 14 23 TÜRKÇE 33 41 ...

Page 4: ...ication 9 Soleplate 10 Light ring 11 Base 12 Iron storage lock 13 Mains cord Using the appliance Filling the water tank Note Your appliance has been designed to be used with tap water In case you live in an area with hard water fast scale build up may occur Therefore it is recommended to use distilled or de mineralized water to prolong the lifetime of your appliance Note Do not add perfume water f...

Page 5: ...ide polyester 1 No No Note As indicated in the table above do not use steam or steam boost at a low temperature otherwise hot water may leak from the iron 1 Consult table 1 to set the temperature dial to the appropriate setting for your garment Fig 4 2 Consult table 1 to select a steam setting that corresponds to the temperature you have set Fig 5 3 Place the iron on its base and connect the base ...

Page 6: ...the iron on its base during the resting period Do not place the iron on its heel Fig 9 Table 2 Light status Iron status Instructions Flashing blue Heating up Wait for iron to be ready Steady blue Ready for use You can start ironing Flashing orange The iron needs to be charged now Put the iron back to the base to charge it Slow breathing blue speciic types only Safety auto off has been activated Re...

Page 7: ... to slowly breath in blue to indicate the safety auto off mode is activated To let the iron heat up again remove the iron if the iron is on the base and put it back to the base Cleaning and maintenance Cleaning 1 Set the steam control to unplug the base and let the iron cool down Fig 2 2 Pour any remaining water out of the water tank 3 Wipe lakes and any other deposits off the soleplate with a dam...

Page 8: ...ase put the iron on the base and let the iron heat up Fig 6 5 Remove the iron when the light ring turns steady blue Fig 8 6 Hold the iron over the sink Push the steam control to the Calc Clean position and hold it Fig 14 7 Gently shake the iron while holding the steam control until all water in the water tank has been used up Fig 15 Caution While scale is lushed out steam and boiling water also co...

Page 9: ... chapter summarises the most common problems you could encounter with the appliance If you are unable to solve the problem with the information below visit www philips com support for a list of frequently asked questions or contact the Consumer Care Centre in your country see the worldwide guarantee lealet for contact details Problem Possible cause Solution The iron does not produce steam Cordless...

Page 10: ...r use of steam and steam boost You have used the steam boost function too often within a very short period Put the iron back to its base to heat up and dry the soleplate Use the steam boost function less frequently The water tank is overilled Do not ill the water tank beyond the MAX indication The door of illing opening is not closed properly Make sure that the door of illing opening is closed pro...

Page 11: ...eam control in the turbo steam position while using turbo steam For other steam settings this is not necessary Only part of the light ring is lighted in safety auto off mode This is normal This is intended to save energy in safety auto off mode N A The base is not lighted up when I place the iron on it The iron is not connected to the base properly Take out the iron and put it back to the base aga...

Page 12: ... 1 1 2 3 CALC CLEAN Calc Clean 4 5 6 7 8 MAX 9 10 11 12 13 Aqua 14 ...

Page 13: ...15 1 2 2 MAX 3 3 1 MAX 3 2 1 1 1 1 4 2 1 5 3 6 ...

Page 14: ...16 4 7 5 8 20 25 2 9 2 ...

Page 15: ...17 10 11 5 12 2 8 1 2 2 ...

Page 16: ...18 3 Calc Clean Calc Clean 1 2 2 MAX 3 3 MAX 13 4 6 5 8 6 Calc Clean 14 ...

Page 17: ...19 7 15 8 2 Calc Clean 1 2 3 1 2 2 3 16 4 17 5 18 ...

Page 18: ...20 www philips com support 1 2 1 ...

Page 19: ...21 1 MAX Calc Clean Calc Clean ...

Page 20: ...е пайдалануға арналған Ток соғудан қорғау класы 1 класс Өнімнің жасалған күнін сериялық нөмірін анықтауға болады xxxxYYWWxxxxxx мұнда YY жыл WW апта нөмірі x кез келген таңба Мысалы AJ021025123456 жасалған күні 25 апта 2010 жыл Жасалған күні кейбір үлгілерде мынадай кодтар түрінде басылуы мүмкін YYWW YYWWx YYWWxx немесе xYYWWxxxx Өнімнің жасалған күнін анықтау қиын болған жағдайда қолдау алу үшін ...

Page 21: ... 1 1 2 3 CALC CLEAN Calc Clean 4 5 6 7 8 MAX 9 10 11 12 13 23 ...

Page 22: ...24 Aqua 1 2 2 MAX 3 3 1 MAX 3 2 1 1 ...

Page 23: ...25 1 1 4 2 1 5 3 6 4 7 5 8 20 25 2 9 ...

Page 24: ...26 2 10 11 5 12 ...

Page 25: ...27 2 8 1 2 2 3 ...

Page 26: ...28 2 1 2 2 MAX 3 3 MAX 13 4 6 5 8 6 14 7 15 8 2 ...

Page 27: ...29 1 2 3 1 2 2 3 16 4 17 5 18 www philips com support ...

Page 28: ...30 1 2 1 ...

Page 29: ...31 1 MAX ...

Page 30: ...овых нужд Класс защиты от электрического тока Класс 1 Дату изготовления можно определить по серийному номеру xxxxYYWWxxxxxx где YY год WW номер недели x любой знак Например по серийному номеру AJ021025123456 можно определить что дата производства 25 ая неделя 2010 года На некоторых моделях дата изготовления может быть указана в следующих форматах YYWW YYWWx YYWWxx или xYYWWxxxx Если определить дат...

Page 31: ...tabanı 10 I ıklı halka 11 Taban 12 Ütü saklama kilidi 13 Elektrik kablosu Cihazın kullanımı Su haznesinin doldurulması Not Cihazınız musluk suyuyla kullanılmak üzere tasarlanmı tır Suyun sert oldu u bir bölgede ya ıyorsanız hızlı kireç olu umu görülebilir Bu nedenle cihazınızın kullanım ömrünü uzatmak için saf veya demineralize su kullanmanız önerilir Not Suyun damlamasına ve kahverengi lekelere s...

Page 32: ...rilik naylon polyamid polyester 1 Hayır Hayır Not Yukarıdaki tabloda gösterildi i gibi buharı veya buhar püskürtmeyi dü ük sıcaklıkta kullanmayın aksi takdirde ütüden sıcak su sızabilir 1 Sıcaklık kadranını kuma ınıza uygun ayara getirmek için tablo 1 e ba vurun ek 4 2 Belirledi iniz sıcaklı a uygun buhar ayarını seçmek için tablo 1 e ba vurun ek 5 3 Ütüyü tabanına yerle tirin ve tabanı elektrik p...

Page 33: ...zerine oturtmayın ek 9 Tablo 2 I ı ın durumu Ütünün durumu Talimatlar Yanıp sönen mavi Isıtma Ütünün hazır olmasını bekleyin Sabit mavi Kullanıma hazır Ütülemeye ba layabilirsiniz Yanıp sönen turuncu Ütünün imdi arj edilmesi gerekiyor Ütüyü arj etmek için tabana geri koyun Yava ça yanıp sönen mavi sadece belirli modellerde Güvenli otomatik kapanma etkinle tirildi Özellikler bölümündeki güvenli oto...

Page 34: ...kinle ti ini belirtmek için mavi renkte yava ça yanıp sönmeye ba lar Ütünün yeniden ısınması için ütü tabandaysa ütüyü kaldırın ve tabana geri koyun Temizlik ve bakım Temizleme 1 Buhar ayar dü mesini ayarına getirin tabanı prizden çekin ve ütünün so umasını bekleyin ek 2 2 Su haznesinde kalan suyu bo altın 3 Nemli bir bez ve a ındırıcı olmayan sıvı bir temizlik maddesi kullanarak tabandaki tortula...

Page 35: ...tirin ek 13 4 Tabanı prize takın ütüyü tabana yerle tirin ve ütünün ısınmasını bekleyin ek 6 5 I ıklı halka sabit mavi renkte yandı ında ütüyü kaldırın ek 8 6 Ütüyü lavabo üzerinde tutun Buhar ayar dü mesini Calc Clean konumuna itin ve basılı tutun ek 14 7 Su haznesindeki tüm su kullanılana kadar buhar ayar dü mesine basmaya devam edin ve ütüyü nazikçe sallayın ek 15 Dikkat Kireç atılırken tabanda...

Page 36: ...bölüm cihazda en sık kar ıla abilece iniz sorunları özetlemektedir Sorunu a a ıdaki bilgilerle çözemiyorsanız sık sorulan sorular listesi için www philips com support adresini ziyaret edin veya ülkenizdeki Mü teri Destek Merkezi ile ileti im kurun ileti im bilgileri için dünya çapında garanti kitapçı ına ba vurun Sorun Nedeni Çözüm Ütü hiç buhar üretmiyor Kablosuz ütü bir süre sonra so umu tur arj...

Page 37: ...enin kullanımı içinTablo 1 e bakın Buhar püskürtme fonksiyonunu kısa bir süre içinde çok sık kullandınız Ütü tabanının ısınıp kuruması için ütüyü tabana koyun Buhar püskürtme fonksiyonunu daha seyrek kullanın Su haznesi fazla doldurulmu tur Su haznesini MAX göstergesini a acak ekilde doldurmayın Doldurma a zı kapa ı düzgün kapatılmamı tır Doldurma a zı kapa ının düzgün kapatıldı ından emin olun Üt...

Page 38: ...uharı kullanırken buhar ayar dü mesini turbo buhar konumunda tutmaya devam edin Di er buhar ayarlarında bu i lem gerekmez Güvenli otomatik kapanma modunda ı ıklı halkanın sadece bir kısmı yanıyor Bu durum normaldir Güvenli otomatik kapanma modunda enerjiden tasarruf etmek içindir Yok Ütüyü koydu umda taban yanmıyor Ütü tabana düzgün ekilde takılı de ildir Ütüyü kaldırın ve tabana yeniden koyun ...

Page 39: ...41 1 1 2 3 CALC CLEAN Calc Clean 4 5 6 7 8 MAX 9 10 11 12 13 41 ...

Page 40: ...42 Aqua 1 2 2 MAX 3 3 1 MAX 3 2 1 1 ...

Page 41: ...43 1 1 4 2 1 5 3 6 4 7 5 8 20 25 2 9 ...

Page 42: ...44 2 10 11 5 ...

Page 43: ...45 12 2 8 1 2 2 3 ...

Page 44: ...46 Calc Clean Calc Clean Calc Clean 1 2 2 MAX 3 3 MAX 13 4 6 5 8 6 Calc Clean 14 7 15 8 2 Calc Clean ...

Page 45: ...47 Calc Clean 1 2 3 1 2 2 3 16 4 17 5 18 www philips com support ...

Page 46: ...48 1 2 1 ...

Page 47: ...49 1 MAX Calc Clean Calc Clean Calc Clean ...

Page 48: ...50 N A ...

Page 49: ......

Page 50: ......

Reviews: