Service Modes, Error Codes, and Fault Finding
5.
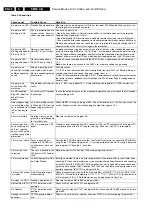
Table 5-4 Repair tips
Phenomenon
Possible Cause
Repair tip
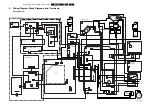
No picture, no LED. Standby Supply defective. Measure circuitry (see diagram A2). Start at test-point A19.When the Mains switch is 'on',
this voltage must always be available
No picture, LED
blinking at 3 Hz.
Set is in protection due to
various causes. For error
codes see error-code list.
You have no picture, so:
- Read the error buffer via ComPair (error buffer is accessible when set is in protection,
compare-file will guide you to this)
- Read the blinking LED information via standard remote command <mute>06250x<ok>
- Or you read the error code sequence via standard remote command <mute>062500<ok>.
When you have found the error, check the circuitry related to the supply voltage and I2C-
communication or the circuitry that triggers the protection.
No picture, LED
blinking with code 6-
6-6 or 18-18-18.
No communication on
slow I2C- or fast I2C-bus.
As processor cannot communicate with one of the 2 busses it the standby-led spontane-
ously starts blinking 6-6-6-etc or 18-18-18-etc... If in the error buffer somewhere is an error
6 or 18, these will have the highest priority starting the mentioned blinking. Measure de-
pendent of the error on the I2C-bus which device is loading the bus. (Use I2C-overview)
No picture, LED
blinking with code 1-
1-1.
No communication on
NVM-I2C bus to the uP.
As the uP cannot communicate with the NVM I2C bus, it spontaneously starts blinking
1-1-1.
Note: when there is no access to the NVM, a lot of picture setting can go wrong.
No picture, no
sound. Set is making
audible squeaking
sound
Supply is possibly in hic-
cup-mode, which is audi-
ble via a squeaking supply
transformer.
Possible causes:
1- V_BAT is shorted (caused by short circuited line transistor 7421), or Sound winding is
shorted (amplifier is shortening the power supply lines), or
2- D6514 is shorted (due to a too high V_BAT). Remove excessive load, to see what causes
the failure, or check feedback circuit. See repair tip 'Main Power Supply' (supply needs a
minimal load).
No picture, no
sound. Blue LED
works fine
Supply does not work cor-
rectly.
If e.g. V_BAT is only about 90 V, it is possible that the regulator IC (7506) is defective.
No RC-reception.
Blue LED does not
echo RC-com-
mands.
uP circuitry or RC-receiver
is defective.
In case the set does react on a local keyboard operation, you must check the RC-receiver
circuitry (diagram E).
Relay (degaussing)
is not audible, when
set is switched from
'off' or 'standby' to
'on'.
uP is not working correct-
ly.When pin 115 is low, the
degaussing must be acti-
vated.
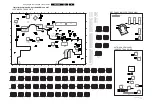
Check RESET-circuitry on diagram B5A. Check the level on pin 115 when you switch the
set 'on'. Signal must be low initially and go to high after approx. 12 s.
Picture is rotated.
Rotation circuitry on dia-
gram A5, or related supply
to it, malfunctions.
Measure test points on diagram A5.
Picture is continu-
ously switching 'off'
and 'on', showing
heavy 'switch' spots
(set does not go into
protection).
200 V is missing on CRT
panel.
Probably a bad connection from LSP connector 1424 to CRT connector 1424 (diagram F1),
or an interruption of the 200 V supplies line (e.g. R3341 on circuit F1 is interrupted).
Picture is not sharp. Focus is possibly mis-
aligned or SCAVEM-cir-
cuitry does not work cor-
rectly.
Re-align the 'FOCUS' potmeter on the Line Output Transformer, or check the SCAVEM cir-
cuitry on the CRT-panel (diagram F2). It is also possible that the DAF circuitry is defective
(see diagram I). Check the V_dc values.
Picture is not syn-
chronised.
The sync is derived in the
HIP from xtal 1305 and/or
1308.
Maybe the crystals 1305 and/or 1308 are making a bad contact.
Picture is distorted.
Check video-path in Serv-
ice Default Mode.
Investigate whether there is an error code present in the error buffer. In case there is one,
check the I2C-bus and/or supply lines (see overview supply lines).Measure and check sig-
nal path Tuner-HIP-PICNIC-HOP-RGB amplifier.In case it is a geometry issue, check on di-
agram A4 opto-coupler 7482, OpAmps 7440/7450 and the Frame circuitry alignments or a
possible corrupted NVM (7011) on diagram B5A.
Picture with horizon-
tal stripes.
Pixel Plus processing is
malfunctioning
Check functionality on circuitry (B3a, B3b, and B3c) of PICNIC (7713), FALCONIC (7718,
EAGLE (7724) and/or field memories (7714, 7717, 7719, 7722 and 7723.Tip: the whole Pix-
el Plus chipset (3 ICs + 5 Field Memories) can be diagnosed via ComPair.
No menu, no OSD.
Probably a defective uP.
Measure test points B61to B64 on diagram B5A.
No NextView (EPG). IC7012 defective or not
powered.
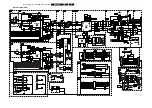
Check circuitry around IC7012 on diagram B5A.
No Teletext.
IC7007 defective or not
powered.
Check circuitry around IC7007 on diagram B5A. Check also B61to B64 around uP on dia-
gram B5A.
Strange switch 'off'
behaviour
TS7445 possibly defec-
tive.
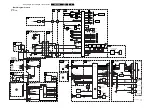
Check, with a multi-meter, whether transistor TS7445 is well functioning. (diagram A3).


