Electrical Alignments
8.
8.
Electrical Alignments
Index of this chapter:
1.
General alignment conditions
2.
Hardware alignments
3.
Software alignments
4.
Option settings
8.1
General Alignment Conditions
8.1.1
Start Conditions
Perform all electrical adjustments under the following
conditions:
•
Power supply voltage: 230 V_ac / 50 Hz (
±
10 %).
•
Connect the set to the mains via an isolation transformer
with low internal resistance.
•
Allow the set to warm up for approximately 20 to 30
minutes.
•
Measure voltages and waveforms in relation to chassis
ground (with the exception of the voltages on the primary
side of the power supply).
Caution: never use heatsinks as ground.
•
Test probe: Ri > 10 M ohm, Ci < 20 pF.
•
Use an isolated trimmer/screwdriver to perform
alignments.
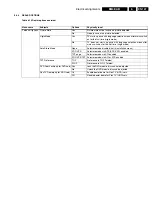
Perform all electrical adjustments with the following default
settings (for all CRTs):
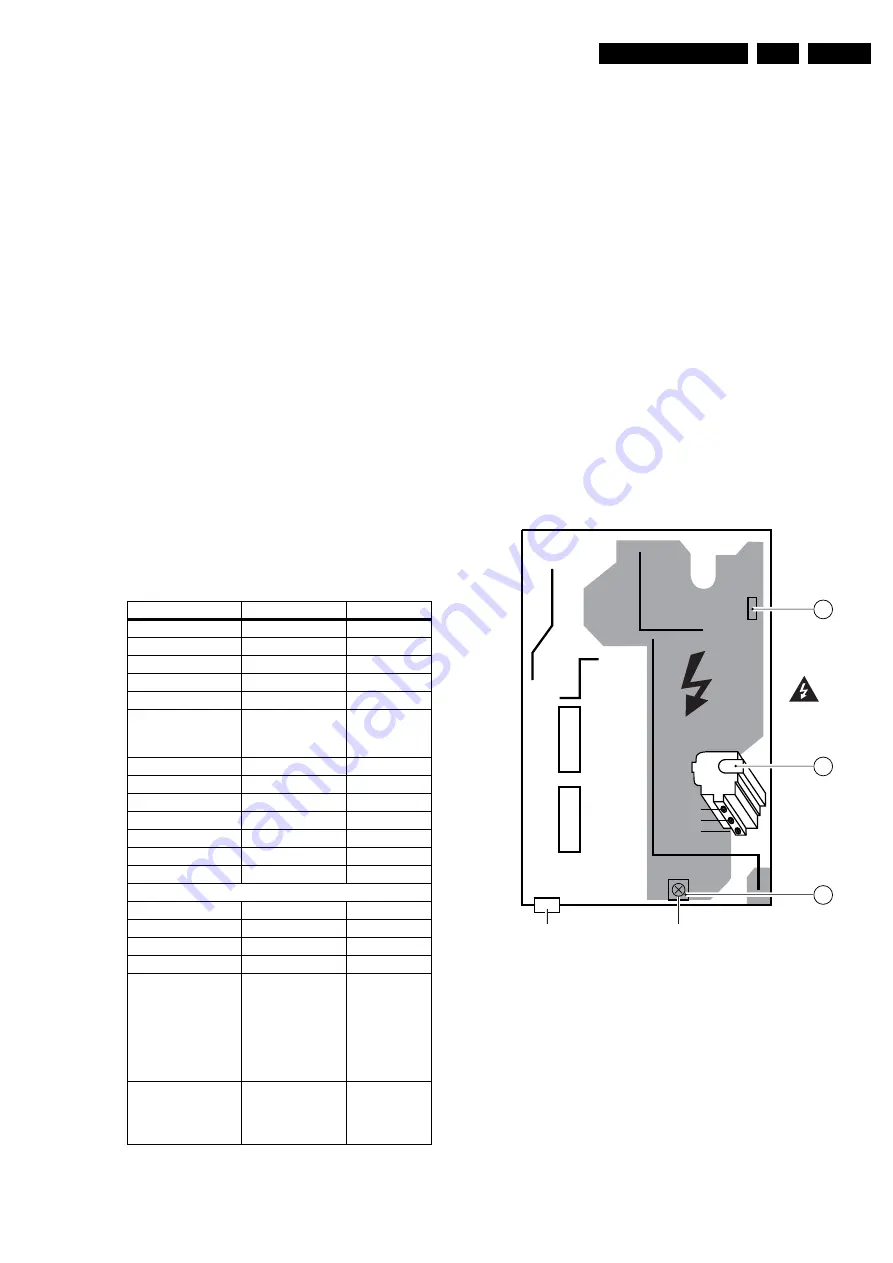
Table 8-1 Default settings
8.1.2
Adjustment Sequence
Use the following adjustment sequence:
1.
Set the correct TV-set "options" (after storing, re-start the
set).
2.
Rough adjustment of "Vg2" and "Focus".
3.
Rough adjustment of "Geometry".
4.
Allow the set to warm up.
5.
Precise adjustment of "Vg2" and "Focus".
6.
Precise adjustment of "Geometry".
7.
"Colour" alignments.
8.
"PIP" alignments (if present).
9.
Software alignments (like "Cut-Off", "Cathode Drive",
"Peak White", etc).
8.2
Hardware Alignments
Notes:
•
The Service Alignment Mode (SAM) is described in the
"Service Modes, Error Codes and Fault Finding" section.
•
All changes to menu items and alignments are stored
automatically.
•
Use the cursor-, menu-, and OK-buttons of the remote
control (RC) transmitter for navigation.
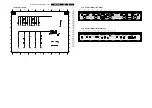
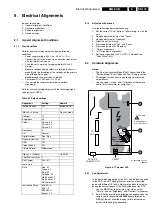
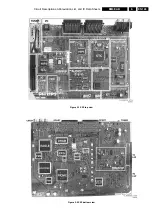
Figure 8-1 Top view LSP
8.2.1
Vg2 Adjustment
In the frame-blanking period of the R, G, and B signals applied
to the CRT, the HOP video processor inserts a measuring
pulse with different DC levels. Measure the black level pulse
during the vertical flyback at the RGB cathodes of the CRT.
1.
Use the MENU key to enter the "user" menu, select
"Picture", and set "Brightness" and "Contrast" to minimum.
2.
Enter SAM by pressing the following key sequence on the
remote control transmitter: 062596 directly followed by
OSD [i+] (do not allow the display to time out between
entries while keying the sequence).
Alignment
Setting
Remark
[Active Control]
Off
Button on RC
[Menu] -> Picture
Via user menu
Contrast
75
Brightness
40
Colour
28 inch: 52
32 inch: 53
36 inch: 54
Sharpness
3
Tint
Normal
Digital Options
Pixel Plus
Dynamic Contrast
Off
DNR
Off
Colour Enhan.
Off
Picture Format
Widescreen
Alignm. -> General
Via SAM
Peak White Limiter
9
Soft Clipper
Pwl + 0%
Luma Gain
2
Drive
Red: 32
Green: 32
Blue: 32
Cathode: 15
Rd BL offset: 7
Bk BL offset: 7
Col.temp: norm.
Luminance Delay
PAL BG: 9
PAL I: 9
SECAM: 11
Bypass: 10
CL 36532008_122.eps
080503
TO
SSB
V.SHIFT
SERVICE
CONNECTOR
3642
1502
5430
Focus 2
Focus 1
Screen
VG2
LOT
Warning
All alignments
are on hot-part !
A
B
C


