24
EN
9 Appendix 1:
Mount the
device onto wall
Caution
•
Risk of product damage! Always consult professional
personnel to safely mount the product onto wall.
Warning
•
Risk of injury! Make sure that no supply ducts such as gas,
water or electricity are harmed when you drill the holes.
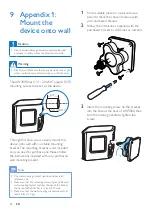
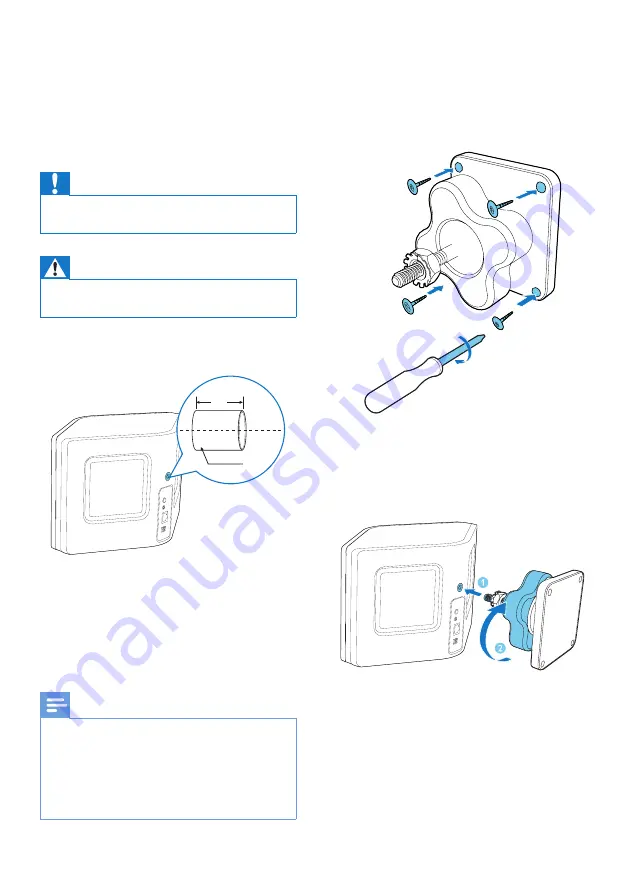
The AW3000 has a ¼" - 20 UNC (depth: 0.35")
mounting hole at the back of the device.
Through this hole, you can easily mount the
device onto wall with a suitable mounting
bracket. The mounting bracket is not included
and you need to purchase one. Please follow
the instructions included with your purchased
wall mounting bracket.
Note
•
The wall mounting bracket described below is for
reference only.
•
Make sure that the mounting screw of your purchased
wall mounting bracket matches the size of the hole at
the back of AW3000, that is, ¼ inch (6.75mm).
•
Make sure that the wall mounting bracket supports at
least 25 lbs (11.3 kg).
0.35’’
1/4’’ -20UNC
1
Find a suitable place on a wall and use a
pencil to mark the chosen location with
your purchased bracket.
2
Follow the instructions supplied with the
purchased bracket to drill holes as marked.
3
Insert the mounting screw on the bracket
into the hole at the back of AW3000, then
turn the rotating handle to tighten the
screw.
Summary of Contents for Fidelio AW3000
Page 2: ......

