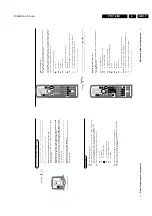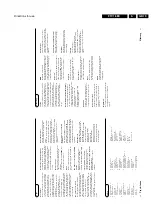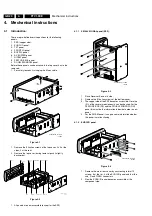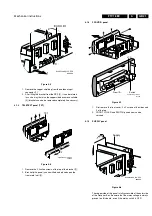
Directions for use
GB 6
FTV1.9EE
3.
&
Place the r
eceiv
er bo
x wher
ev
er y
ou want,
but lea
ve
at least 5 cm space fr
ee
all ar
ound the bo
x f
or v
entilation and do not co
ver the v
entilation openings.
(E.g.
on the gr
ound,
in a cupboar
d,
behind a wall,
in another r
oom....)
To
pr
ev
ent an
y unsaf
e situations,
do not place an
y objects on top of the
monitor or the r
eceiv
er
.A
void heat,
dir
ect sunlight and exposur
e to rain or
water
.
é
Connect the
supplied
aerial cable
1
and the
VG
A
cable with trailing audio
cinch connectors
2
as sho
wn in the inside fr
ontco
ver of this handbook.
Mak
e sur
e all scr
ew
s of the cable
2
ar
e tightened w
ell.
“
To
connect y
o
ur computer
,see p
.22.
To
connect other peripherals,
see p
.19.
In or
der to obtain the best r
esult,
please use onl
y the supplied antenna cables
betw
een the r
eceiv
er bo
x and videor
ecor
der
,and betw
een videor
ecor
der and
antenna connector
.
‘
Inser
t the mains cor
d supplied
3
(with filter) into the
MAINS INLET
at the
back of the monitor and the mains cor
d
4
at the back of the r
eceiv
er
.Put
both in the wall sock
ets.
Please
,
onl
y use the mains cor
d
3
(with filter) supplied with the
monitor
,
for the monitor
,
the mains cor
d
4
supplied with the
receiv
er
,
onl
y f
or the r
eceiv
er
.
(
Remote contr
ol:
Remo
ve
the co
ver of the batter
y compar
tment.
Inser
t the 2 batteries supplied (T
ype R03G-1.5V).
Pr
ess the
TV
ke
y next to the displa
y to be sur
e y
our r
emote contr
ol is in the
TV mode
.
The batter
ies supplied do not contain the heavy metals mercur
y and cadmium.
Ne
ver
theless in many countr
ies batter
ies may not be disposed of with your
household w
aste
.Please check on ho
w to dispose of batter
ies according to local
re
gulations
.
§
Switch the
TV on
:
Pr
ess the po
w
er button
A
at the right side of the
monitor and the one on the fr
ont of the r
eceiv
er bo
x.
A gr
een indicator lights up and the scr
een comes on.
If the indicator is r
ed,
pr
ess the
-
P+
ke
y on the r
emote contr
ol.
The green indicator b
links e
ver
y time you press a k
ey on the remote control.
When you switch on your set
for the f
irst time
,the menu
LANGU
A
G
E
automatically appear
s on the screen.
The e
xplanation appear
s in diff
erent languages
one at a time
.
3
Pr
eparation
Pr
eparation
R
O
3 / AAA
VCR 1
VCR 2
DVD
AMP
TUNER
TAPE
SAT
CD
TV
ZOOM
π
π
π
OK
M
u
TV
B
A
2
Pr
eparation
Y
our r
emote contr
o
l
T
e
lete
xt
p.
1
7
dir
e
ct txt page or subject selection
k
index page selection
e
inter
rupt teletext displa
y
c
mix tv/txt pictur
e
h
enlarge
f
solution to puzzles
U
time displa
y/subpage selection p
.10
Dual scr
een
p.
1
6
-P+
channel selection
c
sw
itching scr
eens
d
fr
eeze the subpictur
e
Smar
t Contr
ols
p.
1
0
pictur
e
and sound settings
b
dual scr
een on/off p
.16
A
select y
our choice p
.5
OK
activate y
our choice
S
fr
eeze the main pictur
e
p
.11
P
re
duce image noise
fi
m
u
lti scr
een on/off
s
personal pr
ef
er
ence
PICTURE
,
SOUND
,
FEA
TURES
men
us p
.10
pr
o
g
ramme list
p.
1
0
VG
A
men
u
p
.24
dir
e
ct txt page or subject selection p
.17
P
pr
ogramme selection p
.9
Video r
e
cor
der
p.
2
5
Digital Video
Disc
p.
2
5
Installation
p.
5
s
S
yÚ
V
vo
lume up/do
wn p
.9
¬
sound m
u
te p
.9
u
selection of
EXT
1
,
EXT
2
,
EXT
3
,
FR
ONT
,
VG
A
or
TV channels
p.
9
M
peripheral selection with
remote contr
o
l
TV
TV selection
q
pictur
e
f
o
rmat p
.9
X
bilingual choice/sound inf
o
p
.9
j
contin
uous subtitles p
.10
subtitle language selection p
.25
(D
VD - Digital
Video Disc)
b
teletext on/off p
.17
VCR 1
VCR 2
DVD
AMP
TUNER
TAPE
SAT
CD
TV
B
1
23
4
56
789
0
TV
M
u
OK
¬
i
0
a
P
b
q
X
j
b
c
e
f
h
U
k
‡
Ï
N
C
π
†
Ò
®
+
-
PP
c
d
S
P
fi
s
T-
C
AUDIO
PICTURE
SOUND
b
DV
D
SELECT
DV
D
i
on scr
een inf
o
p
.9
0
pr
ev
ious pr
ogramme p
.9
B
sw
itch to standb
y p
.9
Summary of Contents for FTV1.9EE
Page 45: ...Electrical diagrams and print layouts 45 FTV1 9EE 7 Teletext component side ...
Page 46: ...Electrical diagrams and print layouts 46 FTV1 9EE 7 Teletext copper side ...
Page 49: ...Electrical diagrams and print layouts 49 FTV1 9EE 7 Euro I O panel ...
Page 50: ...Electrical diagrams and print layouts 50 FTV1 9EE 7 Euro I O panel ...
Page 51: ...Electrical diagrams and print layouts 51 FTV1 9EE 7 Euro I O component side ...
Page 52: ...Electrical diagrams and print layouts 52 FTV1 9EE 7 Euro I O copper side ...
Page 54: ...Electrical diagrams and print layouts 54 FTV1 9EE 7 Feature box component side ...
Page 55: ...Electrical diagrams and print layouts 55 FTV1 9EE 7 Feature box copper side ...
Page 56: ...Electrical diagrams and print layouts 56 FTV1 9EE 7 Incredible sound Incredible sound ...
Page 57: ...Electrical diagrams and print layouts 57 FTV1 9EE 7 ECO NICAM ...
Page 74: ...Electrical diagrams and print layouts 74 FTV1 9EE 7 Personal notes Personal notes ...


