background image

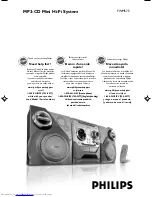
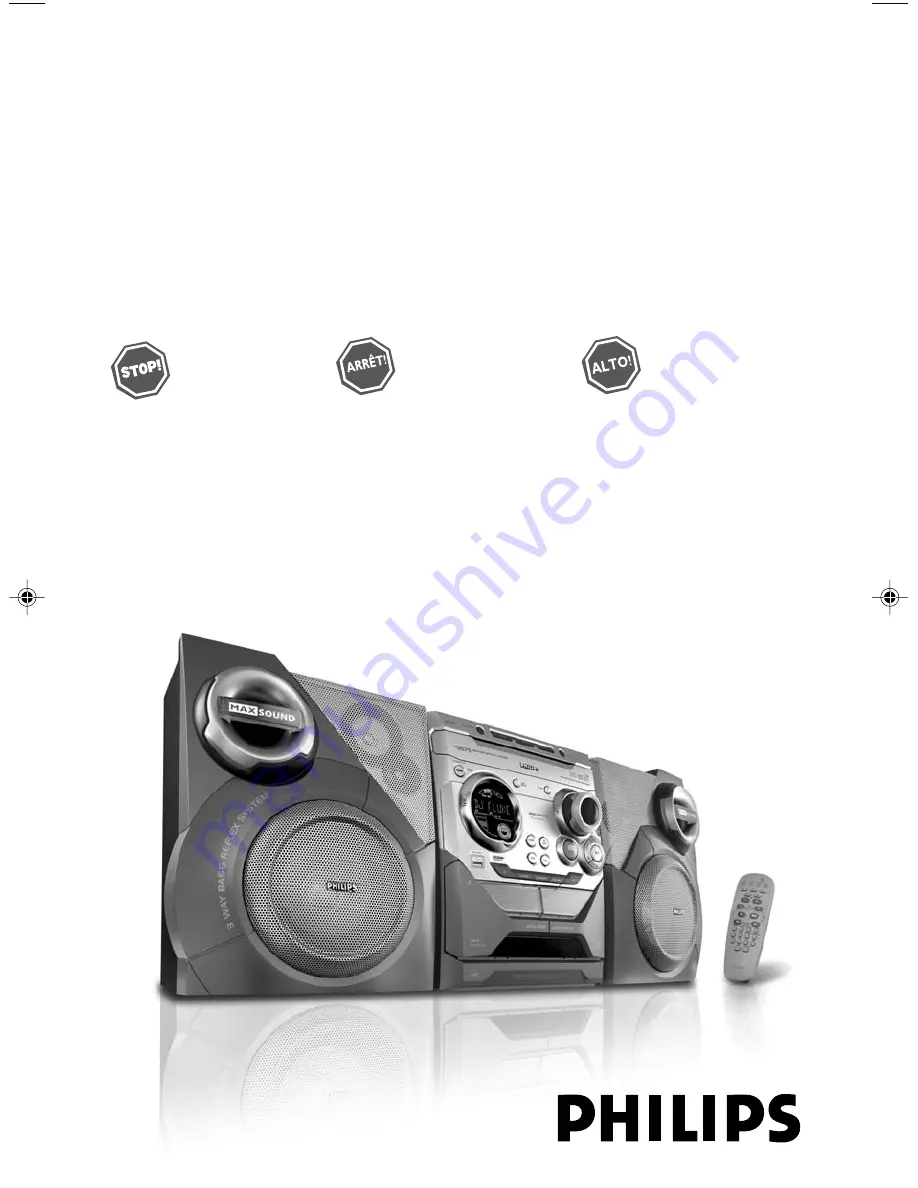
MP3-CD Mini Hi-Fi System

FWM575

Thank you for choosing Philips.

Need help fast? 

Read your Quick Use Guide and/or

Owner's Manual first for quick tips

 that make using your Philips product 

more enjoyable.

If you have read your instructions 

and still need assistance,

you may access our online help at 

www.philips.com/support

or call

1-888-PHILIPS (744-5477) 

while with your product.

(and Model / Serial number)

Philips vous remercie de 

votre confiance.

Besoin d'une aide 

rapide? 

Les Guide d'utilisation rapide et Manuel de 

l'utilisateur regorgent d'astuces destinées à 

simplifier l'utilisation de votre produit Philips.

Toutefois, si vous ne parvenez pas à résoudre 

votre probléme, vous pouvez accéder à 

notre aide en ligne à l'adresse 

www.philips.com/support

ou formez le

1-800-661-6162 (Francophone)

1-888-PHILIPS (744-5477) (English speaking)

Veillez à avoir votre produit à

portée de main.

(et model / serial nombre)

Gracias por escoger Philips

Necesita ayuda 

inmediata? 

Lea primero la Guía de uso rápido o el

Manual del usuario, en donde encontrará

consejos que le ayudarán a disfrutar 

plenamente de su producto Philips.

Si después de leerlo aún necesita ayuda,

consulte nuestro servicio de 

asistencia en línea en 

www.philips.com/support

o llame al teléfono

1-888-PHILIPS (744-5477)

y tenga a mano el producto.

(y número de model / serial)

pg001-pg031_FWM575-Eng-37

2006.2.8, 13:16

1

Summary of Contents for FW M575

Page 1: ...à simplifier l utilisation de votre produit Philips Toutefois si vous ne parvenez pas à résoudre votre probléme vous pouvez accéder à notre aide en ligne à l adresse www philips com support ou formez le 1 800 661 6162 Francophone 1 888 PHILIPS 744 5477 English speaking Veillez à avoir votre produit à portée de main et model serial nombre Gracias por escoger Philips Necesita ayuda inmediata Lea pri...

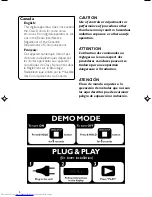
Page 2: ...Règlement sur le Brouillage Radioélectrique édicté par le Ministère des Communications du Canada CAUTION Use of controls or adjustments or performance of procedures other than herein may result in hazardous radiation exposure or other unsafe operation ATTENTION L utilisation des commandes ou réglages ou le non respect des procédures ci incluses peuvent se traduire par une exposition dangereuse à l...

Page 3: ...3 3 3 4 5 8 1 2 7 ª º 6 3 9 7 8 5 1 2 6 4 3 ª 0 ...

Page 4: ...ncluding special money sav ing offers Know these safetysymbols This bolt of lightning indicates uninsulated material within your unit may cause an electrical shock For the safety of everyone in your household please do not remove product covering The exclamation point calls attention to features for which you should read the enclosed literature closely to prevent operating and maintenance problems...

Page 5: ...re entitled to protection by one of the most comprehensive warranties and outstanding serv ice networks in the industry What s more your purchase guaran tees you ll receive all the information and special offers for which you qualify plus easy access to accessories from our convenient home shopping network Most importantly you can count on our uncompromising commit ment to your total satisfaction ...

Page 6: ...6 IMPORTANT SAFETY INSTRUCTIONS Class II equipment symbol This symbol indicates that the unit has a double insulation system Clean only with dry cloth materials ...

Page 7: ...7 English Français Español Index English 8 Français 36 Español 64 ...

Page 8: ...3 disc 17 Loading discs 17 18 Playing discs 18 Replacing discs during playback 18 Selecting a desired track passage 18 Selecting a desired Album Title MP3 disc only 18 Different play modes SHUFFLE and REPEAT 19 Programming the disc tracks 19 Erasing the programme 19 Radio Reception Tuning to radio stations 20 Storing preset radio stations 20 21 Automatic preset programming Manual preset programmin...

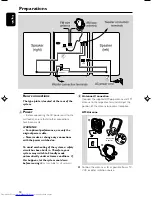
Page 9: ...sult your dealer Place the system on a flat hard and stable surface Place the system in a location with adequate ventilation to prevent internal heat build up in your system Allow at least 10 cm 4 inches clearance from the rear and the top of the unit and 5 cm 2 inches from each side The ventilation should not be impeded by covering the ventilation openings with items such as newspapers table clot...

Page 10: ...o avoid overheating of the system a safety circuit has been built in Therefore your system may switch to Standby mode automatically under extreme conditions If this happens let the system cool down before reusing it not available for all versions B Antennas Connection Connect the supplied AM loop antenna and FM antenna to the respective terminals Adjust the position of the antenna for optimal rece...

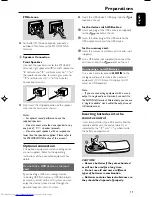
Page 11: ... stored music through the powerful speakers of Hi Fi system Insert the USB device s USB plug into the socket on the set for the devices with USB cables 1 Insert one plug of the USB cable not supplied to the socket on the set 2 Insert the other plug of the USB cable to the USB output terminal of the USB device for the memory card 1 Insert the memory card into a card reader not supplied 2 Use a USB ...

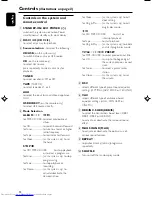
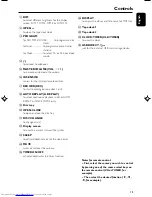
Page 12: ...ramme forTuner on the system only to stop programming forTape to stop playback or recording for Demo on the system only to activate deactivate the demonstration for Clock on the system only to exit clock setting for Plug Play on the system only to exit plug play mode ÉÅ for CD MP3 CD USB to start or interrupt playback forTape to start playback for Plug Play on the system only to initiate and start...

Page 13: ...hones MASTERVOLUME VOL to increase or decrease the volume IR SENSOR sensor for the infrared remote control RECORD REC to start recording on tape deck 1 or 2 AUTO REPLAY A REPLAY to select continuous playback in either AUTO REPLAY or ONCE MODE only Disc tray OPEN CLOSE to open or close the disc tray DISC CHANGE to change disc s Display screen to view the current status of the system SLEEP to activa...

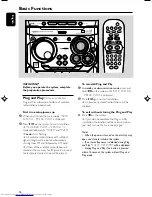
Page 14: ... stations are stored or the memory for 40 presets are used the last preset radio station will be played To reinstall Plug and Play 1 In standby or demonstration mode press and holdÉ Åon the system until AUTO INSTALL PRESS PLAY is displayed 2 PressÉ Åagain to start installation All previously stored radio stations will be replaced To exit without storing the Plug and Play Press Çon the system If yo...

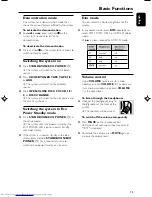
Page 15: ... in the active mode The system enters Eco power standby the ECO POWER LED is on or normal standby with clock display If the system is in normal standby with clock display press and hold STANDBY ON ECO POWER 2 for 3 seconds or more to switch to Eco power standby or vice versa Dim mode You can select the desired brightness for the display In any source mode press DIM repeatedly to select DIM 1 DIM 2...

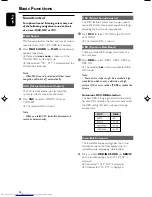
Page 16: ...ound magnifies the virtual distance between the front speakers for an incredibly wide enveloping stereo effect Press and hold DBB INC SURR or DBB IS on the remote control until INCR SUR is displayed If activated INCR SUR is displayed If deactivated IS OFF is displayed Sound control For optimal sound listening select only one of the following navigation sound controls at a time MAX DSC or VAC MAX S...

Page 17: ...io CD Rewritable CDRW discs MP3 CDs CD ROMs with MP3 tracks About MP3 disc Supported formats ISO9660 Joliet Multisession Max track number plus album is 255 Max nested directory is 8 levels The max album number is 32 The max MP3 program track number is 99 SupportedVBR bit rate Supported sampling frequencies for MP3 disc are 32 kHz 44 1 kHz 48 kHz Supported Bit rates of MP3 disc are 32 64 96 128 192...

Page 18: ...ll play once then stop To interrupt playback Press É Å The current track time flashes To resume playback press É Å again To stop playback Press STOPÇ For MP3 CD During playback press DISPLAY to show the album and title name Replacing discs during playback 1 Press DISC CHANGE The disc tray will open without interrupting current playback 2 To change the inner disc press DISC CHANGE again CHANGING DI...

Page 19: ...ng PROG starts flashing 4 Press TITLE í ë repeatedly to select the desired track For MP3 disc press ALBUM à á and TITLE í ë to select the desired album and title for programming 5 Press PROG to store the track 6 To end programming press STOPÇ once PROG stays and the programme mode remains active The total number of tracks programmed and the total playing time are displayed For MP3 disc total playi...

Page 20: ...matic Preset Programming Plug and Play setting refer to Basic Functions Plug and Play OR 1 Press TUNER to selectTUNER mode To begin automatic preset from a desired preset number Press TITLE í ë PRESET to select the desired preset number If a radio station has been stored in one of the presets it will not be stored again under another preset number 2 Press and hold PROGRAM until AUTO is displayed P...

Page 21: ...radio station PROG disappears Repeat steps 1 3 to store other radio stations To exit manual preset mode Press Ç on the system Notes If you attempt to store more than 40 preset radio stations FULL is displayed During programming if no key is pressed within 20 seconds the system will exit the programme mode automatically Tuning to preset radio stations Once you ve programmed the radio stations press...

Page 22: ...e tape deck door 2 Load the tape with the open side downward and full spool to the left 3 Close the tape deck door Playing tapes To playback a selected tape deck 1 Press TAPE or TAPE 1 2 on the remote control repeatedly to select tape deck 1 or 2 2 Press É Å To stop playback Press Ç To select automatic replay or one time playback Press AUTO REPLAY or A REPLAY repeatedly to select the different pla...

Page 23: ...n Put a piece of clear adhesive tape over the opening IMPORTANT Recording is permissible if copyright or other rights of third parties are not infringed upon Recording is possible only on tape deck 2 Preparation for recording 1 Press TAPE to selectTAPE 2 2 Load a recordable tape into tape deck 2 with full spool to the left 3 Prepare the source to be recorded CD load the disc s TUNER tune to the de...

Page 24: ...Press STOP Ç Recording and disc playback will stop simultaneously Dubbing tapes 1 Load the prerecorded tape in tape deck 1 You can set the tape to the desired passage where recording will start 2 Press RECORD Playing and recording will start simultaneously DUB is displayed Dubbing of tapes is possible on one side of the tape only To continue recording on the reverse side at the end of side A flip ...

Page 25: ...yright protection technology Such protected contents will be unplayable on any other devices such as this Hi Fi system Supported formats USB or memory file format FAT12 FAT16 FAT32 sector size 512 65 536 bytes MP3 bit rate data rate 32 320 Kbps and variable bit rate WMA v9 or earlier Directory nesting up to a maximum of 8 levels Number of albums folders maximum 99 Number of tracks titles maximum 4...

Page 26: ...the file names ofWMA files end with wma For DRM protectedWMA files useWindows Media Player 10 or later for conversion Visit www microsoft com for details aboutWindows Media Player andWM DRM Windows Media Digital Rights Management 1 Check the USB device has been properly connected See Preparations Connecting a USB device or memory card 2 Press CD USB once or more to select USB or USB DIRECT on the ...

Page 27: ...be set in either 12 hour or 24 hour mode AM 12 00 or 00 00 for example 1 In standby or view clock mode press CLOCK TIMER once In other source mode press CLOCK TIMER twice 2 Press PROGRAM repeatedly to select clock mode AM 12 00 or 00 00 starts flashing 3 Press ALBUM à á on the system repeatedly to set the hour 4 Press TITLE í ë on the system repeatedly to set the minute 5 Press CLOCK TIMER again t...

Page 28: ...time is reached and the selected disc tray is empty the next available disc will be selected If all the disc trays are not available Tuner will be selected automatically During timer setting if no button is pressed within 90 seconds the system will exit timer setting mode automatically To deactivate theTIMER Press TIMER ON OFF on the remote control The display will show OFF and TIMER will disappea...

Page 29: ...support MP3 and WMA files Number of albums folders maximum 99 Number of tracks titles maximum 400 TUNER FM wave range 87 5 108 MHz AM wave range 530 1700 kHz Number of presets 40 Antenna FM 75 Ω wire AM Loop antenna TAPE PLAYER Frequency response Normal tape type I 80 12500 Hz 8 dB Signal to noise ratio Normal tape type I 48 dBA Wow and flutter 0 4 DIN SPEAKERS System 2 way double port bass reflex...

Page 30: ...istened with cleaning fluid or alcohol You also can clean the heads by playing a cleaning tape once C C B B A Demagnetising the heads Use a demagnetising tape available at your dealer WARNING Under no circumstances should you try to repair the system yourself as this will invalidate the warranty Do not open the system as there is a risk of electric shock If a fault occurs first check the points li...

Page 31: ... system again Remove and reconnect the AC power plug and switch on the system again Adjust the volume Disconnect the headphones Check that the speakers are connec ted correctly Check if the stripped speaker wire is clamped Make sure the MP3 CD was recorded within 32 256 kbps bit rate with sampling frequencies at 48 kHz 44 1 kHz or 32 kHz Check the speaker connections and location Select the source...

Page 32: ...32 ...

Reviews: