background image

English

11

CD/MP3 Operation

5

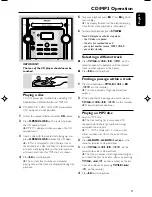
To pause playback press 

2;

.  Press 

2;

 again to

resume play.

The display freezes and the elapsed playing

time flashes when playback is interrupted.

6

To stop disc playback, press 

STOP 

9

.

Note: CD playback will also stop when;
– the CD door is opened.
– the disc has reached the end.
– you select another source:  TAPE, TUNER.
– you select standby.

Selecting a different track

Press 

TITILE-/+


¡1

 or 

2™

 (

í

/

ë

on the

remote) once or repeatedly until the desired
track number appears in the display.

Press 

2;

 to start playback.

Finding a passage within a track

1

Press and hold down 

TITILE-/+


¡1

 or 

2™

(

í

/

ë

on the remote).

The disc is played at high speed and low

volume.

2

When you find the passage you want, release

TITILE-/+


¡1

 or 

2™

 (

í

/

ë

on the remote).

Normal playback continues.

Playing an MP3 disc

1

Load an MP3 disc.

The disc reading time may exceed 10

seconds due to the large number of songs
compiled into one disc.

"

XX YYY

" is displayed. 

XX

 is the current

album number and 

YYY

 is the current track

number.

2

Press 

ALBUM+

 (

ALBUM-/+

 5

/

6

 on the

remote) to select a desired album.

3

Press 

TITILE-/+


¡1 

2™


(

í

/

ë

on the

remote) to select a desired track.

The album number will change accordingly as

you reach the first track of an album by pressing

TITILE-

 4

 (

í

on the remote) or the last

track of an album by pressing 


¢

(

ë

on the remote).

4

Press 

2;

 to start playback.

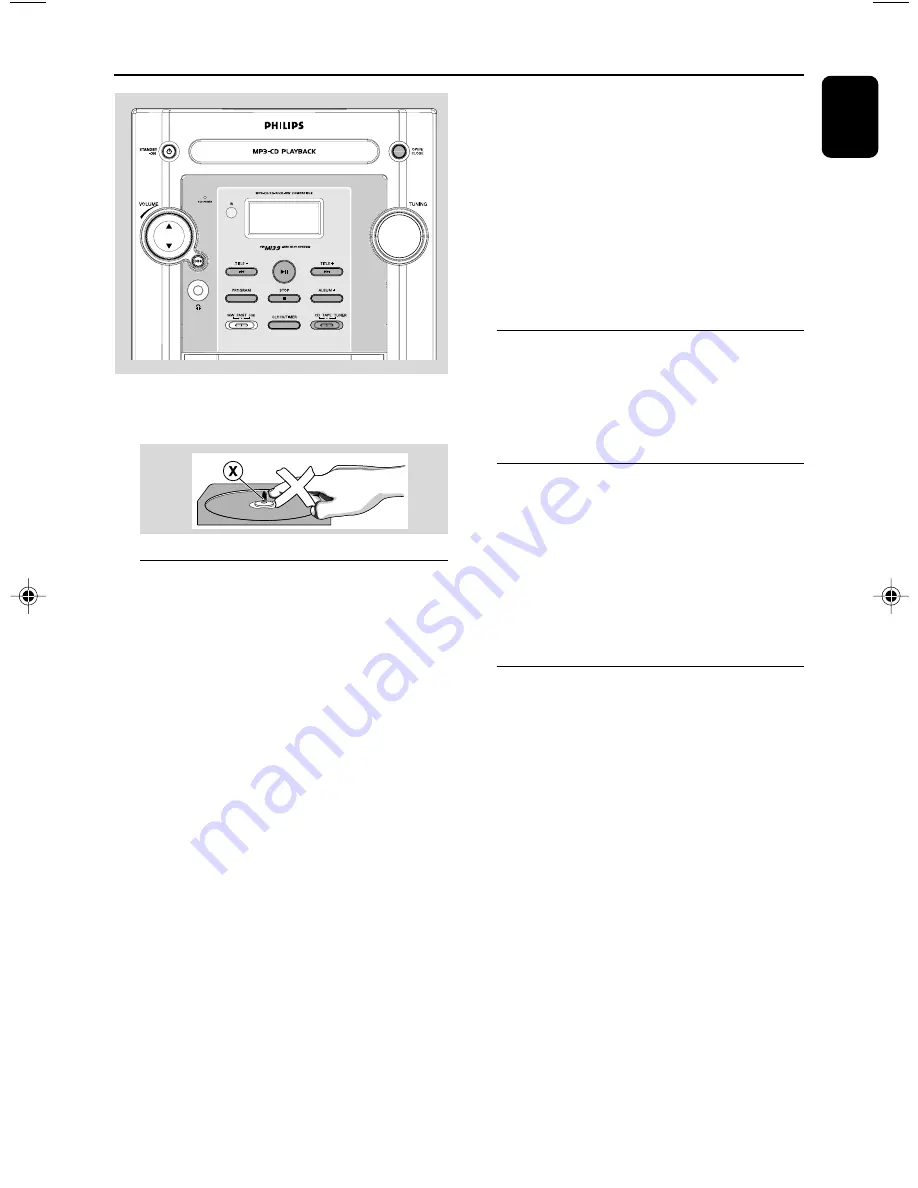
IMPORTANT:
The lens of the CD player should never be
touched.

Playing a disc

This CD player plays Audio Discs including CD-
Recordables, CD-Rewritables and MP3 CD.

CD-ROM, CD-I, CDV,  VCD, DVD or computer
CDs, however, are not possible.

1

Adjust the source selector to select 

CD 

source.

2

Press 

OPEN/CLOSE

 on the system to open

the CD compartment.

OPEN


is displayed when you open the CD

compartment.

3

Insert a disc with the printed side facing up and
press 

OPEN/CLOSE

 to close the CD door.

rEAd


is displayed as the CD player scans

the contents of a disc, and then the total number
of tracks and playing time (or the total number
of albums and tracks for MP3 disc) are shown.

4

Press 

2;

 to start playback.

The current track number and elapsed

playing time of the track are displayed during disc
playback.

pg001-pg020_FWM139_79

2007.4.20, 10:50

11

Summary of Contents for FWM139

Page 1: ...FWM139 MP3 CD Mini Hi Fi System ...

Page 2: ...2 CAUTION Use of controls or adjustments or performance of procedures other than herein may result in hazardous radiation exposure or other unsafe operation ...

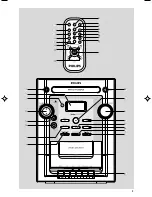
Page 3: ...3 2 5 4 3 8 4 1 2 3 9 0 5 6 8 7 ...

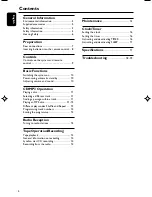
Page 4: ... CD MP3 Operation Playing a disc 11 Selecting a different track 11 Finding a passage within a track 11 Playing an MP3 disc 11 12 Different play modes Shuffle and Repeat 12 Programming track numbers 12 Erasing the programme 12 Radio Reception Tuning to radio stations 13 Tape Operation Recording Tape playback 14 General information on recording 14 Synchro start CD recording 14 Recording from the rad...

Page 5: ... by covering the ventilation openings with items such as newspapers table cloths curtains etc Do not expose the system batteries or discs to excessive moisture rain sand or heat sources caused by heating equipment or direct sunlight No naked flame sources such as lighted candles should be placed on the apparatus No objects filled with liquids such as vases shall be placed on the apparatus The appa...

Page 6: ...re To establish a safe volume level Set your volume control at a low setting Slowly increase the sound until you can hear it comfortably and clearly without distortion Listen for reasonable periods of time Prolonged exposure to sound even at normally safe levels can also cause hearing loss Be sure to use your equipment reasonably and take appropriate breaks Be sure to observe the following guideli...

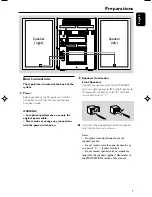
Page 7: ...Connection Front Speakers Connect the speaker wires to the SPEAKERS terminals right speaker to R and left speaker to L coloured marked wire to and black unmarked wire to Fully insert the stripped portion of the speaker wire into the terminal as shown Notes For optimal sound performance use the supplied speakers Do not connect more than one speaker to any one pair of speaker terminals Do not connec...

Page 8: ...e correct polarity as indicated by the and symbols inside the battery compartment CAUTION Remove batteries if they are exhausted or will not be used for a long time Do not use old and new or different types of batteries in combination Batteries contain chemical substances so they should be disposed of properly Preparations ...

Page 9: ...tops CD playback or erases a CD program TUNING tunes to a radio station DISPLAY display the current time DBB Dynamic Bass Boost enhances the bass VOLUME 3 4 adjusts the volume level n connect headphones Tape Deck Operation RECORD 0 starts recording PLAY 2 starts playback REW à F FWD á fast rewinds forwards the tape STOP OPEN 9 stops the tape opens the tape compartment PAUSEÅ pauses recording or pl...

Page 10: ...k display press and hold STANDBY ON y POWER y on the remote for 3 seconds or more to switch to Eco power standby or vice versa Power saving automatic standby The power saving feature automatically switches to standby 30 minutes after a tape or CD playback has ended and no control is operated Adjusting volume and sound 1 Press VOLUME 3 4 to increase or decrease volume Display shows the volume level...

Page 11: ...YYY is the current track number 2 Press ALBUM ALBUM 5 6 on the remote to select a desired album 3 Press TITILE 1 2 í ë on the remote to select a desired track The album number will change accordingly as you reach the first track of an album by pressing TITILE 4 í on the remote or the last track of an album by pressing TITILE ë on the remote 4 Press 2 to start playback IMPORTANT The lens of the CD ...

Page 12: ...9 twice during playback opening the CD compartment selecting another sound source PROG disappears from the display Supported MP3 disc formats ISO9660 Joliet UDF 1 5 Maximum title number 511 depending on filename length Maximum album number 99 Supported sampling frequencies 32 kHz 44 1 kHz 48 kHz Supported Bit rates 32 256 kbps variable bitrates Different play modes SHUFFLE and REPEAT You can selec...

Page 13: ...o or FMST stereo 3 Adjust the TUNING control knob to tune to a desired radio frequency Note The system is equipped with a built in MW antenna and a fixed FM antenna For optimal MW reception adjust the position of the whole set until the strongest signal is found For optimal FM reception fully extend and adjust the position of the FM antenna until the strongest signal is found ...

Page 14: ...Synchro start CD recording 1 Adjust the source selector to select CD source 2 Insert a disc and if desired programme track numbers 3 Press STOP OPENÇç to open the tape door 4 Insert a suitable tape into the deck and close the tape door 5 Press RECORD 0 to start recording Playing of the CD programme starts automatically from the beginning of the CD after 7 seconds It is not necessary to start the C...

Page 15: ...stan s B and pressure roller s C after every 50 hours of tape operation Use a cotton swab slightly moistened with cleaning fluid or alcohol You can also clean the heads by playing a cleaning tape once A A B C Demagnetising the heads Use a demagnetising tape available at your dealer Tape Operation Recording To select and record a particular passage within a CD track Press and hold down on REW à or ...

Page 16: ...k digits for the minutes flash 4 Press TITILE 1 2 í ë on the remote to set the minutes 5 Press CLOCK TIMER to confirm the time The timer is now set and actiated Activating and deactivating TIMER In standby or during playback press TIMER ON OFF once Display shows if activated and disappears if deactivated Setting the clock 1 In any mode press CLOCK TIMER twice The clock digits for the hours flash 2...

Page 17: ...LIFIER Output power 2 x 20 W RMS 2 x 40W MPO Signal to noise ratio 62 dBA IEC Frequency response 63 16000 Hz 3 dB Impedance loudspeakers 8 Ω Impedance headphones 32 Ω 1000 Ω CD PLAYER Frequency range 63 16000 Hz Signal to noise ratio 65 dBA TUNER FM wave range 87 5 108 MHz MW wave range 522 1710 kHz TAPE DECK Frequency response Normal tape type I 125 8000 Hz 8 dB Signal to noise ratio Normal tape ...

Page 18: ... clean the disc see Maintenance Use a finalised CD RW CD R or MP3 CD RADIO RECEPTION Radio reception is poor Increase the distance between the Micro HiFi System and yourTV orVCR TAPE OPERATION RECORDING Recording or playback cannot be made Clean deck parts see Maintenance Use only normal IEC I tape for recording Apply a piece of adhesive tape over the missing tab space GENERAL The system does not ...

Page 19: ...d Replace the batteries Point the remote control directly toward IR sensor on the front of the system The timer is not working Set the clock correctly PressTIMER ON OFF to switch on the timer If a recording is in progress stop the recording The Clock Timer setting is erased Power has been interrupted or the power cord has been disconnected Reset the clock timer Troubleshooting ...

Page 20: ... months for the above listed Consumer Electronics products if used in commercial applications 6 Philips may at its discretion choose to replace rather than repair any product covered by this warranty 7 Product accessories are covered by the same warranty period Please contact the Philips Technology Care Centre for free replacement of faulty accessories 8 This Manufacturers Warranty is neither tran...

Page 21: ...ing instructions or unauthorised modification to the product or repair by an unauthorised technician 4 Reasonable evidence in the form of a sales docket must be supplied to indicate that the product was purchased no more than 12 months prior to the date of your claim 5 In the event of a failure Philips shall be under no liability for any injury or any loss or damage caused to property or products ...

Page 22: ...English Printed in China FWM139 PDCC JS JW 0716 Meet Philips at the Internet http www philips com ...

Reviews: