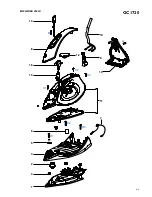
GC1720
BACKPLATE 14
LAMP ASSY 7
CORDSET 10
SWIVEL 9
DOSING ASSY 13
INLAY 8
SPRAY KNOB 16
SPRAY PUMP ASSY 15
Remove
Screw A
Remove
BACKPLATE 14
Remove
DOSING ASSY 13
Remove
Screw B
Remove
INLAY 8
DISASSEMBLY ADVICE
THERMOSTAT DIAL 12
WATER TANK ASSY 11
THERMOSTAT BUSH 6
METAL SHEET 5
COVER 4
DOSING SEAL 2
RYTON RING 3
SOLEPLATE ASSY 1
Remove
THERMOSTAT DIAL 12
Remove
Screws C1, C2, C3
Remove
WATER TANK ASSY 11
Remove
THERMOSTAT BUSH 6
Remove
Screws D1, D2, D3
Remove
COVER 4
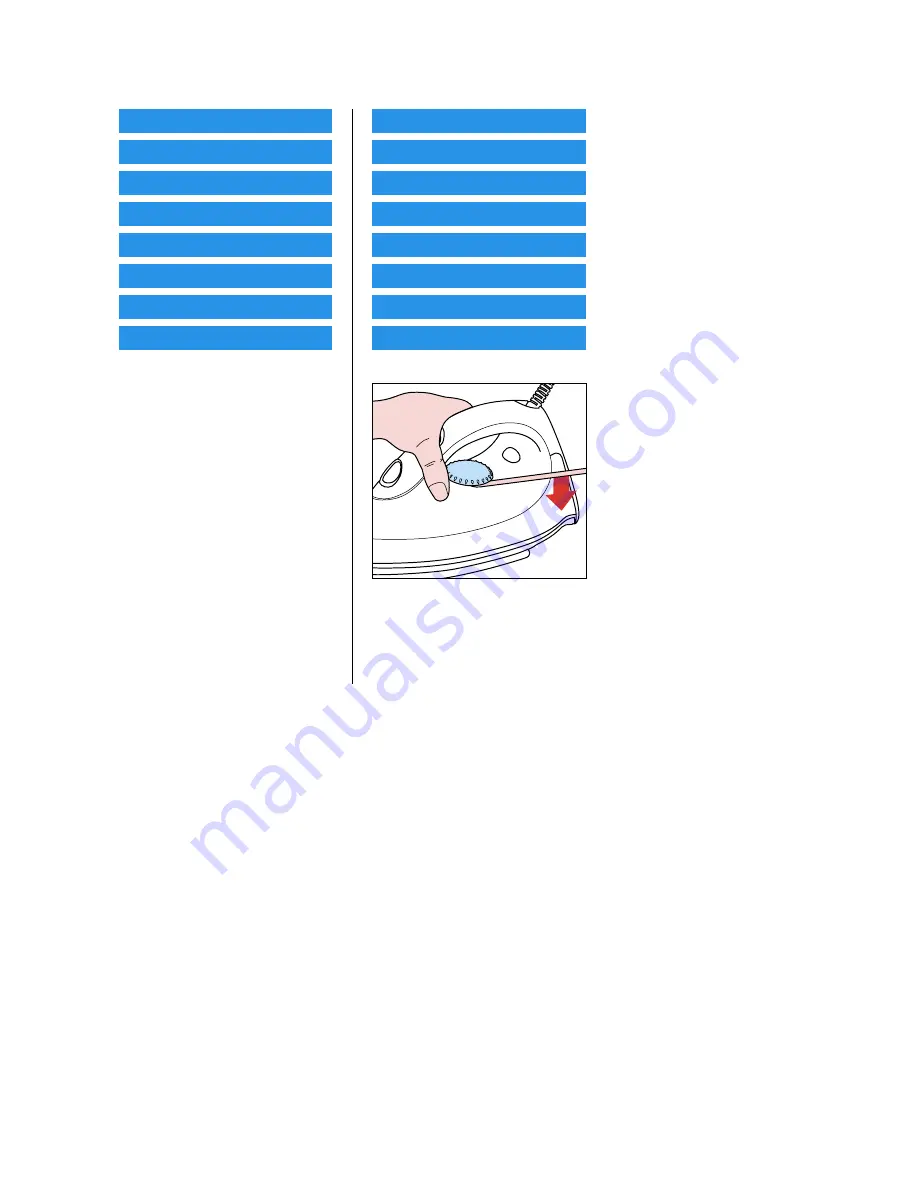
REPAIR INSTRUCTION
- In case of any defect on the thermostat, the complete soleplate has to be replaced.
- In the event that no information about the type number & voltage has been stamped onto the type plate sparepart, engrave at
least type number & voltage onto the typeplate sparepart with a tool when replacing this part.
- After product has been repaired, it should function properly & has to meet the safety requirements & legal regulations as officially
laid down at this moment.
2-4


