background image

 Register your product and get support at


www.philips.com/welcome

Question?

Contact 

Philips

 Always there to help you


DCB7005

 EN 

User manual 

3  

  DA 

Brugervejledning 

25  

  DE 

Benutzerhandbuch 

47  

  FR 

Mode  d’emploi 

71  

  IT 

Manuale utente 

95

  NO 

Brukerhåndbok 

119  


Summary of Contents for Harmony DCB7005

Page 1: ...nd get support at www philips com welcome Question Contact Philips Always there to help you DCB7005 EN User manual 3 DA Brugervejledning 25 DE Benutzerhandbuch 47 FR Mode d emploi 71 IT Manuale utente 95 NO Brukerhåndbok 119 ...

Page 2: ... in standby mode in standby mode ...

Page 3: ... 8 Overview of the remote control 9 3 Preparations 11 Place the product 11 Connect 11 Install replace the batteries of remote control 13 4 Get started 14 Turn on 14 Set clock 14 Demonstrate features 14 Adjust brightness of display panel 15 Turn on or off LED light 15 5 Play 15 Play a disc 15 Play from a USB storage device 15 Basic operations 16 Program audio tracks 16 Adjust sound 16 6 Play from i...

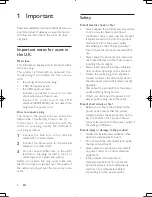
Page 4: ...ts on power cords or on other electrical equipment If the product is transported in temperatures below 5 C unpack the product and wait until its temperature matches room temperature before connecting it to the power outlet 1 Important Read and understand all instructions before you use this product If damage is caused by failure to follow the instructions the warranty does not apply Important note...

Page 5: ...in a confined space Always leave a space of at least four inches around the product for ventilation Make sure that curtains or other objects never cover the ventilation slots on the product Risk of contamination Do not mix batteries old and new or carbon and alkaline etc Remove batteries if they are exhausted or if the remote control is not to be used for a long time Batteries contain chemical sub...

Page 6: ...mponents which can be recycled and reused When this crossed out wheeled bin symbol is attached to a product it means that the product is covered by the European Directive 2002 96 EC Please inform yourself about the local separate collection system for electrical and electronic products Please act according to your local rules and do not dispose of your old products with your normal household waste...

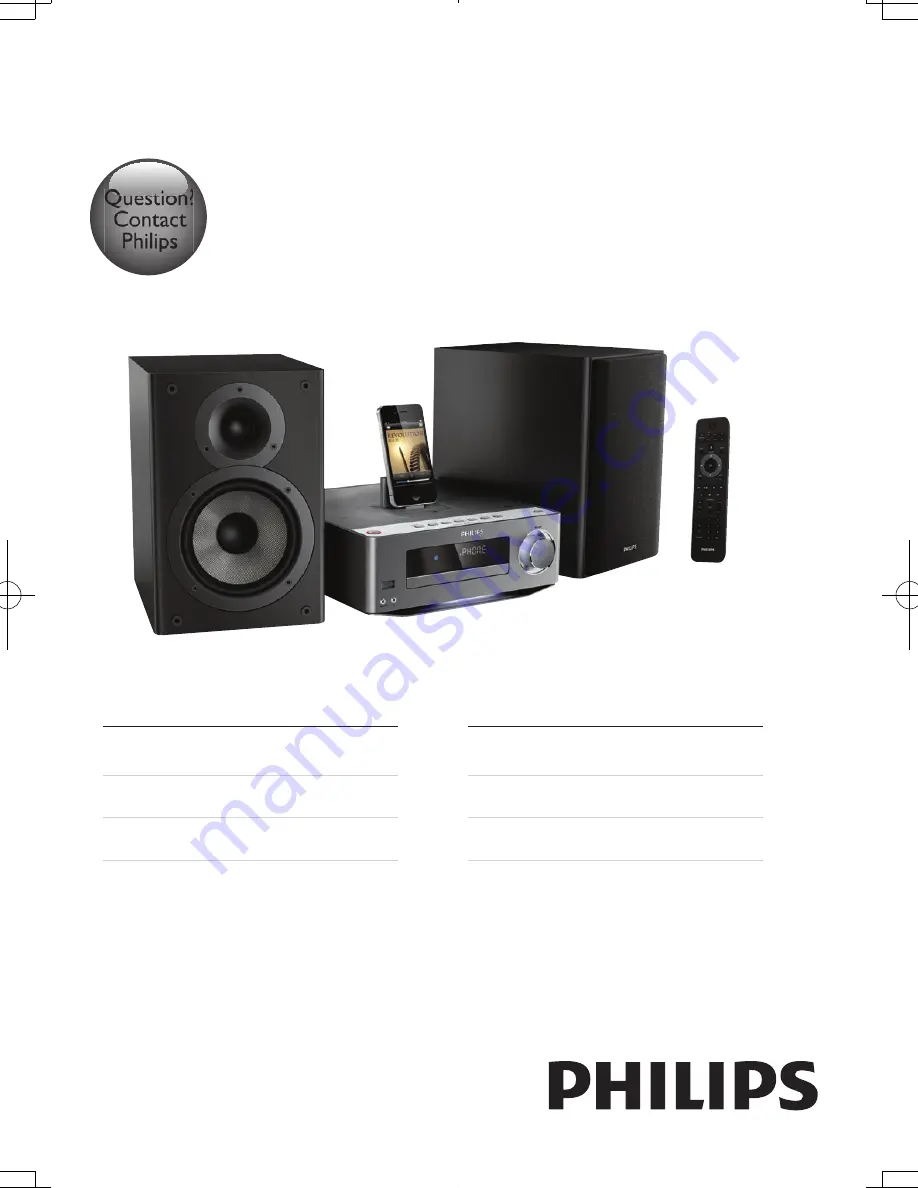
Page 7: ...i Fi System Congratulations on your purchase and welcome to Philips To fully benefit from the support that Philips offers register your product at www Philips com welcome Introduction With this unit you can enjoy audio from discs USB devices iPod iPhone iPad and other external devices listen to radio stations You can enrich sound output with these sound effects Treble and Bass Control Loudness Con...

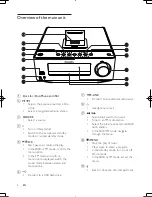
Page 8: ...e access the menu k Eject or close the disc compartment Overview of the main unit a Dock for iPod iPhone and iPad b Skip to the previous next track title or file Select a programmed radio station c SOURCE Select a source d Turn on this product Switch to the eco power standby mode or normal standby mode e OK Start pause or resume the play In the DAB or FM mode confirm the menu option In the FM mode...

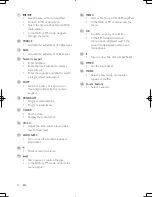
Page 9: ...vigate through the menu f RDS INFO Display the information of RDS DAB radio program Synchronize the clock with an RDS radio station that transmits time signals Display the current status or the media information Display available ID3 information of MP3 tracks g Stop the play of music Press twice to erase a program In the normal standby mode turn on or off Demo mode In the DAB or FM mode access the...

Page 10: ... the DAB or FM mode navigate through the menu j TREBLE Activate the adjustment of treble level k BASS Activate the adjustment of bass level l Numeric keypad Enter numbers Enter the track number to select a track directly Enter the sequence number to select a programmed radio station m SHIFT Switch the entry of a one two or three digit number by the numeric keypad n PROGRAM Program radio stations P...

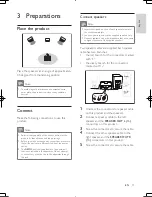
Page 11: ...e 4 Connect the other speaker cable to the right speaker and the SPEAKER OUT R connectors on this product 5 Screw the connectors to secure the cable DEMO a a b c b c 3 Preparations Place the product Place the speakers at an angle of approximately 45 degrees from the listening position Note To avoid magnetic interference or unwanted noise never place this product too close to any radiation devices ...

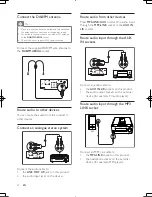
Page 12: ...the headphone socket on the external device for example MP3 player MP3 MP3 LINK Connect the DAB FM antenna Tip Make sure that you have connected and fully extended the antenna before your connect the power supply For better reception connect an outdoor FM antenna to the DAB FM AERIAL socket The unit does not support MW radio reception Connect the supplied DAB FM wire antenna to the DAB FM AERIAL s...

Page 13: ...to the voltage printed on the back or the underside of the unit Before you connect the AC power cord make sure that you have completed all other connections Connect the AC power cord to the AC MAINS socket on this product the wall power socket Install replace the batteries of remote control Note Risk of explosion Keep batteries away from heat sunshine or fire Never discard batteries in fire Remove...

Page 14: ...it the feature demonstration press again 4 Get started Caution Use of controls or adjustments or performance of procedures other than herein may result in hazardous radiation exposure or other unsafe operation Always follow the instructions in this chapter in sequence Turn on Press This product switches to the last selected source Switch modes Automatically switch the modes After this product keep...

Page 15: ...to the disc tray with its label facing up 3 Press to close the disc compartment 2 Press DISC to select the disc source 3 Press if the play does not start automatically Play from a USB storage device Note Philips does not guarantee compatibility with all USB devices NTFS NewTechnology File System data format is not supported Adjust brightness of display panel Press DIM repeatedly to select differen...

Page 16: ...ess to turn on or off the automatic loudness control BASS Press BASS and then press VOL to increase or decrease the bass level TREBLE Press TREBLE and then press VOL to increase or decrease the treble level Make sure that the USB storage device contains playable audio contents 1 Insert the USB storage device into the USB socket 2 Press USB to select the USB source Play starts automatically If the ...

Page 17: ...ote control press MENU to access the menu press to select an item and then press OK to confirm Note The music stops when the iPhone receives an incoming call 6 Play from iPod iPhone iPad You can enjoy audio from iPod iPhone iPad through this unit Note No audio output from the headphone jack in this situation Compatible iPod iPhone iPad The unit supports the following iPod iPhone and iPad models iP...

Page 18: ...ions automatically 1 Press DAB FM repeatedly to switch to the DAB mode FULL SCAN is displayed 2 Press or OK to start the auto installation This product automatically stores radio stations with sufficient signal strength After all available radio stations are stored the first stored radio station is broadcast automatically Basic operations Follow the instructions below for more functions Charge the...

Page 19: ...ss MENU or to exit the menu Tune to the next FM radio station with sufficient signal strength at the lower higher frequency Press and hold to start the auto search Tune to the FM radio station at a specific frequency Press repeatedly until the frequency digitals are displayed Program FM radio stations automatically Press and hold SCAN or PROGRAM to start the auto programming Program DAB radio stat...

Page 20: ... correctly 2 In the normal standby mode press and hold TIMER until TIMER SET scrolls on the display 3 Press VOL to select an alarm source CD FM DAB USB Dock or iPod iPhone iPad playlist To use iPod iPhone iPad playlist as the alarm source create a playlist named PHILIPS in your iPod iPhone iPad first If no playlist named PHILIPS exists in the iPod iPhone iPad or the playlist includes no playable t...

Page 21: ...upply turn on this product and perform the upgrade again 9 Upgrade the firmware Note Power supply must not be interrupted during the upgrade The firmware upgrade can only be available through the mini USB port on the back plate When the firmware upgrade succeeds all settings are restored to the factory default status Register your product 1 Go to www philips com welcome 2 Click the link of Registe...

Page 22: ...r Box 10 7 kg 2 5 kg 2 X 3 15 kg 10 Product information Note Product information is subject to change without prior notice Specifications Amplifier Rated Output Power 2 X 50W RMS Frequency Response 20 20000 Hz 3dB Signal to Noise Ratio 82dBA Aux Input 1000 mV RMS 22kohm Disc LaserType Semiconductor Disc Diameter 12cm 8cm Support Disc CD DA CD R CD RW MP3 CD WMA CD Audio DAC 24Bits 44 1kHz Total Ha...

Page 23: ...1 USB flash players USB 2 0 or USB1 1 memory cards requires an additional card reader to work with this unit Supported formats USB or memory file format FAT12 FAT16 FAT32 sector size 512 bytes MP3 bit rate data rate 32 320 Kbps and variable bit rate WMA v9 or earlier Directory nesting up to a maximum of 8 levels Number of albums folders maximum 99 Number of tracks titles maximum 999 ID3 tag v2 0 o...

Page 24: ...er try to repair the system yourself If you encounter problems when using this apparatus check the following points before requesting service If the problem remains unsolved go to the Philips web site www philips com support When you contact Philips ensure that the apparatus is nearby and the model number and serial number are available No power Ensure that the AC power cord of the unit is connect...

Page 25: ... 2012 Koninklijke Philips Electronics N V All rights reserved DCB7005_10_UM_V3 0 ...

Reviews: