background image

7

EN

English

Menus overview

Menus

Default 

cooking 

time

Cooking time 

regulating 

range

Preset 

time

Default 

cooking 

temperature

Temperature 

regulating 

range

Rice (Riz)

40 min

/

1-24 hr 130-140°C

/

Risotto (Risotto)

40 min

/

1-24 hr 130-140°C

/

Cereal (Céréales)

10 min

5 min - 2 hr

1-24 hr 90-100°C

/

Soup (Soupe/
Sauce)

1 hr

20 min-4 hr

1-24 hr 90-100°C

/

Steam (Vapeur)

20 min

5 min - 2 hr

1-24 hr 100°C

/

Stew (Mijoter)

1 hr

20 min - 10 hr 1-24 hr 95°C

/

Slow cooking  
(Slow cooking)

5 hr

1-15 hr

1-24 hr 80°C

/

Bake (Four)

45 min

20 min - 2 hr

/

130°C

40-160°C

Roast (Rissoler)

1 hr

/

/

130°C

/

Fry (Frire)

15 min

5-60 min

/

145-160°C

/

Pizza (Pizza)

35 min

10-60 min

/

130°C

/

Omelette 
(Omelette)

10 min

5-20 min

/

120°C

/

Pasta (Pâtes)

4 min

1-15 min

/

100°C

/

Boil (Bouillir)

4 min

1-15 min

/

100°C

/

Beverages


(Compote)

10 min

5-40 min

1-24 hr 100°C

/

Confiture 
(Confiture)

6 hr

4-10 hr

1-24 hr 90-100°C

/

Yogurt (Yaourt)

8 hr

6-12 hr

1-24 hr 40±3°C

/

Reheat 
(Réchauffer)

25 min

5-60 min

/

85°C

/

Manual (Manuel) 2 hr

5 min - 10 hr

1-24 hr 100°C

30-160°C

Multi-stage 
cooking 
(MyRecipe)

10 min

5 min - 15 hr

/

120°C

30-160°C

Note


You can adjust the cooking temperature for the baking and manual functions. For baking, 
the temperature is available from 40°C to 160°C; for the manual function, the temperature is 
available from 30°C to 160°C.


After the cooking has started, you can touch the Start/Cancel button (On/Off) to deactivate 
the current cooking process, and the multicooker will switch to the standby mode.

Summary of Contents for HD3198

Page 1: ...com welcome Recipe http www philips com welcome Warranty a b d e f c i h g 1 1 2 3 4 5 6 7 9 8 10 3 HD3198 Specifications are subject to change without notice 2018 Koninklijke Philips N V All rights reserved HD3198_UM_FR_v3 0 Always there to help you Register your product and get support from Question Contact Philips www philips com welcome ...

Page 2: ...11 12 13 14 15 16 17 18 19 20 21 22 23 24 25 26 32 3S 31 30 29 28 27 33 34 40 42 39 3S 41 36 35 37 38 43 45 3S 44 ...

Page 3: ...1 Baking Four 11 Roasting Rissoler 12 Frying Frire 12 Making pizza Pizza 12 Making omelette Omelette 13 Boiling pasta Pâtes 13 Boiling Bouillir 14 Making beverage Compote 14 Making confiture Confiture 14 Making yogurt Yaourt 15 Reheating Réchauffer 15 Manual Manuel 15 Multi stage cooking 16 MyRecipe MyRecipe 16 Warm keeping 17 Setting up the cooking time 17 Preset time for delayed cooking 18 Setti...

Page 4: ...e in a safe way and understand the hazards involved This appliance can be used by people with reduced physical sensory or mental capabilities or lack of experience and knowledge if they have been given supervision or instruction concerning use of the appliance in a safe way and understand the hazards involved Keep the appliance and its cord out of reach of children ages less than 8 years Cleaning ...

Page 5: ...tter must not be co located in conjunction with any other antenna or transmitter Check if the voltage indicated on the multicooker corresponds to the local power voltage before you connect it Check if the steam valve is clear before every cooking and becomes block during the cooking If the steam valve is blocked the pressure will increase in the appliance and the jet of steam could hurt and scald ...

Page 6: ...ct and the multicooker is used according to the user manual return it to the service center for checking and repair if necessary Only connect the multicooker to a grounded power outlet Always make sure that the plug is inserted firmly into the power outlet Do not use the appliance if the plug the power cord the inner pot the sealing ring or the main body is damaged Do not let the power cord hang o...

Page 7: ...id the steam The inner pot and steamer during and after cooking process may be hot and heavy Do not lift and move the multicooker while it is operating Do not exceed the maximum water level indicated in the inner pot to prevent overflow Do not place the cooking utensils inside the pot during cooking warm keeping or reheating Only use the cooking utensils provided Avoid using sharp utensils To avoi...

Page 8: ... a Multicooker main unit b Power cord c Measuring cup d Detachable steam tray e Rice scoop f Soup ladle g User manual h Recipe booklet i Warranty card 4 Overview fig 2 Product overview a Top lid b Inner pot c Lid release button d Control panel e Heating element f Main body g Power socket h Cooker handle i Water level indications j Detachable steam vent cap k Sealing ring Controls overview l Keep w...

Page 9: ... 10 60 min 130 C Omelette Omelette 10 min 5 20 min 120 C Pasta Pâtes 4 min 1 15 min 100 C Boil Bouillir 4 min 1 15 min 100 C Beverages Compote 10 min 5 40 min 1 24 hr 100 C Confiture Confiture 6 hr 4 10 hr 1 24 hr 90 100 C Yogurt Yaourt 8 hr 6 12 hr 1 24 hr 40 3 C Reheat Réchauffer 25 min 5 60 min 85 C Manual Manuel 2 hr 5 min 10 hr 1 24 hr 100 C 30 160 C Multi stage cooking MyRecipe 10 min 5 min ...

Page 10: ...n reset the multicooker including the WiFi module to factory mode To do so touch increase for 5 to 10 seconds and displays on the screen All the saved recipes and the previous WiFi connection will be removed after reset Tip To select a certain menu touch the menu button Menu repeatedly You can also touch the menu button Menu once and then touch the increase or decrease button to do so Before first...

Page 11: ...tto Risotto 1 Put the ingredients for the risotto into the inner pot 2 Wipe the outside of the inner pot dry fig d and then put it in the multicooker fig e 3 Close the lid of the multicooker fig f and put the plug in the power socket fig g 4 Touch the menu button Menu to select risotto Risotto fig j 5 Touch and hold the start button On Off for 3 seconds to confirm and start cooking fig i 6 When th...

Page 12: ...fig g 5 Touch the menu button Menu to select Steam Vapeur fig m To choose a different cooking time refer to chapter Setting up the cooking time 6 Touch and hold the start button On Off for 3 seconds to confirm and start cooking fig i 7 When the water is brought to boil the appliance beeps the remaining steaming time displays on the screen and starts counting down 8 When the cooking is finished the...

Page 13: ...ients to bake in the inner pot 2 Wipe the outside of the inner pot dry fig d and then put it in the multicooker fig e 3 Close the lid of the multicooker fig f and put the plug in the power socket fig g Note If you bake other food with a temperature above 140 C keep the lid open 4 Touch the menu button Menu to select bake Four fig p To choose a different baking temperature touch the temperature but...

Page 14: ...ver 8 When the cooking is finished the appliance beeps and turns into standby automatically Frying Frire 1 Put food and ingredients into the inner pot 2 Wipe the outside of the inner pot dry fig d and then put it in the multicooker fig e 3 Put the plug in the power socket fig g 4 Touch the menu button Menu to select fry Frire fig s 5 Touch and hold the start button On Off for 3 seconds to confirm ...

Page 15: ...nd start cooking fig i 6 When the cooking is finished the appliance beeps and turns into standby automatically Boiling pasta Pâtes 1 Fill the inner pot with some water Note Do not exceed the MAX indication on the inside of the inner pot 2 Wipe the outside of the inner pot dry fig d and then put it in the multicooker fig e 3 Close the lid of the multicooker fig f and put the plug in the power socke...

Page 16: ...Making beverage Compote 1 Put the ingredients for the beverage in the inner pot 2 Wipe the outside of the inner pot dry fig d and then put it in the multicooker fig e 3 Close the lid of the multicooker fig f and put the plug in the power socket fig g 4 Touch the menu button Menu to select beverage Compote fig x To choose a different cooking time refer to chapter Setting up the cooking time 5 Touch...

Page 17: ...of the multicooker fig f and put the plug in the power socket fig g 5 Touch the menu button Menu to select reheat Réchauffer fig To choose a different cooking time refer to chapter Setting up the cooking time 6 Touch and hold the start button On Off for 3 seconds to confirm and start cooking fig i 7 When the cooking is finished the appliance beeps and turns into warm keeping automatically Manual M...

Page 18: ...plays on the screen 5 Set the cooking time and temperature for stage 2 6 Repeat the above steps until you have set all the stages you need and then touch and hold the start button On Off for 3 seconds to confirm and start cooking fig i MyRecipe MyRecipe Saving MyRecipe settings Within 10 minutes after the stage cooking is finished you can save the cooking stages in MyRecipe 1 Touch and hold MyReci...

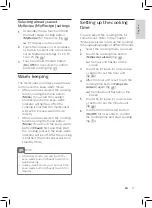
Page 19: ... keep warm button Chaud first and then start the cooking process the keep warm indicator will be off After the cooking is finished the multicooker will be in standby mode Note At standby mode you can touch the keep warm button Chaud to switch to warm keeping In keep warm mode you can touch the keep warm button Chaud to switch to standby Setting up the cooking time You can adjust the cooking time f...

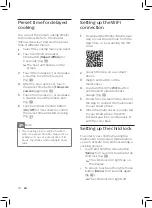
Page 20: ...t time of 8 hours the dishes will be ready 8 hours later Setting up the WiFi connection 1 Download the Philips Multicooker App to your smart phone from the App Store or by scanning the QR code 2 Launch the App on your smart phone 3 Plug in and switch on the multicooker 4 Touch and hold the WiFi button until the WiFi indicator blinks orange fig 5 Follow the onscreen instructions in the App to conne...

Page 21: ...etachable steam tray rice scoop soup ladle and detachable steam vent cap Soak in hot water and clean with sponge 7 Recycling This symbol means that this product shall not be disposed of with normal household waste 2012 19 EU Follow your country s rules for the separate collection of electrical and electronic products Correct disposal helps prevent negative consequences for the environment and huma...

Page 22: ... power output 860W Rated capacity 5 0L WiFi router 802 11 b g n 2 4GHz Compatible with iPhone 5 or higher Requires iOS 7 or higher The operating frequency bands of WIFI module are from 2400 MHz to 2483 5MHz The maximum RF output power is 100mW 20dBm ...

Page 23: ...f power Take the appliance to your Philips dealer or a service center authorized by Philips to have the battery replaced The rice is not cooked There is not enough water Add water according to the scale on the inside of the inner pot You did not touch and hold the start button On Off for 3 seconds Make sure that there is no foreign residue on the heating element and the outside of the inner pot be...

Page 24: ...utton Menu repeatedly to select the desired function as shown by the indicator Rice smells bad after cooking Clean the inner pot with some washing detergent and warm water After cooking make sure the steam vent cap inner lid and inner pot is cleaned thoroughly The WiFi indicator blinks blue and orange The WiFi connection has failed Unplug the multicooker and plug it in after 15 seconds Touch and h...

Page 25: ...g Cuisson lente 35 Faire cuire au four 35 Faire rissoler 36 Faire frire 37 Faire des pizzas 37 Faire une omelette 37 Faire cuire des pâtes 38 Faire cuire à l eau bouillante 38 Faire de la purée de fruits 39 Faire des confitures 39 Faire des yaourts 39 Faire réchauffer 40 Manuel 40 Cuisson en plusieurs étapes 41 MyRecipe 41 Mode de maintien au chaud 42 Le réglage du temps de cuisson 42 Programmatio...

Page 26: ... qu ils aient reçu des instructions quant à l utilisation sécurisée de l appareil et qu ils aient pris connaissance des dangers encourus Cet appareil peut être utilisé par des personnes dont les capacités physiques sensorielles ou intellectuelles sont réduites ou des personnes manquant d expérience et de connaissances à condition que ces personnes soient sous surveillance ou qu elles aient reçu de...

Page 27: ...surface de la résistance chauffante reste chaude pendant un certain temps L appareil n est pas destiné à être utilisé avec un minuteur externe ou un système de contrôle séparé Pour respecter les exigences relatives à l exposition au rayonnement RF cet appareil doit être utilisé à une distance minimale de 20 centimètres de toute personne lorsque le routeur Wi Fi est allumé L antenne utilisée pour l...

Page 28: ...r multifonction si le couvercle supérieur était ouvert pendant la cuisson Elle peut facilement être essuyée à l aide d un chiffon propre et une cuisson en continu Si de l eau des aliments liquides s écoulent directement de la soupape de vapeur ou entre le couvercle supérieur et le corps principal éteignez immédiatement le cuiseur multifonction Vérifiez si la quantité d eau dans la cuve ne dépasse ...

Page 29: ...vos mains sont mouillées Ne versez pas une trop grande quantité d huile de cuisson dans la cuve pour frire des ingrédients Attention N utilisez jamais d accessoires ou de pièces d un autre fabricant ou n ayant pas été spécifiquement recommandés par Philips L utilisation de ce type d accessoires ou de pièces entraîne l annulation de la garantie N exposez pas le cuiseur multifonction à des températu...

Page 30: ...aximal indiqué dans la cuve Ne placez pas les ustensiles à l intérieur de la cuve durant la cuisson le maintien au chaud ou le réchauffage Utilisez uniquement les ustensiles de cuisine fournis Évitez d utiliser des ustensiles coupants Il est déconseillé de cuisiner des crustacés et des coquillages afin d éviter les rayures Ôtez les coquilles et carapaces avant la cuisson N insérez pas d objet méta...

Page 31: ...cuiseur multifonction est employé de manière inappropriée à des fins professionnelles ou semi professionnelles ou en non conformité avec les instructions de ce mode d emploi la garantie est caduque et Philips décline toute responsabilité concernant les dégâts occasionnés Champs électromagnétiques CEM Cet appareil Philips est conforme à toutes les normes et à tous les règlements applicables relatif...

Page 32: ...outon de cuisson en plusieurs étapes et MyRecipe u Bouton d augmentation v Bouton marche arrêt 4 Vue d ensemble fig 2 Présentation du produit a Couvercle supérieur b Cuve c Bouton de déverrouillage du couvercle d Panneau de commande e Résistance chauffante f Corps de l appareil g Prise secteur h Poignée du cuiseur i Indications du niveau d eau j Capuchon amovible des évents à vapeur k Anneau d éta...

Page 33: ...45 160 C Pizza 35 min 10 60 min 130 C Omelette 10 min 5 20 min 120 C Pâtes 4 min 1 15 min 100 C Bouillir 4 min 1 15 min 100 C Compote 10 min 5 40 min 1 24 h 100 C Confiture 6 h 4 10 h 1 24 h 90 100 C Yaourt 8 h 6 12 h 1 24 h 40 3 C Réchauffer 25 min 5 60 min 85 C Manuel 2 h 5 min 10 h 1 24 h 100 C 30 160 C Cuisson en plusieurs étapes MyRecipe 10 min 5 min 15 h 120 C 30 160 C Note Vous pouvez régle...

Page 34: ...30 secondes après le branchement du cuiseur multifonction vous pouvez restaurer les paramètres par défaut du cuiseur multifonction y compris le module Wi Fi Pour ce faire touchez pendant 5 à 10 secondes et apparaît sur l afficheur Toutes les recettes enregistrées et la connexion Wi Fi précédente seront perdues après la réinitialisation Conseil Pour sélectionner un menu particulier touchez le bouto...

Page 35: ...rsque la cuisson est terminée l appareil émet un signal sonore et maintient au chaud automatiquement Note Cet appareil maintient au chaud pendant 12 heures ensuite il émet un signal sonore et entame un processus de refroidissement Faire cuire du risotto 1 Dans la cuve mettez les ingrédients nécessaires à la préparation du risotto 2 Essuyez la partie externe de la cuve fig d et placez la dans le cu...

Page 36: ...férent reportez vous au chapitre Réglage du temps de cuisson 5 Maintenez le bouton Marche Arrêt On Off enfoncé pendant 3 secondes pour confirmer et démarrer la cuisson fig i 6 Lorsque la cuisson est terminée l appareil émet un signal sonore et maintient au chaud automatiquement Vapeur 1 Versez un peu d eau dans la cuve 2 Placez le plateau de cuisson vapeur dans la cuve mettez les aliments dans un ...

Page 37: ...endant 3 secondes pour confirmer et démarrer la cuisson fig i 6 Lorsque la cuisson est terminée l appareil émet un signal sonore et maintient au chaud automatiquement Slow cooking Cuisson lente 1 Mettez les ingrédients pour cuisson lente dans la cuve 2 Essuyez la partie externe de la cuve fig d et placez la dans le cuiseur multifonction fig e 3 Fermez le couvercle du cuiseur multifonction fig f et...

Page 38: ...cuisine ou un torchon car la cuve risque d être brûlante Faire rissoler 1 Mettez les ingrédients dans la cuve 2 Essuyez la partie externe de la cuve fig d et placez la dans le cuiseur multifonction fig e 3 Fermez le couvercle du cuiseur multifonction fig f et branchez le cordon d alimentation sur la prise secteur fig g 4 Appuyez sur le bouton Menu et sélectionnez la fonction Rissoler fig r 5 Maint...

Page 39: ...r la prise secteur fig g 4 Touchez le bouton Menu et sélectionnez la fonction Pizza fig t Pour sélectionner un temps de cuisson différent reportez vous au chapitre Réglage du temps de cuisson 5 Maintenez le bouton Marche Arrêt On Off enfoncé pendant 3 secondes pour confirmer et démarrer la cuisson fig i 6 Lorsque la cuisson est terminée l appareil émet un signal sonore et maintient au chaud automa...

Page 40: ...z le couvercle ouvert et remuez en permanence les pâtes avec une spatule 9 Lorsque la cuisson est terminée l appareil émet un signal sonore et se met automatiquement en veille Faire cuire à l eau bouillante 1 Remplissez la cuve avec de l eau Note Ne dépassez pas l indication MAX à l intérieur de la cuve 2 Essuyez la partie externe de la cuve fig d et placez la dans le cuiseur multifonction fig e 3...

Page 41: ...hez le cordon d alimentation sur la prise secteur fig g 4 Touchez le bouton Menu et sélectionnez la fonction Confiture fig y Pour sélectionner un temps de cuisson différent reportez vous au chapitre Réglage du temps de cuisson 5 Maintenez le bouton Marche Arrêt On Off enfoncé pendant 3 secondes pour confirmer et démarrer la cuisson fig i 6 Lorsque la cuisson est terminée l appareil émet un signal ...

Page 42: ...u temps de cuisson et du thermostat 1 Mettez les ingrédients dans la cuve 2 Essuyez la partie externe de la cuve fig d et placez la dans le cuiseur multifonction fig e 3 Fermez le couvercle du cuiseur multifonction fig f et branchez le cordon d alimentation sur la prise secteur fig g 4 Touchez le bouton Menu et sélectionnez le mode Manuel fig Pour sélectionner une température de cuisson différente...

Page 43: ...us ayez réglé toutes les phases nécessaires puis maintenez le bouton Marche Arrêt On Off enfoncé pendant 3 secondes pour confirmer et démarrer la cuisson fig i MyRecipe Enregistrement des réglages MyRecipe Dans un délai de 10 minutes après la fin de la cuisson par étapes vous pouvez enregistrer les étapes de cuisson dans MyRecipe 1 Maintenez enfoncé MyRecipe pendant 3 secondes fig F1 apparaît sur ...

Page 44: ... 3 secondes pour confirmer le temps et démarrer la cuisson fig i Sélection des réglages MyRecipe déjà enregistrés 1 En mode veille maintenez enfoncé le bouton de cuisson en plusieurs étapes MyRecipe pendant 3 secondes fig F1 apparaît sur l afficheur 2 Touchez le bouton d augmentation ou de diminution pour sélectionner l un des réglages MyRecipe précédemment enregistrés F1 F2 F3 F4 ou F5 fig 3 Main...

Page 45: ...cuiseur multifonction est connecté à votre smartphone le voyant WiFi reste allumé en bleu Programmation pour une cuisson ultérieure Vous pouvez définir le temps de cuisson programmé pour certains menus Reportez vous au chapitre Présentation des menus pour consulter le temps de cuisson programmé de différents menus 1 Sélectionnez le menu que vous voulez préparer 2 Maintenez enfoncé le bouton Départ...

Page 46: ...eillez à enlever tous les résidus d aliments autour du panneau de commande Accessoires Cuve plateau de cuisson vapeur amovible mesure à riz louche et capuchon amovible des évents à vapeur Trempez dans de l eau chaude et nettoyez à l aide d une éponge Configuration de la fonction verrouillage enfant Pour empêcher votre enfant d utiliser le cuiseur multifonction ou pour éviter tout dysfonctionnement...

Page 47: ...ures ménagères 2012 19 UE Respectez les règles en vigueur dans votre pays pour la mise au rebut des produits électriques et électroniques Une mise au rebut correcte contribue à préserver l environnement et la santé 8 Garantie et service Si vous rencontrez un problème ou si vous souhaitez obtenir des informations ou faire réparer votre appareil rendez vous sur le site Web de Philips à l adresse www...

Page 48: ...ice Agréé Philips pour remplacer la batterie Le riz n est pas cuit Il n y a pas assez d eau Ajoutez de l eau jusqu au niveau correspondant à l intérieur de la cuve Vous n avez pas maintenu enfoncé le bouton Marche Arrêt On Off pendant 3 secondes Assurez vous qu aucun résidu ne se trouve sur l élément chauffant et l extérieur de la cuve avant d allumer le cuiseur multifonction L élément chauffant e...

Page 49: ...t pas bon après la cuisson Nettoyez la cuve à l eau chaude savonneuse Après la cuisson veillez à nettoyer soigneusement le capuchon des évents à vapeur le couvercle intérieur et la cuve Le voyant WiFi clignote en bleu et en orange La connexion WiFi a été perdue Débranchez le cuiseur multifonction puis rebranchez le au bout de 15 secondes Maintenez enfoncé le bouton WiFi du cuiseur multifonction ju...

Page 50: ......

Reviews: