Top Case Assemblies
4
-
42
Removal and Replacement
SpO
2
Connector
The SpO
2
Connector is located in the corner of the top case, next to the ECG
Connector.
CAUTION
See cautions regarding handling and connection of flex circuits on page 4-1.
Removal
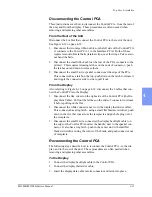
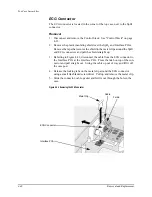
1. Disconnect and remove the ECG Connector. See "ECG Connector" on
page 4-40.
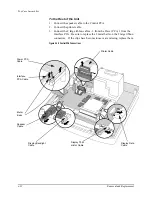
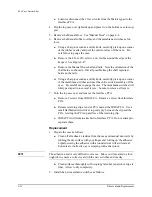
2. Remove the 2 screws from the SpO
2
PCA. See Figure 4-22.
3. Lift up the PCA gently. Pivot to make the underside visible as shown in
4. Note the orientation and placement of the flex circuit between the SpO
2
connector and the SpO
2
PCA. Disconnect it at the SpO
2
PCA. There is
no latch - just pull it straight out.
5. Leave the flex circuit from the SpO
2
PCA to the Interface PCA con-
nected.
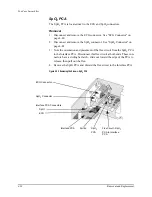
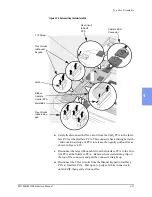
6. Release the locking tabs on the metal clip around the SpO
2
connector
using a small flat-bladed screwdriver. Pull up and remove the metal clip.
See Figure 4-25.
7. Slide the connector, gasket, and flex circuit out through the hole in the
case.
Figure 4-25 Removing the SpO
2
Connector
Metal Clip
SpO2 PCA
SpO
2
Connector
Summary of Contents for Heartstart XLT
Page 1: ...H E A R T S TA R T X LT S e r v i c e M a n u a l M 3 5 0 0 B M 5 5 0 0 B ...
Page 2: ......
Page 3: ...Service Manual M3500B HeartStart XLT M5500B Heartstart 4000 Defibrillator Monitor ...
Page 6: ......
Page 16: ......
Page 20: ......
Page 52: ......
Page 216: ......
Page 223: ......
Page 224: ...M3500 90900 Printed in USA February 2003 Second Edition M3500 90900 2 ...


