background image


&    ,C6435/PB,
HP6436/PB: )  

- C)   &  % "

 '   &    
)  %   "&.

- 9      )

( ,C6106)     %
( ,C2911)  ! 1  2 "&,  
"      %  
5% % (   "&)
      "  
2.

$ & "  

?      " 2    !
    "  
&5,    
  %  Philips   %!
www.philips.com  '    
)  +  Philips   "+
  (! 5  '   %!
 %  ). ?  %  "
)  +   "+  ,
!!   & & '
Philips  '      5.

102

Summary of Contents for HP4635/PB

Page 1: ...ENGLISH 4 DEUTSCH 16 FRANÇAIS 28 NEDERLANDS 40 ESPAÑOL 52 ITALIANO 65 PORTUGUÊS 77 89 TÜRKÇE 103 HP6438 6437 6436 6435 6434 6433PB 3 ...

Page 2: ...llimetres and pull them out by the roots The hairs that grow back are soft and downy So no stubble Important Check if the mains voltage indicated on the appliance corresponds to your local mains voltage before you connect the appliance Make sure the appliance does not come into contact with water Keep the appliance out of the reach of children To prevent damage and injuries keep the running applia...

Page 3: ... problems should occur please contact your doctor as well Because the appliance pulls the hairs out by the roots the skin may be slightly sensitive or become somewhat red and irritated This phenomenon is absolutely normal especially when you have just started using the appliance and will quickly disappear As you use the appliance more often the skin irritation will decrease Moreover the hairs that...

Page 4: ...ar massages with a loofah types HP6433 PB HP6434 PB HP6435 PB only may help prevent ingrown hairs When the skin surface is carefully scrubbed with a loofah fine hairs will continue to grow without a problem Do not scrub immediately before or after epilating Applying a mild cream or body milk after epilation will help to reduce any skin irritation that may develop Hairs are easier to remove after y...

Page 5: ... you start epilating Make sure the outside of the skin cooler is completely dry before you freeze it Tip You can store the skin cooler in the freezer permanently Epilating the legs Make sure your skin is clean and free of grease and cream Do not use cream right before you start epilating C 1 Slide the frozen skin cooler into the protective sleeve C 2 Snap the skin cooler onto the appliance 3 Put t...

Page 6: ...kin with your free hand to make the hairs stand upright C 6 Place the appliance on the skin at right angles with the cord pointing towards you and move it against the direction of hair growth Make sure both the epilating discs and the skin cooler touch your skin Do not press the appliance onto the skin C 7 Be sure to stretch your leg when you epilate the back of your knee C 8 Switch the appliance ...

Page 7: ...the hairs are not too long max 1 cm long 1 Switch the appliance off C 2 Place the precision cap on the appliance The precision cap only fits onto the appliance in one way C 3 Snap the skin cooler in its protective sleeve onto the appliance C 4 Switch the appliance on by selecting the desired speed We advise you to use speed II C 5 Stretch the skin with your free hand and place the appliance on the...

Page 8: ...ion 1 Switch the appliance off C 2 Remove the epilating head Press the ribbed sections and slide the epilating head off the appliance in the direction of the arrow C 3 Snap the shaving head onto the appliance by pushing it against the direction of the arrow Click The shaving head can only be mounted on the appliance in one way C 4 Switch the appliance on by selecting the desired speed We advise yo...

Page 9: ...o the appliance in one way 5 Switch the appliance on Choose speed I or II depending on the required exfoliating strength We recommend exfoliating each leg for 1 3 minutes To obtain a good skin appearance use the exfoliating head once or twice a week Don t use any cream foam gel or lotion just before or during the exfoliation Don t use the exfoliating head within two days after epilation For hygien...

Page 10: ... to clean the appliance C 1 Switch the appliance off and pull the plug out of the wall socket C 2 Remove the skin cooler C 3 Slide the protective sleeve off the skin cooler C 4 Rinse the skin cooler and the protective sleeve under the tap or clean them with a moist cloth Make sure the outside of the skin cooler is completely dry before you put it in the freezer or freezing compartment ENGLISH 12 ...

Page 11: ...iscs with the brush Never try to detach the epilating discs from the appliance C 8 Slide the epilating head back onto the appliance against the direction of the arrow The epilating head only fits onto the appliance in one way Cleaning the shaving head types HP6435 PB HP6436 PB HP6438 PB only 1 Remove the shaving head C 2 Clean the hair chamber and the cutter block with the brush To avoid damage do...

Page 12: ...he exfoliating head under a running tap Do not rinse the epilator with water The exfoliating head can be dried with a towel Storage 1 Put the protective cap back onto the appliance after cleaning 2 Store the appliance and the accessories in the pouch 3 Put the skin cooler in the freezer cassette and put this cassette in the freezer or in the freezing compartment ENGLISH 14 ...

Page 13: ...mes a week or more often and replace them when they are damaged Service information If you need information or if you have a problem please visit the Philips Web site at www philips com or contact the Philips Customer Care Centre in your country you will find its phone number in the worldwide guarantee leaflet If there is no Customer Care Centre in your country turn to your local Philips dealer or...

Page 14: ...en Pinzetten erfassen auch die kürzesten Härchen bis zu 0 5 mm und zupfen sie sanft an der Wurzel heraus Die nachwachsenden Härchen sind dünn und zart Keine Stoppeln mehr Wichtig Prüfen Sie bevor Sie das Gerät in Betrieb nehmen ob die Spannungsangabe auf dem Gerät mit der örtlichen Netzspannung übereinstimmt Achten Sie darauf dass das Gerät nicht mit Wasser in Berührung kommt Halten Sie das Gerät ...

Page 15: ...es gilt bei geschwächter Abwehrlage z B bei Diabetes mellitus Zuckerkrankheit Schwangerschaft Hämophilie und Immunschwäsche Nach der ersten Anwendung des Geräts könnten Sie ein leichtes Unbehagen empfinden da die Haare an der Haarwurzel entfernt werden Das geht nach wenigen Anwendungen vorüber Außerdem lassen sich die nachwachsenden Härchen leichter entfernen da sie weicher und dünner sind Sollte ...

Page 16: ...erhindert dass Härchen in die Haut wachsen Bei regelmäßiger Anwendung eines Luffa Schwamms wachsen die Härchen normal Massieren Sie aber nicht unmittelbar vor oder nach dem Epilieren Nach dem Epilieren können Sie eine milde Creme oder eine Body Lotion auftragen um eventuell auftretende Hautreizungen zu lindern Das Epilieren ist nach einem Dusch oder Vollbad am leichtesten Ihre Haut muss aber völli...

Page 17: ...en Ihre Haut muss bei der Anwendung sauber fettfrei und absolut trocken sein Verwenden Sie vor dem Epilieren keine Cremes C 1 Setzen Sie die Schutzkappe auf den gekühlten Skin Cooler C 2 Drücken Sie den Skin Cooler auf das Gerät 3 Stecken Sie den Stecker in die Steckdose C 4 Schalten Sie das Gerät ein indem Sie die gewünschte Geschwindigkeit wählen Geschwindigkeit I Für Stellen mit schwacher Behaa...

Page 18: ...als auch der Skin Cooler Ihre Haut berühren Drücken Sie das Gerät nicht auf die Haut C 7 Strecken Sie Ihr Bein wenn Sie die Kniekehlen epilieren C 8 Schalten Sie das Gerät aus indem Sie den Schalter auf O stellen Achselhöhlen und Bikini Zone Nur Type HP6434 PB HP6437 PB HP6438 PB Epilieren Ihr Gerät ist mit einer Präzisionskappe ausgerüstet Sie reduziert die Anzahl der wirksamen Pinzetten während ...

Page 19: ...aufsetzen C 3 Drücken Sie den Skin Cooler in der Schutzkappe auf das Gerät C 4 Schalten Sie das Gerät ein indem Sie die gewünschte Geschwindigkeit wählen Wir empfehlen Geschwindigkeit II C 5 Spannen Sie die Haut mit der freien Hand und setzen Sie das Gerät senkrecht auf Ihre Haut Achten Sie darauf dass sowohl die Epilierpinzetten als auch der Skin Cooler Ihre Haut berühren 6 Führen Sie das Gerät l...

Page 20: ...iffelten Fläche der Epiliereinheit und schieben Sie sie in Pfeilrichtung vom Gerät herunter C 3 Schieben Sie die Rasiereinheit in Gegenrichtung des Pfeiles auf der Rasiereinheit bis zum Einrasten Klick auf das Gerät Die Rasiereinheit kann nur in einer Richtung aufgesetzt werden C 4 Schalten Sie das Gerät ein indem Sie die gewünschte Geschwindigkeit wählen Wir empfehlen Geschwindigkeit I C 5 Setzen...

Page 21: ...ät 3 Nehmen Sie den Skin Cooler ab C 4 Schieben Sie den Peelingaufsatz auf das Gerät Er lässt sich nur in einer Richtung aufsetzen 5 Schalten Sie das Gerät ein Wählen Sie Geschwindigkeit I oder II abhängig von der erwünschten Peelingintensität Wir empfehlenjedes Bein 1 3 Minuten zu behandeln Um ein gutes Ergebnis zu erzielen verwenden Sie die Peelingeinheit ein bis zwei mal pro Woche Verwenden Sie...

Page 22: ...reme oder Körperlotion nach der Exfoliation angewandt führt der Haut Feuchtigkeit zu und verbessert ihr Aussehen Reinigung des Geräts Verwenden Sie keine scharfen Reinigungs und Scheuermittel oder Lösungsmittel wie Benzin oder Aceton C 1 Schalten Sie das Gerät aus und ziehen Sie den Stecker aus der Steckdose C 2 Nehmen Sie den Skin Cooler ab C 3 Nehmen Sie die Schutzkappe vom Skin Cooler ab DEUTSC...

Page 23: ... C 6 Nehmen Sie die Epiliereinheit vom Gerät Drücken Sie auf die geriffelten Fläche der Epiliereinheit und schieben Sie sie in Pfeilrichtung vom Gerät herunter C 7 Reinigen Sie alle zugänglichen Teile und die Pinzetten mit der Bürste Versuchen Sie niemals die Pinzetten Epilierscheiben vom Gerät abzunehmen C 8 Schieben Sie die Epiliereinheit in Gegenrichtung zu dem auf ihm angebrachten Pfeil wieder...

Page 24: ...der auf Nur Type HP6437 PB und HP6438 PB Reinigung des Exfoliationskopfes 1 Schalten Sie das Gerät aus C 2 Schieben Sie den Peelingaufsatz in Pfeilrichtung vom Gerät C 3 Spülen Sie den Peelingaufsatz unter fließendem Wasser ab Spülen Sie den Epilator nicht mit Wasser ab Der Peelingaufsatz kann mit einem Handtuch abgetrocknet werden Aufbewahrung 1 Setzen Sie nach Gebrauch die Schutzkappe auf das Ge...

Page 25: ... HP2911 bei normalem Gebrauch von ein oder zweimal pro Woche oder häufiger nach einem oder zwei Jahren bzw vorher wenn ein sollchesTeil beschädigt ist Garantie und Service Wenden Sie sich mit Ihren Fragen Wünschen und Problemen bitte an das Philips Service Center in Ihrem Lande Sollte sich in Ihrem Lande kein solches Center befinden so wenden Sie sich bitte an das Service Department von Philips Do...

Page 26: ...té à l épilation de vos jambes Les disques rotatifs attrapent même les poils les plus courts 0 5 mm et les retirent à partir de la racine Le poil qui repouse est doux et fin Plus de poils durs Important Avant de brancher l appareil vérifiez que la tension indiquée sur celui ci correspond à la tension de votre secteur Ne laissez pas l appareil en contact avec de l eau Conservez l appareil à l écart...

Page 27: ...s s appliquent aux personnes ayant des protections immunitaires reduites par exemple les femmes enceintes les diabétiques les hémophiles ou les déficients immunitaires En cas de problème consultez votre médecin L appareil retire les poils avec leurs racines et donc cela peut provoquer un rougissement ou une irritation de la peau Il s agit d une réaction normale surtout quand vous utilisez l appare...

Page 28: ...sage régulier de la peau avec un gant végétal ou un loofah Type HP6433 PB HP6434 PB HP6435 PB uniquemen de massage peut vous aider à éviter les poils incarnés Quand la surface de la peau est brossée avec un loofah les poils fins continueront à croître sans problèmes Ne brossez pas la surface de la peau immédiatement avant ou après l épilation Après utilisation vous pouvez appliquer une crême douce...

Page 29: ...le pack givrant est parfaitement sec avant de le congeler Suggestion Vous pouvez conserver le pack givrant dans le freezer du réfrigérateur en permanence Epilation des jambes Assurez vous que votre peau soit propre sans huile ni crêmes N appliquez aucune crême avant l épilation C 1 Glissez le pack givrant dans son manchon C 2 Cliquetez le pack givrant et son manchon sur l appareil 3 Branchez la fi...

Page 30: ...a peau avec votre main libre pour redresser les poils C 6 Placez l appareil à angle droit sur la peau avec le commutateur marche arrêt dans le sens de déplacement de l appareil Déplacez l appareil lentement sur la peau dans le sens inverse de la pousse des poils Assurez vous que les disques épilateurs et le pack givrant touchent votre peau N exercez pas de pression C 7 Il faut allonger la jambe qu...

Page 31: ...tez l appareil C 2 Placez l adapteur de précision L adapteur de précision ne peut être fixé que dans une seule direction C 3 Cliquez le pack givrant et son manchon sur l appareil C 4 Mettez en marche l appareil en sélectionant la vitesse désirée Nous vous conseillons d utiliser la vitesse II C 5 Assurez vous que la peau est tendue et placez l appareil à angle droit sur la peau Assurez vous que les...

Page 32: ... épilation Appuyez sur les sections striées et faîtes glisser la tête dans la direction de la flèche C 3 Encliquetez la tête de rasage sur l appareil et pressez la en sens inverse Click La tête de rasage peut être monté sur l appareil dans une seule direction C 4 Mettez en marche l appareil en sélectionant la vitesse désirée Nous vous conseillons d utiliser la vitesse I C 5 Placez la tondeuse et l...

Page 33: ... d exfoliation peut être montée sur l appareil dans une seule position 5 Mettez en marche l appareil Sélectionnez la vitesse I ou II selon l intensité d exfoliation nécessaire Nous vous recommandons que l exfoliation de chaque jambe ne dure pas plus de 1 à 3 minutes Pour obtenir les meilleurs résultats utilisez la tête d exfoliation une fois ou deux fois par semaine N appliquez aucune crême mousse...

Page 34: ...rès l épilation Nettoyage de l appareil N utilisez pas des détergents corrosifs des chiffons à récurer de l essence acétone etc pour nettoyer l appareil C 1 Arrêtez l appareil et retirez la fiche d alimentation secteur de la prise murale C 2 Otez le pack givrant C 3 Retirez le manchon du pack givrant C 4 Rincez le pack givrant et son manchon protecteur ou nettoyez les avec un chiffon humide Assure...

Page 35: ... accessibles et les disques d épilation avec une brosse N essayez jamais de retirer les disques d épilation de l appareil C 8 Remettez la tête de rasage sur l appareil et pressez la dans la direction inverse de la flèche La tête de rasage peut être montée sur l appareil dans une seule direction Nettoyage de la tête de rasage type HP6435 PB HP6436 PB HP6438 PB uniquement 1 Enlevez la tête de rasage...

Page 36: ...ez la tête d exfoliation à l eau du robinet Ne rincez pas l épilateur à l eau La tête d exfoliation peut être séchée à l aide d une serviette Rangement 1 Remettez le capot de protection sur l appareil après utilisation 2 Conservez l appareil et les accessoires dans un étui 3 Mettez le pack givrant dans son coffret et placez le au freezer ou dans la partie congélateur du réfrigérateur FRANÇAIS 38 ...

Page 37: ...ou deux fois par semaine ou plus souvent et remplacez les quand ils sont endommagés Service et information Pour plus d informations visitez notre Philips Web site www philips com ou veuillez contacter le Service Consommateurs Philips de votre pays vous trouverez le numéro de téléphone dans le dépliant sur la garantie internationale S il n y a aucun Service Consommateurs Philips dans votre pays con...

Page 38: ...gevangen en met wortel en al uitgetrokken De haartjes die mogelijk na enige tijd zullen verschijnen zijn donzig zacht Dus geen stoppels Belangrijk Controleer of het op het apparaat aangegeven voltage overeenkomt met de netspanning in uw woning voordat u het apparaat aansluit Voorkom dat het apparaat in contact komt met water Houd het apparaat uit de buurt van kinderen Voorkom verwonding of beschad...

Page 39: ...odeficiëntie lijdt is het mogelijk dat u gevoeliger bent Mochten er problemen optreden neem dan contact op met uw huisarts Doordat de haartjes met de haarwortels worden uitgetrokken kan de huid wat gevoelig rood of geirriteerd zijn Dit verschijnsel is heel normaal met name wanneer u het apparaat voor het eerst gebruikt en zal spoedig weer verdwijnen Naarmate u het apparaat vaker gebruikt zal de ir...

Page 40: ...akt en goed onderhoudt Tips Regelmatig masseren met een massagehandschoen loofah Alleen type HP6433 PB HP6434 PB HP6435 PB kan helpen voorkomen dat haartjes gaan ingroeien Door voorzichtig de bovenste huidlaag te scrubben kunnen fijne haartjes probleemloos doorgroeien Scrub bij voorkeur niet direct voor of na het epileren Een milde crème helpt na gebruik van het apparaat eventuele huidirritaties t...

Page 41: ...iggen voordat u gaat epileren Zorg dat de buitenzijde van de huidkoeler droog is voor u deze invriest Tip U kunt de huidkoeler ook permanent in de vrieskist of het vriesvak bewaren Benen epileren Zorg ervoor dat uw huid schoon niet vet en vrij van crème is Gebruik geen creme vlak voor het ontharen C 1 Schuif de beschermhuls om de bevroren huidkoeler C 2 Klik de huidkoeler aan het apparaat 3 Steek ...

Page 42: ...and strak zodat de haartjes goed rechtop staan C 6 Plaats het apparaat loodrecht op de huid met het snoertje naar u toe wijzend en beweeg het tegen de haargroeirichting in Zorg ervoor dat zowel de epileerschijfjes als de huidkoeler contact maken met uw huid Oefen tijdens het epileren geen druk uit op het apparaat C 7 Houd uw been goed gestrekt wanneer u uw knieholte epileert C 8 Schakel het appara...

Page 43: ...chakel het apparaat uit C 2 Plaats de precision cap op het apparaat De precision cap kan maar op een manier op het apparaat worden geplaatst C 3 Klik de huidkoeler met de beschermhuls aan het apparaat C 4 Schakel het apparaat in door de gewenste snelheid te kiezen Wij adviseren u snelheid II te gebruiken C 5 Houd de huid strak en plaats het apparaat loodrecht op de huid Zorg ervoor dat zowel de ep...

Page 44: ... epileerhoofd Druk op de geribbelde vlakjes en schuif het epileerhoofd in de richting van de pijl van het apparaat af C 3 Plaats het scheerhoofd op het apparaat door het tegen de richting van de pijl in te schuiven Klik Het scheerhoofd kan slechts op een manier op het apparaat worden geschoven C 4 Schakel het apparaat in door de gewenste snelheid te kiezen Wij adviseren u snelheid I te gebruiken C...

Page 45: ...essoire op het apparaat Dit onderdeel kan maar op één manier op het apparaat bevestigd worden 5 Schakel het apparaat in Kies snelheid I of II afhankelijk van de gewenste peelingintensiteit We adviseren u elk been 1 tot 3 minuten te peelen Gebruik het peelingaccessoire één of twee keer per week om uw huid er goed uit te laten zien Gebruik geen crème schuim gel of lotion vlak voordat u gaat peelen G...

Page 46: ...erbeteren Het apparaat schoonmaken Gebruik geen agressieve schoonmaakmiddelen schuurdoekjes schuursponsjes benzine aceton e d C 1 Schakel het apparaat uit en haal de stekker uit het stopcontact C 2 Verwijder de huidkoeler C 3 Neem de beschermhuls van de huidkoeler af C 4 Spoel de huidkoeler en de beschermhuls af of reinig deze met een vochtige doek Zorg dat de buitenzijde van de huidkoeler droog i...

Page 47: ...obeer nooit de epileerschijfjes los te maken van het apparaat C 8 Plaats het epileerhoofd weer terug op het apparaat door het tegen de richting van de pijlen in te schuiven Het epileerhoofd kan slechts op een manier op het apparaat worden geschoven Scheerhoofd schoonmaken alleen type HP6435 PB HP6436 PB HP6438 PB 1 Verwijder het scheerhoofd C 2 Borstel de haarkamer en het messenblok schoon Oefen g...

Page 48: ...el het peelingaccessoire af onder de kraan Spoel niet het apparaat af met water U kunt het peelingaccessoire met een handdoek afdrogen Opbergen 1 Plaats altijd na gebruik de beschermkap op het apparaat 2 Bewaar het apparaat en de accessoires in het etui 3 Doe de huidkoeler in de vriescassette en leg deze in de vrieskist of in het vriesvak NEDERLANDS 50 ...

Page 49: ...r week of vaker gebruikt of wanneer deze beschadigd zijn Service informatie Als u informatie nodig heeft of als u een probleem heeft bezoek dan onze Website www philips com of neem contact op met het Philips Customer Care Centre in uw land u vindt het telefoonnummer in het worldwide guarantee vouwblad Als er geen Customer Care Centre in uw land is ga dan naar uw Philips dealer of neem contact op m...

Page 50: ...adora Satinxice es particularmente adecuada para las piernas Los discos depiladores que giran rápidamente atrapan incluso el vello más corto 0 5 mm y lo arrancan de raíz El vello que vuelve a aparecer es más suave y fino Por tanto no más piernas ásperas Importante Antes de enchufarlo compruebe que el voltaje indicado en el aparato se corresponde con el voltaje de su hogar Asegúrese de que el apara...

Page 51: ... venas varicosas granos lunares con pelos o rasguños sin consultar primero a su médico Si tiene una reducida respuesta inmunológica por ejemplo durante el embarazo o si padece diabetis mellitus hemofilia o inmunodeficiencia puede que sea más susceptible Si aparece cualquier problema consulte también a su médico Dado que el aparato arranca el vello de raíz la piel puede volverse ligeramente sensibl...

Page 52: ...que primero pruebe el aparato sobre una pequeña zona de su piel Una limpieza regular y un adecuado mantenimiento garantizan los mejores resultados y la más larga vida del aparato Consejos Un masaje regular de la piel con una esponja vegetal exfoliante sólo en los modelos HP6433 PB HP6434 PB HP6435 PB puede ayudarle a evitar que el vello crezca hacia dentro El frotar cuidadosamente la superficie de...

Page 53: ...cador de Frío C 2 Ponga el Aplicador de Frío sin la funda protectora en el estuche congelador e introdúzcalo en el congelador durante al menos 6 horas antes de empezar la depilación Antes de congelarlo asegúrese de que el exterior del Aplicador de Frío esté completamente seco Consejo Puede guardar permanentemente el Aplicador de Frío en el congelador Cómo depilarse las piernas Asegúrese de que su ...

Page 54: ...nte bajo la piel como rodillas y tobillos Velocidad II Para zonas más amplias o donde el vello crece más fuerte C 5 Con su mano libre mantenga la piel tirante para hacer que el vello se levante C 6 Coloque el aparato en ángulo recto sobre la piel con el cable de red hacia usted y muévalo en sentido contrario al del crecimiento del vello Asegúrese de que tanto los discos depiladores como el Aplicad...

Page 55: ...recisión disminuye el número de discos activos y estira la piel durante la depilación Es particularmente adecuado para depilar las axilas y la línea del bikini Obtendrá los mejores resultados cuando el vello no sea demasiado largo de 1 cm como máximo 1 Apague el aparato C 2 Coloque el adaptador de precisión en el aparato El adaptador de precisión sólo puede colocarse de una forma en el aparato C 3...

Page 56: ... a la del crecimiento del vello Depilación de corte sólo modelos HP6435 PB HP6436 PB HP6438 PB Puede usar el cabezal de depilación de corte para depilar zonas sensibles de su cuerpo tales como las axilas y la línea del bikini Con el cabezal de depilación de corte obtendrá un resultado uniforme de un modo confortable y suave Para esta operación no ha de usar el Aplicador de Frío 1 Apague el aparato...

Page 57: ...y la lámina de depilación de corte sobre su piel y mueva lentamente el aparato en dirección contraria a la del crecimiento del vello mientras presiona ligeramente Cómo exfoliar sólo modelos HP6437 PB and HP6438 PB Use el cabezal exfoliador sólo en sus piernas y no en las axilas ni en la línea del bikini 1 Asegúrese de que el aparato esté apagado C 2 Quite el cabezal depilador presione la sección e...

Page 58: ...loción justo antes o durante la exfoliación No use el cabezal exfoliador hasta dos días después de la depilación Por razones higiénicas el cabezal exfoliador sólo debe ser usado por una persona Le aconsejamos que se exfolie antes de ir a la cama por la noche Cualquier irritación que pueda producirse disminuirá durante la noche Después de la exfoliación aplíquese una crema suave o leche corporal pa...

Page 59: ...n un paño húmedo Asegúrese de que el exterior del Aplicador de Frío esté completamente seco antes de ponerlo en el congelador C 5 Sólo en los modelos HP6434 PB HP6437 PB HP6438 PB Desmonte el adaptador de precisión C 6 Desmonte el cabezal depilador Presione las secciones estriadas y deslice el cabezal depilador fuera del aparato en la dirección de la flecha ESPAÑOL 61 ...

Page 60: ...o puede montarse de una forma en el aparato Limpieza del cabezal de depilación de corte sólo modelos HP6435 PB HP6436 PB HP6438 PB 1 Desmonte el cabezal de depilación de corte C 2 Limpie la cámara del pelo y la unidad de corte con el cepillo Para evitar deterioros no ejerza ninguna presión sobre la lámina de depilación de corte Limpieza del cabezal exfoliador sólo modelos HP6437 PB HP6438 PB 1 Apa...

Page 61: ... el Aplicador de Frío en el estuche congelador y ponga el estuche en el congelador Mantenimiento y sustitución Sólo modelos HP6435 PB HP6436 PB Cabezal de depilación de corte Dos veces al año ponga una gota de aceite de máquina de coser en el peine recortador y en la lámina de depilación de corte Sustituya la lámina de depilación de corte tipo HP6106 y la unidad de corte tipo HP2911 cada 1 ó 2 año...

Page 62: ...cte con el Servicio Philips de Atención al Cliente de su país hallará su número de teléfono en el folleto de la Garantía Mundial Si en su país no hay Servicio Philips de Atención al Cliente diríjase a su distribuidor local Philips o contacte con el Service Department of Philips Domestic Appliances and Personal Care BV ESPAÑOL 64 ...

Page 63: ...ambe Gli speciali dischi rotanti permettono di catturare anche i peli più corti 0 5 mm rimuovendoli alla radice I peli cresceranno inoltre più morbidi e quindi meno ispidi Importante Prima di collegare l apparecchio alla presa di corrente verificate che la tensione indicata sull apparecchio corrisponda a quella della rete locale Evitate che l apparecchio entri in contatto con l acqua Tenete l appa...

Page 64: ...ico In caso di risposta immunitaria ridotta ad esempio durante la gravidanza o nei pazienti affetti da diabete mellito emofilia o immunodeficienza la pelle potrebbe risultare particolarmente sensibile Qualora sorgessero dei problemi consultate il medico L apparecchio rimuove i peli direttamente alla radice e quindi in alcuni casi la pelle potrebbe risultare arrossata o irritata Si tratta di un fen...

Page 65: ...ono di ottenere i migliori risultati e di prolungare la durata dell apparecchio Consigli Massaggiate regolarmente la pelle con una spugna vegetale per evitare la crescita di peli incarnati Solo mod HP6433 PB HP6434 PB HP6435 PB Non effettuate il peeling immediatamente prima o subito dopo l epilazione Applicate una crema idratante o un latte per il corpo dopo l epilazione per ridurre l eventuale ar...

Page 66: ...i che l esterno del Refrigerante Anestetizzante sia perfettamente asciutto prima di congelarlo Consiglio Potrete conservare il Refrigerante Anestetizzante sempre nel freezer Come epilare le gambe Controllate che la pelle sia pulita e priva di creme e sostanze grasse Non applicate nessuna crema prima dell epilazione C 1 Infilate la protezione sul Refrigerante Anestetizzante congelato C 2 Inserite i...

Page 67: ...si sollevino C 6 Appoggiate l apparecchio ad angolo retto sulla pelle con il cavo rivolto verso di voi e fatelo scorrere in senso inverso rispetto alla crescita dei peli Fate in modo che sia i dischi rotanti che il Refrigerante Anestetizzante tocchino la pelle Non esercitate alcuna pressione sulla pelle C 7 Tenete la gamba ben tesa mentre epilate la parte posteriore del ginocchio C 8 Spegnete l ap...

Page 68: ...ete l apparecchio C 2 Mettete la testina precision sull apparecchio La testina precision può essere inserita solo in un senso C 3 Inserite sull apparecchio il Refrigerante Anestetizzante con l apposita protezione C 4 Accendete l apparecchio selezionando la velocità desiderata Vi consigliamo di utilizzare la velocità II C 5 Tendete la pelle con la mano libera in modo che i peli si sollevino e appog...

Page 69: ...gnete l apparecchio C 2 Togliete la testina di epilazione Premete le sezioni con nervature e togliete la testina di epilazione seguendo il senso indicato dalla freccia C 3 Inserite la testina di rasatura sull apparecchio premendola nel senso indicato dalla freccia Click La testina di rasatura può essere montata in un solo modo C 4 Accendete l apparecchio selezionando la velocità desiderata Vi cons...

Page 70: ...e sull apparecchio ricordate che può essere inserita in un solo senso 5 Accendete l apparecchio Selezionate la velocità I o II in base alla potenza di esfoliazione desiderata Vi consigliamo di dedicare 1 3 minuti all esfoliazione di ciascuna gamba Per ottenere una pelle morbida e liscia usate la testina esfoliante una o due volte alla settimana Non applicate nessuna crema schiuma gel o lozione pri...

Page 71: ... o panni abrasivi petrolio acetone ecc C 1 Spegnete l apparecchio e togliete la spina dalla presa C 2 Togliete il Refrigerante Anestetizzante C 3 Togliete la protezione dal Refrigerante Anestetizzante C 4 Risciacquate il Refrigerante Anestetizzante e la protezione sotto l acqua corrente oppure puliteli con uno straccio umido Assicuratevi che l esterno del Refrigerante Anestetizzante sia completame...

Page 72: ...n cercate di togliere i dischi rotanti dall apparecchio C 8 Rimettete a posto la testina di epilazione procedendo in senso inverso rispetto alla freccia La testina di epilazione può essere inserita sull apparecchio in un solo modo Come pulire la testina di rasatura solo mod HP6435 PB HP6436 PB HP6438 PB 1 Togliete la lamina di rasatura C 2 Pulite la camera di raccolta e il blocco di taglio con l a...

Page 73: ...o Non risciacquate l epilatore sotto l acqua La testina esfoliante può essere asciugata con una salvietta Come riporre l apparecchio 1 Dopo l uso rimettete il cappuccio di protezione sull apparecchio 2 Riponete l apparecchio e gli accessori nell apposita custodia 3 Mettete il Refrigerante Anestetizzante nell apposita cassetta e riponete quest ultima nel freezer o nello scomparto del ghiaccio ITALI...

Page 74: ... mod HP2911 dopo 1 o 2 anni Garanzia e Assistenza Per ulteriori informazioni o in caso di problemi vi preghiamo di visitare il sito Philips su www philips com oppure contattare il Centro Assistenza Clienti Philips del vostro Paese troverete il numero di telefono sull opuscolo della garanzia Qualora nel vostro Paese non ci siano Centri Assistenza Clienti rivolgetevi al rivenditore autorizzato Phili...

Page 75: ...para as pernas A rapidez de rotação dos discos de depilação agarra mesmo os pêlos mais curtos 0 5 milímetros arrancando os pela raíz Os novos pêlos nascem macios e fracos Sem picarem Importante Antes de ligar o aparelho verifique se a voltagem indicada na máquina corresponde à corrente eléctrica local Não deixe a máquina entrar em contacto com água Mantenha fora do alcance das crianças Para evitar...

Page 76: ...anismo apresenta uma diminuição dos sistemas de defesa por exemplo durante a gravidez ou se sofrer de diabetes for hemofílica ou tiver imuno deficiências poderá estar mais susceptível Se ocorrer algum problema por favor contacte o seu médico Uma vez que a depiladora arranca os pêlos pela raíz a pele poderá ficar ligeiramente sensível ou tornar se vermelha e irritada Trata se de um fenómeno perfeit...

Page 77: ...a para a máquina Sugestões Massagens regulares com uma luva de crina ajudam a evitar que os pêlos encravem apenas no mod HP6434 PB HP6433 PB HP6434 PB HP6435 PB Quando a pele é exfoliada cuidadosamente com uma luva de crina os pêlos finos continuam a crescer sem problemas Não deve no entanto fazê lo imediatamente antes ou depois da depilação Se depois da depilação aplicar um creme macio ou uma loç...

Page 78: ...Antes de o congelar certifique se que o aplicador de frio anestesiante está bem seco Sugestão O aplicador de frio anestesiante pode estar sempre no congelador Depilação das pernas A pele deve estar limpa e sem qualquer vestígio de gordura ou cremes Não aplique nenhum creme antes de fazer a depilação C 1 Introduza a manga de protecção no aplicador de frio anestesiante congelado C 2 Encaixe o aplica...

Page 79: ...los bem visíveis C 6 Coloque a máquina em ângulo recto sobre a pele com o fio virado na sua direcção e movimente a no sentido contrário ao do crescimento dos pêlos Tanto os discos de depilação como o aplicador de frio anestesiante devem ficar em contacto com a pele Não faça força com a máquina contra a pele C 7 Mantenha a perna esticada quando depilar a parte de trás dos joelhos C 8 Desligue a máq...

Page 80: ...pridos máx 1 cm 1 Desligue a máquina C 2 Coloque o adaptador de precisão na máquina O adaptador de precisão só tem uma posição de encaixe C 3 Encaixe o aplicador de frio anestesiante na manga de protecção e coloque na máquina C 4 Ligue a máquina e seleccione a velocidade pretendida Neste caso aconselha se a velocidade II C 5 Estique bem a pele com a mão livre e coloque a máquina em ângulo recto so...

Page 81: ...cia e a depilação é confortável e suave Nestas zonas não precisa de utilizar o aplicador de frio anestesiante 1 Desligue a máquina C 2 Retire a cabeça de corte Comprima as secções salientes e puxe a cabeça de depilação para fora da máquina na direcção da seta C 3 Encaixe a cabeça de corte na depiladora empurrando a na direcção da seta Clique A cabeça de corte só tem uma posição de encaixe C 4 Ligu...

Page 82: ...beça de depilação aperte de ambos os lados e puxe a cabeça de exfoliação para fora da máquina na direcção da seta 3 Retire o aplicador de frio anestesiante C 4 Encaixe a cabeça de exfoliação na máquina Tem apenas uma posição de encaixe 5 Ligue a máquina Seleccione a velocidade I ou II dependendo da força de exfoliação pretendida Recomenda se 1 a 3 minutos em cada perna Para que a pele fique com um...

Page 83: ...er sinal desaparecerá durante a noite Após a exfoliação aplique um creme macio ou um leite corporal para hidratar a pele e melhorar a sua textura Limpeza da máquina Não utilize detergentes corrosivos esfregões ou panos abrasivos petróleo acetona etc C 1 Desligue a máquina e retire a ficha da tomada de corrente C 2 Retire o aplicador de frio anestesiante C 3 Puxe a manga de protecção para fora do a...

Page 84: ...aptador de precisão C 6 Retire a cabeça de corte Comprima as secções salientes e puxe a cabeça de depilação para fora da máquina na direcção da seta C 7 Limpe todas as peças acessíveis e os discos de depilação com a escova Nunca tente retirar os discos de depilação da máquina C 8 Encaixe novamente a cabeça de depilação na máquina empurrando na direcção da seta A cabeça de depilação só encaixa numa...

Page 85: ... C 2 Retire a cabeça de exfoliação para fora da máquina C 3 Enxague a cabeça de exfoliação à torneira Não passe a depiladora por água A cabeça de exfoliação pode ser seca com uma toalha Arrumação 1 Após a utilização volte a colocar a capa de protecção na máquina 2 Guarde a máquina e os acessórios dentro da bolsa 3 Coloque o aplicador de frio anestesiante na cassete e guarde esta no congelador ou n...

Page 86: ...por semana ou mais e mude as quando estiverem danificadas Informações e assistência Se precisar de assistência ou de informações ou se tiver qualquer problema por favor visite o site da Philips em www philips com ou contacte o Centro de Atendimento Philips do seu País os números de telefone encontram se no folheto da garantia mundial Se não existir um Centro de Atendimento no seu País dirija se a ...

Page 87: ... C Satinxice Satinxice Satinxice 0 5 2 3 4 5 5 6 5 7 8 2 5 5 89 ...

Page 88: ... 9 4 Philips Philips Satinxice 5 5 5 5 A 2 5 9 5 90 ...

Page 89: ... 2 2 7 5 A 5 3 C6434 PB J 5 2 91 ...

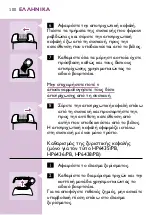
Page 90: ... 5 3 2 A 5 9 6 5 J 5 5 C 1 9 92 ...

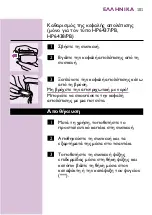
Page 91: ...C 2 3 6 6 5 5 J 5 6 5 N C 1 J C 2 4 3 J 2 93 ...

Page 92: ...C 4 9 3 O 5 3 OO C 5 3 C 6 9 2 6 5 5 2 C 7 Q C 8 J5 94 ...

Page 93: ... 9 HP6434 PB HP6437 PB HP6438 PB 3 5 5 1 5 1 J5 C 2 3 5 3 5 2 C 3 4 C 4 9 J 5 OO C 5 3 95 ...

Page 94: ...6 5 5 6 T C6435 PB HP6436 PB HP6438 PB 8 2 1 J5 C 2 9 4 5 5 C 3 3 2 5 7 96 ...

Page 95: ... C 4 9 J 5 O C 5 9 6437 PB HP6438 PB 1 6 5 5 C 2 6 5 5 5 3 9 97 ...

Page 96: ...C 4 6 2 5 V O OO J 5 1 3 8 5 2 8 J 5 5 5 5 98 ...

Page 97: ... 7 5 N C 1 J5 5 2 C 2 9 C 3 J 5 C 4 T 5 6 5 C 5 3 C6434 PB HP6437 PB HP6438 PB 9 5 99 ...

Page 98: ...C 6 9 4 5 5 C 7 7 5 5 C 8 J 5 2 7 HP6435 PB HP6436 PB HP6438 PB 1 9 C 2 7 5 8 2 5 100 ...

Page 99: ...7 C6437 PB HP6438 PB 1 J5 C 2 6 C 3 T 5 5 7 1 2 9 3 3 5 101 ...

Page 100: ... C6435 PB HP6436 PB C 9 C6106 C2911 1 2 5 2 2 5 Philips www philips com Philips 5 Philips 5 102 ...

Page 101: ...aki tüylerden kurtulmak için uygundur Döner diskler 0 5 mm uzunluğundaki tüyleri bile yakalar ve kökünden çeker Tekrar çıkan tüyler ince ve yumuşak olacaktır Önemli Cihazı kullanmadan önce cihazın üzerinde belirtilen voltajın ülkenizdeki voltajla uygunluğunu kontrol ediniz Cihazın suyla temas etmemesine dikkat ediniz Cihazı çocuklardan uzak tutunuz Cihaz çalışır durumdayken herhangi bir kaza veya ...

Page 102: ...debilir ve cildinizde hafif bir kızarıklık oluşabilir Bu çok normal bir durum olup cihazı kullandıkça cildinizdeki tahriş azalacaktır Cihazı kullandıkça yeni çıkan tüyler daha yumuşak çıkacaklar ve epilasyon işlemi daha kolay olacaktır Herşeye rağmen eğer cildinizdeki tahriş 3 gün içerisinde hala devam etmekteyse size tavsiyemiz uzman bir doktora başvurmanız olacaktır Size tavsiyemiz ilk defa epil...

Page 103: ...önce ve hemen sonra eldiven ile masaj yapmayınız Epilasyondan sonra alkol içermeyen nemlendirici bir krem veya vücut losyonu kullanmanız cildinizi rahatlatacak ve daha pürüzüsüz hissetmenizi sağlayacaktır Epilasyonun banyodan veya duştan sonra yapılması daha kolay ve rahat olacaktır Ancak cildinizin tamamen kuru olmasına dikkat ediniz Size tavsiyemiz epilasyonu gece yapmanızdır Cildinizin üzerinde...

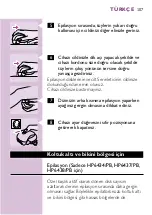
Page 104: ...bilirsiniz Bacaklar İçin Cildinizin temiz kremsiz ve kuru olduğundan emin olunuz Epilasyondan önce krem sürmeyiniz C 1 Koruyucu kılıfı Cilt Serinletici aparatın üzerine takınız C 2 Cilt serinleticiyi cihaza takınız 3 Cihazın fişini prize takınız C 4 Cihazı çalıştırıp istediğiniz hız ayarını seçiniz Hız ayarı 1 Tüylerin ince olduğu ve ulaşılması güç alanlar ile kemikli bölgeler Diz kapağı ve ayak b...

Page 105: ...dokunduğundan emin olunuz Cihazı cildinize bastırmayınız C 7 Dizinizin arka kısmına epilasyon yaparken ayağınız gergin olmasına dikkat ediniz C 8 Cihazı ayar düğmesini sıfır pozisyonuna getirerek kapatınız Koltuk altı ve bikini bölgesi için Epilasyon Sadece HP6434 PB HP6437 PB HP6438 PB için Özel başlık aktif olarak dönen disk sayısını azaltarak derinin epilasyon sırasında daha gergin olmasını sağ...

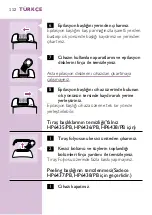
Page 106: ...i aparatı cihaza takınız C 4 Cihazı çalıştırıp istediğiniz hız ayarını seçiniz 2 hız ayarını kullanmanızı tavsiye ederiz C 5 Cildinizi elinizle geriniz Cihazın cildinizin üzerinde doğru açıda durmasını sağlayınız Epilasyon disklerinin vecilt Serinleticinin cildinize dokunduğundan emin olunuz 6 Cihazı cildiniz üzerinde tüylerin çıkış yönünün tersine doğru yavaşça gezdiriniz Tıraş sadece HP6435 PB H...

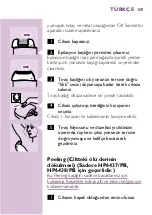
Page 107: ...akınız Tıraş başlığı cihaza sadece bir yönde takılabilir C 4 Cihazı çalıştırıp istediğiniz hız ayarını seçiniz Cihazı 1 hız ayarı ile kullanmanızı tavsiye ederiz C 5 Tıraş folyosunu ve düzelticiyi cildinizin üzerinde tüylerin çıkış yönünün tersine doğru yavaşça ve hafifçe bastırarak gezdiriniz Peeling Ciltteki ölü derinin dökülmesi Sadece HP6437 PB HP6438 PB için geçerlidir Bu Peeling başlığını sa...

Page 108: ...apmanızı öneririz güzel bir cilde sahip olmak için peeling başlığını haftada bir veya iki kez kullanınız Peeling sırasında veya hemen öncesinde kesinlikle krem köpük veya losyon kullanmayınız Peeling başlığını kesinlikle epilasyondan iki gün içinde kullanmayınız Sağlık nedenlerinden dolayı Peeling başlığı yalnızca bir kişi tarafından kullanılmalıdır Peeling işlemini yatmadan önce yapmanız tavsiye ...

Page 109: ...ız C 3 Cilt Serinleticiyi koruyucu kutusundan çıkarınız C 4 Cilt Serinleticiyi ve koruyucu kapağını musluk altında yıkayarak veya nemli bir bezle silerek temizleyebilirsiniz Cilt Serinletici aparatını buzluğa yerleştirirken aparatın dış yüzeyinin iyice kuru olmasına dikkat ediniz C 5 Yalnız HP6434 PB HP6437 PB HP6438 PB için Özel Hassas Bölge başlığını çıkarınız TÜRKÇE 111 ...

Page 110: ...pilasyon başlığını cihaz üzerinde bulunan ok yönünün tersinde kaydırarak yerine yerleştiriniz Epilasyon başlığı cihaza üzerine tek bir yönde yerleştirilebilir Tıraş başlıklarının temizliği Yalnız HP6435 PB HP6436 PB HP6438 PB için 1 Tıraş folyosunu kesici üniteden çıkarınız C 2 Kesici bölümü ve tüylerin toplandığı bölümleri fırça yardımı ile temizleyiniz Tıraş Folyosu üzerinde fazla baskı yapmayın...

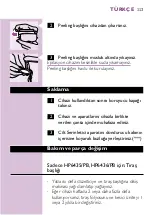
Page 111: ...ve aparatlarını cihazla birlikte verilen çanta içinde muhafaza ediniz 3 Cilt Serinletici aparatını dondurucu kabının içerisine koyarak buzluğa yerleştiriniz Bakım ve parça değişim Sadece HP6435 PB HP6436 PB için Tıraş başlığı Yılda iki defa düzelticiye ve tıraş başlığına dikiş makinası yağı damlatıp yağlayınız Eğer cihazı haftada 2 veya daha fazla defa kullanıyorsanız tıraş folyosunu ve kesici üni...

Page 112: ...veya bilgiye ihtiyacınız olursa Philips internet sayfasına www philips com tr veya ülkenizde bulunan Philips Tüketici Danışma Merkezini arayabilirsiniz Telefon numarasını garanti belgeleri içerisinden bulabilirsiniz 0800 261 33 02 TÜRKÇE 114 4203 000 49282 ...

Reviews: