background image

38

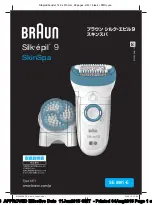
Summary of Contents for HP6578/00

Page 1: ...HP6578 ...

Page 2: ...2 2 3 4 1 2 5 6 7 1 1 2 8 9 1x 10 2x 11 12 1 2 13 14 15 16 17 18 19 20 21 ...

Page 3: ...3 2 3 R 1 3 2 1 S P G Q F E A D C B 5 4 J K N M O H I L 1 ...

Page 4: ...4 ...

Page 5: ...HP6578 English 6 Français 18 39 49 ...

Page 6: ...tter how hard or soft you push The Opti light helps you to target and remove even the trickiest hairs so that you do not miss a hair The active hairlifter on the front of the active hairlifter with active massage gently vibrates and lifts flat lying hairs so that they can be easily removed The active massaging roller on the back of the active hairlifter with active massage vibrates to give the ski...

Page 7: ...intended for removing women s body hair on areas below the neck by epilating legs and shaving underarms and bikini area The precision epilator is intended for removing women s body hair in the bikini and underarm area on hard to reach areas such as knee and ankle and for removing hairs on the upper lip and the chin Do not use the appliances for any other purpose For hygienic reasons the appliances...

Page 8: ...appliance and the adapter in a wall socket Epilation tips Before you start epilating Note Always clean the epilating head before first use When you use the appliances for the first time we advise you to try them out on an area with only light hair growth to get accustomed to the epilation process We advise you to epilate before going to bed at night as skin irritation usually disappears overnight ...

Page 9: ...onge or cream e g during showering 24 hours after epilation helps to prevent ingrowing hair as the gentle scrubbing action removes the upper skin layer and fine hair can get through to the skin surface Using the epilator Epilating the legs with the epilator If you already have some experience with epilation you can simply use the epilating head with the basic epilation cap If you are not used to e...

Page 10: ...having head 4 Stretch the skin with your free hand When shaving the underarms raise your arm to stretch the skin 5 Place the sensitive area shaving head at an angle of 90 onto your skin with the on off button pointing in the direction in which you are going to move the appliance 6 Move the appliance slowly against the direction of hair growth Note Make sure that the shaving unit with integrated tr...

Page 11: ...n the appliance has not yet cooled down completely Overload protection If you press the epilating head too hard onto your skin or when the rotating tweezers of the epilating head get blocked e g by clothes etc the appliance stops and the speed setting indications start to flash red for 5 seconds 1 Check if the rotating tweezers of the epilating head are blocked by turning the tweezers with your th...

Page 12: ...s you to depilate wherever and whenever you want The SmartTweezers are supplied ready for use with 3 button batteries in the battery compartment Using the tweezers 1 Clean your eyebrows with skin tonic or alcohol to prevent eyebrow hair from slipping away between the tweezer arms 2 Use a warm face cloth to soften the skin before tweezing This makes hair removal easier 3 Brush your eyebrows in the ...

Page 13: ...rush Fig 30 3 Rinse the epilating head under the tap for 5 10 seconds while turning the tweezers with your thumb Fig 31 Note Never try to detach the epilating tweezers from the epilating head 4 Shake the epilating head firmly Fig 32 5 Dry the epilating head thoroughly with a tea towel Note Make sure the epilating head is completely dry before you place it back onto the appliance 6 To reattach the ...

Page 14: ...an integrated travel lock which prevents the appliance from accidentally being switched on during travel 1 To activate the travel lock press and hold the on off button for 3 seconds until the speed setting indications flash white 2 times Fig 41 The epilator starts running and stops immediately when the travel lock becomes active 2 To deactivate the travel lock press and hold the on off button for ...

Page 15: ...to contact the rechargeable battery terminals or short circuit the batteries Do not try to reassemble the appliance in order to connect it to the mains This is dangerous Precision epilator and SmartTweezers Non rechargeable batteries contain substances that may pollute the environment Do not throw away non rechargeable batteries with the normal household waste but dispose of them at an official co...

Page 16: ...bathroom to make sure the socket is live You could also use a working socket outside the bathroom The overheat protection has been activated When the epilator stops working and the speed setting indications and the charging light start flashing red the overheat protection has been activated Let the appliance cool down The lights stop flashing after 30 seconds When the appliance has cooled down swi...

Page 17: ...ting indications flash red Turn the tweezers with your thumb until you can easily remove the item that is blocking the rotating tweezers Then switch on the appliance again Do not press the appliance too hard onto your skin The precision epilator does not work The batteries are empty or have been inserted incorrectly Replace the batteries or insert them correctly see Inserting the batteries in chap...

Page 18: ... vous appuyiez doucement ou fortement La lumière Opti light vous permet de cibler et d éliminer même les poils les plus rebelles pour une épilation nette L unité de redressement des poils à l avant du système de massage actif vibre doucement et soulève les poils couchés pour faciliter leur épilation Le rouleau massant actif à l arrière du système de massage actif vibre de manière agréable pour apa...

Page 19: ...lectuelles sont réduites ou par des personnes manquant d expérience ou de connaissances à moins qu elles ne soient sous surveillance ou qu elles n aient reçu des instructions quant à l utilisation des appareils par une personne responsable de leur sécurité Veillez à ce que les enfants ne puissent pas jouer avec les appareils Attention L épilateur est exclusivement destiné à l élimination des poils...

Page 20: ...nt fig 5 Le voyant de charge clignote en blanc pour indiquer que l épilateur se recharge fig 6 Une fois les batteries entièrement chargées le voyant de charge devient blanc et cesse de clignoter pendant 20 minutes puis s éteint fig 7 Témoin de charge faible 1 Lorsque les batteries sont faibles le voyant de charge se met à clignoter en rouge Lorsque le voyant de charge clignote en rouge les batteri...

Page 21: ...ez l appareil dans plusieurs directions pour des résultats optimaux Si vous transpirez pendant l épilation séchez votre peau en la tapotant avec un tissu doux Lorsque vous utilisez l adaptateur ultra performant veillez à ce que les deux rouleaux du dispositif d étirement de la peau soient en contact permanent avec la peau pour un résultat optimal Lorsque vous utilisez le redresseur de poils massan...

Page 22: ...t veillez à ce que les deux rouleaux du dispositif d étirement de la peau soient en contact permanent avec la peau pour un résultat optimal Lorsque vous utilisez le système de massage actif redressant les poils veillez à ce que le rouleau massant actif et l unité de redressage des poils soient en contact permanent avec la peau Le rouleau massant stimule et détend la peau pour une épilation plus ag...

Page 23: ...at régulier 5 Lorsque vous avez fini éteignez l appareil et nettoyez la tête de rasoir spécial zones sensibles ainsi que l accessoire tondeuse bikini voir le chapitre Nettoyage et entretien 6 Laissez l accessoire tondeuse bikini fixé à la tête de rasoir spécial zones sensibles lorsque vous rangez l appareil Fonctionnement sur secteur Pour utiliser l épilateur sur le secteur éteignez l appareil ava...

Page 24: ...n tapotant avec une serviette 2 Allumez l appareil 3 Étirez la peau à l aide de votre main libre Lorsque vous vous épilez les aisselles levez le bras pour tendre la peau 4 Placez la tête d épilation à un angle de 90 avec la peau le bouton marche arrêt orienté dans la direction où vous allez passer l appareil 5 Passez l appareil lentement sur la peau dans le sens inverse de la pousse des poils Épil...

Page 25: ...tif orientée vers l avant dans le compartiment à piles et lampe Remarque La pince à épiler lumineuse fonctionne avec trois piles bouton alcalines de type L736H ou AG3 diam 7 8 x 3 4 mm 4 Refermez le compartiment à piles et lampe en faisant tourner le fond dans le sens des aiguilles d une montre à l aide d une pièce de monnaie fig 25 Nettoyage et entretien Remarque Assurez vous que les appareils so...

Page 26: ...g 37 5 Secouez énergiquement la tête de rasoir spécial zones sensibles ainsi que l accessoire tondeuse bikini fig 38 6 Séchez soigneusement la tête de rasoir spécial zones sensibles et l accessoire tondeuse bikini à l aide d un torchon et laissez l unité de rasage sécher à l air Remarque N exercez aucune pression sur l unité de rasage afin d éviter toute détérioration 7 Remettez l unité de rasage ...

Page 27: ...éé Philips Tête de rasoir spécial zones sensibles Si vous utilisez la tête de rasoir spécial zones sensibles deux fois par semaine ou plus nous vous conseillons de remplacer l unité de rasage au bout d un an ou deux ou lorsqu elle est endommagée Environnement Lorsqu ils ne fonctionneront plus ne jetez pas les appareils avec les ordures ménagères mais déposez les à un endroit assigné à cet effet où...

Page 28: ... un problème rendez vous sur le site Web de Philips à l adresse www philips com ou contactez le Service Consommateurs Philips de votre pays vous trouverez le numéro de téléphone correspondant sur le dépliant de garantie internationale S il n existe pas de Service Consommateurs Philips dans votre pays renseignez vous auprès de votre revendeur Philips local Dépannage Ce chapitre présente les problèm...

Page 29: ...amment refroidi Les batteries sont épuisées Lorsque le voyant de charge s allume en rouge continu cela signifie que les batteries sont épuisées et que vous devez recharger l appareil voir le chapitre Charge Vous pouvez également brancher l appareil sur le secteur quand les batteries sont épuisées Le verrouillage est activé Maintenez le bouton marche arrêt enfoncé pendant 3 secondes jusqu à ce que ...

Page 30: ...30 ...

Page 31: ...31 ...

Page 32: ...32 ...

Page 33: ...33 ...

Page 34: ...34 ...

Page 35: ...35 ...

Page 36: ...36 ...

Page 37: ...37 ...

Page 38: ...38 ...

Page 39: ...39 ...

Page 40: ...40 ...

Page 41: ...41 ...

Page 42: ...42 ...

Page 43: ...43 ...

Page 44: ...44 ...

Page 45: ...45 ...

Page 46: ...46 ...

Page 47: ...47 ...

Page 48: ...48 ...

Page 49: ...49 ...

Page 50: ...50 50 22 23 24 25 26 27 28 29 30 31 32 33 34 2 1 35 36 37 38 39 40 3sec 41 ...

Page 51: ...51 3sec 42 43 44 45 46 47 48 ...

Page 52: ...4203 000 4845 1 ...

Reviews: