background image

53

Summary of Contents for HQC888/00

Page 1: ...DIRECTIONS FOR USE ENGLISH 4 FRANÇAIS 10 21 27 STYLING BOOKLET ENGLISH 30 FRANÇAIS 36 47 53 HQC888 3 á á H Hô ô d dG G á á H Hô ô d dG G ...

Page 2: ...in your home before you connect the appliance C Make sure the appliance and the adapter do not get wet Use charge and store the appliance at a temperature between 15c and 35c CD ROM C Protect the instruction CD ROM from dust humidity and from extremely high or low temperatures C Do not put the CD ROM in direct sunlight for a prolonged period Do not scratch the surface of the CD ROM Only write on t...

Page 3: ...l the time If the appliance has not been used for a long period of time it must be recharged for 12 hours Corded clipping To use the hair clipper connected to the mains Switch the hair clipper off connect it to the mains and wait a few seconds before switching it on If the battery is completely empty wait a few minutes before switching the appliance on Do not run the appliance from the mains when ...

Page 4: ...tachment and blow and or shake the hair from the comb Removing the comb does not change the hair length setting Tip Write down the hair length settings selected to create a certain hairstyle as a reminder for future clipping sessions Clipping without comb attachment you can use the clipper without comb attachment to contour the neckline and the area around the ears You can also find instructions a...

Page 5: ...the inside of the appliance with the brush supplied C 5 Close the cutting unit by pushing it back onto the appliance until you hear a click The appliance does not need any lubrication Replacement A worn or damaged cutting unit should only be replaced with an original Philips cutting unit C 1 Open the cutting unit by applying pressure in the centre and then remove it by pulling it upwards C 2 Place...

Page 6: ...ppy to help you remove the battery and dispose of it in an environmentally safe way 1 Disconnect the appliance from the mains and let the appliance run until the motor stops 2 Open and remove the cutting unit C 3 Undo the screws and remove the metal clip by means of a screwdriver C 4 Remove the front part by pulling it upwards C 5 Remove the hair length adjustment ring Precision Zoom Lock by pushi...

Page 7: ...onnect the appliance to the mains again after it has been opened Information service If you need information or if you have a problem please visit the Philips Web site at www philips com or contact the Philips Customer Care Centre in your country you will find its phone number in the worldwide guarantee leaflet If there is no Customer Care Centre in your country turn to your local Philips dealer o...

Page 8: ...ifiez que la tension indiquée sur la fiche correspond à la tension du secteur de votre logement C Assurez vous que l appareil et son adaptateur ne soient pas en contact avec de l eau Utilisez chargez et rangez l appareil à une température comprise entre 15c et 35c CD ROM C Protégez le CD Rom de la poussière de l humidité et des fortes températures C Ne laissez pas le CD Rom exposé aux rayons direc...

Page 9: ...t deux fois par an en laissant tourner le moteur jusqu à l arrêt Ne laissez pas le cordon d alimentation branché sur le secteur pendant ce temps Si l appareil n a pas été utilisé pendant une longue période rechargez le pendant 12 heures au moins Utilisation sur secteur Vous pouvez utiliser l appareil directement sur le secteur Arrêtez l appareil à l aide du bouton M A Branchez la fiche dans la pri...

Page 10: ...er par la hauteur la plus élevée et de réduire au fur et à mesure 3 Mettez l appareil en marche Choisissez la méthode la plus appropriée dans le livret conseils ou consultez les instructions sur le CD Rom Conseils Si des cheveux se sont accumulés dans guide de coupe retirez le guide de coupe et soufflez dessus Cela ne change en rien la hauteur de coupe choisie Conseils Notez la hauteur de coupe ch...

Page 11: ...voir éteint et débranché 2 Retirez le guide de coupe C 3 Retirez le couteau en poussant dessus au centre C 4 Nettoyez l unité de coupe et l intérieur de l appareil avec la brosse de nettoyage C 5 Remontez le couteau en le replacant sur la tête jusqu à entendre un click Il n est pas nécessaire de lubrifier le couteau Remplacement Utilisez uniquement une unité de rasage Philips d origine pour rempla...

Page 12: ... batterie avec les ordures ménagères habituelles mais déposez la dans un lieu assigné à cet effet Vous pouvez également déposer votre appareil dans un Centre Service Agréé Philips où l on s en chargera avec plaisir 1 Débranchez l appareil de la prise de courant et laissez le fonctionner jusqu à qu à l arrêt complet du moteur 2 Ouvrez et retirez l unité de rasage C 3 Dévissez et retirez la partie m...

Page 13: ...as l appareil sur le secteur après l avoir ouvert Informations Service Pour toute réparation information ou en cas de problème visitez notre website www philips com Ou veuillez contacter le Service Consommateurs Philips de votre pays vous trouverez le numéro de téléphone dans le dépliant sur la garantie internationale S il n y a aucun Service Consommateurs Philips dans votre pays contactez votre d...

Page 14: ...û ûH H É É Y Y ƒ ƒÑ Ñ Ÿ ŸGG I IO OÉ ÉY YGG ø øµ µÁ Á à àd dGG á áj jQ QÉ É Ñ Ñd dGG õ õf fGG h h à à S SÓ ÓÑ Ñd dGG ø øe e á áY Yƒ ƒæ æ ü üŸ ŸGG á áj jQ QÉ É Ñ Ñd dGG á áµ µ S SÉ Ée e í íà àa aGG É É æ æë ë T T ëàa ó H AÉHô µdG G RÉ G π Uh IOÉYÉH º J 9 6 7 8 Y ùÑ a áëØ U IQÉjR æe ƒLôf á µ ûe ájCG â LGh hCG áeóN ájCG G âéàMG GPG GƒæY â âfÎf G www philips com áeóÿ ùÑ a õcôÃ É üJ G hCG ó H øFÉHõdG áe...

Page 15: ... Ñ d áæeBG á jô H É æe ü îàdG h ájQÉ ÑdG õæd JóYÉ ùà ô ôÙ ÙGG b bƒ ƒà àj j CCGG GG π πª ª j j R RÉ É GG O O h h A AÉ ÉH Hô ô µ µd dGG ø øY Y R RÉ É GG π π ü üa aGG ü ü d dGG I Ió óM Mh h õ õf fGG h h í íà àa aGG Z ZGGÈ È d d Ø Øe e á á S SGGƒ ƒH H Ê Êó ó Ÿ ŸGG b bÓ Ód dGG õ õf f h h Z ZGGÈ Èd dGG Ø ØH H º ºb b Y YCC GG GG Ñ Ñë ë S S Ó ÓN N ø øe e e eÉ Ée eCC GG A Aõ õ GG õ õf fGG Ω Ωh hh hõ õd dGG...

Page 16: ...G S Sh h Y Y d dGG Ó ÓN N ø øe e ü ü d dGG I Ió óM Mh h í íà àa aGG I IO Oh hõ õŸ ŸGG I IÉ É T Tô ôØ Ød dGG á á S SGGƒ ƒH H R RÉ É GG π πN NGGO O h h ü ü d dGG I Ió óM Mh h æ æà àH H º ºb b c c ä äƒ ƒ U U ª ª ù ùJ J CCGG GG R RÉ É GG GG É É V V Ó ÓN N ø øe e ü ü d dGG I Ió óM Mh h Ó ÓZ ZÉ ÉH H º ºb b º ë ûJ C RÉ G êÉàëj 3 2 1 5 4 G Gó óÑ Ñà à S S G G ùÑ a øe á UCG iôNCÉH áµ æe hCG áØdÉJ âfÉc GPG ü...

Page 17: ...R RÉ É GG π π û ûà àH H º ºb b L LGGQ Q h hCCGG í íj jô ô ù ùà àd dGGh h º º ª ª ü üà àd dGG ä äÉ Éª ª à àd dGG Ö Öqq à ൠµd d É É a ah h á áÑ Ñ S SÉ Éæ æŸ ŸGG ü ü d dGG á á j jô ôW W Q QÉ É à àN NÉ ÉH H º ºb b d dGG CD Rom ä äÉ Éª ª à à d d π πY YÉ ÉØ Øà àŸ ŸGG ºb hCG h ïØfG h IÉ TôØdG á b õæH ºb IÉ TôØdG ô ûdG øe ÒãµdG qªŒ GPG áë üf IQÉàıG ô ûdG ƒW á Vh Ò j IÉ TôØdG õf á ªY G IÉ TôØdG øe ô ûdG ...

Page 18: ...é éà àd dG G dG É jCG LGQ CD Rom äɪ à d πYÉØàŸG I IO Oh hõ õŸ ŸGG I IÉ É T Tô ôØ Ød dGG Ω ΩGGó óî îà à S SÉ ÉH H ô ô û ûd dGG Ö Öj jò ò û ûJ J H ܃ZôŸG ô ûdG ƒ d É ah IÒѵdG hCG IÒ üdG IÉ TôØdG QÉàNG ô ô û ûd dGG ƒ ƒW W á á V Vh h Q QÉ É à àN NGG h hCCGG ä äÉ É V Vƒ ƒd dGG a aGGƒ ƒà àJ J I IÉ É T Tô ôØ Ød dGG ô ôW W ó óæ æY Y ä äGGΠΪ ª Ÿ ŸÉ ÉH H É É d dGG ô ô T TDDƒ ƒe e ô ô û ûd dGG ƒ ƒW W ä ä...

Page 19: ...É G π UƒJ πÑb dõæe SÉ SC G AÉŸÉH ÓàÑj FÉHô µdG ƒÙG h RÉ G CG ócCÉJ ájƒÄe áLQO 35h 15 ÚH Ée IQGôM RÉ G øjõîàH ºb h øë TG h Ωóîà SG CR Rom dG Y ßaÉM CD Rom iƒ ü dG á dÉ dG IQGô G øeh áHƒWôdG h QÉÑ dG øe äɪ àdG á fóàŸG hCG dG J CD Rom á jƒW IÎØd Iô TÉÑŸG ùª ûdG á TCG É dG π üJ àdG øcÉeC G dG í S TóîH º J CD Rom dG Y ÖàµJ CD Rom UÉN ª S º H G dG Éc GPG CD Rom π üJ CG G G eGóîà SÉH º J OQÉH ɵe ÉXƒØfi ...

Page 20: ...22 ...

Page 21: ...23 ...

Page 22: ...24 ...

Page 23: ...25 ...

Page 24: ...26 ...

Page 25: ...27 ...

Page 26: ...28 ...

Page 27: ...STYLING BOOKLET ...

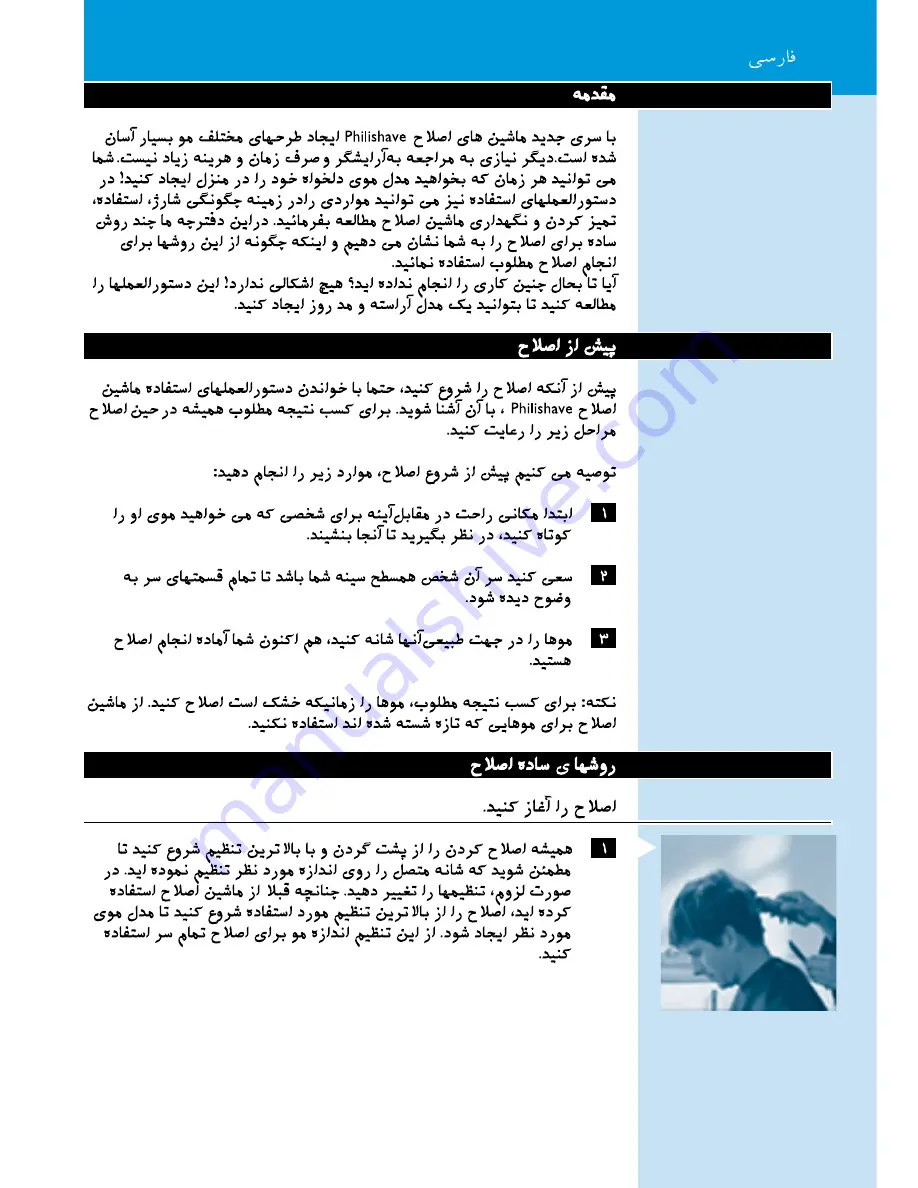
Page 28: ...ollowing procedure during clipping Before you start clipping we recommend that you do the following 1 First find a comfortable place in front of a mirror where the person whose hair you are going to cut can sit down 2 Make sure that the person s head is at the same level as your chest so that all parts of the head are clearly visible and within easy reach 3 Comb the hair in the direction of growth...

Page 29: ...can obtain different hair lengths of up to 41 mm The appliance comes with two comb attachments offering 14 different hair length settings altogether see table The hair length settings are indicated in millimetres on the arms of the comb attachment You can simply slide a comb attachment onto the appliance and choose the desired hair length setting Cutting length settings Small Comb Large Comb setti...

Page 30: ...contours of the head Comb the hair frequently to remove cut hair When clipping the crown pass the clipper slowly over the crown from different directions to achieve an even cutting result Make overlapping passes over the head to ensure that the clipper catches all the hairs that need to be cut Comb the hair in the direction of hair growth from time to time so that the clipper can catch the hair mo...

Page 31: ...thout comb attachment with the cutter pointing downwards 4 Place one edge of the cutter onto the skin and then slowly and carefully shape the desired outline Always keep the teeth of the clipper at a safe distance from the ears Tilt the clipper in such a way that only one edge of the cutting element touches the hair ends Trimming the sideburns C 5 Turn the clipper and hold it with the cutter point...

Page 32: ...w hairstyles The following hairstyles give you an idea of what can be achieved with a Philishave hair clipper The numbers indicated in the picture are the settings used to create each particular style Short and simple Use the small comb C Hair length settings sides 9 mm top 18 mm Long on top and short on the sides of the head C Hair length settings lower part of back and sides 9 mm upper part of b...

Page 33: ... other settings than the ones mentioned above You will see that there are many possibilities To help you remember the settings you have used for yourself and others simply fill in the Personal SettingTable at the end of this booklet Personal Setting Table Name nape lower part of back and sides upper part of back and sides top Name nape lower part of back and sides upper part of back and sides top ...

Page 34: ...ns du mode d emploi pour obtenir les meilleurs résultats Avant la première utilisation nous vous conseillons de suivre les instructions qui suivent 1 Tout d abord vous devez installer confortablement la personne à qui vous allez couper les cheveux devant un miroir 2 Assurez vous que la tête est au même niveau que votre poitrine de manière à avoir une large vue d ensemble 3 Peignez les cheveux dans...

Page 35: ...oupe jusqu à 41 mm L appareil est fourni avec deux guides de coupe offrant au total 14 positions différentes de hauteur de coupe voir tableau Les réglages de hauteur de coupe sont indiqués en millimètres sur le guide de coupe Coulissez simplement un des guides de coupe dans l appareil et choisissez la position désirée Réglages de hauteur de coupe Petit guide de coupe Grand guide de coupe réglage h...

Page 36: ...ment les contours de la tête Peignez les cheveux à intervalles réguliers pour retirer les mèches coupées Lorsque vous coupez les cheveux de la calotte déplacez la tondeuse lentement par dessus la calotte en partant de la nuque vers le dessus de la tête Donnez de petits coups de tondeuse supplémentaires pour vous assurer que la tondeuse a coupé les poils rebelles De temps en temps peignez les cheve...

Page 37: ...z l oreille pour faciliter l opération C 3 Tenez la tondeuse sans le guide de coupe avec le couteau dirigé vers le bas 4 Posez la tondeuse délicatement sur la peau et dessinez lentement le contour désiré Assurez vous que les dents de la tondeuse sont à une distance suffisante des oreilles Inclinez la tondeuse de telle manière que seulement un des bords du couteau touche les cheveux Tailler les pat...

Page 38: ...quelques coiffures Les coiffures suivantes vous donnent une idée de ce que vous pouvez réaliser avec la tondeuse Philishave Les numéros indiqués dans les images correspondent aux réglages utilisés pour réaliser chaque coiffure Court et simple Utilisez le petit guide de coupe C Réglages de la hauteur de coupe côtés 9 mm sommet 18 mm Long au sommet de la tête et court aux côtés C Réglages de la haut...

Page 39: ...ci dessus Vous vous apercevrez qu il existe de nombreuses possibilités Pour vous aider à vous souvenir des positions précédentes que ce soit pour vous ou pour les autres remplissez simplement leTableau des Régalges Personnels à la fin de cette brochure Tableau des Réglages Personnels Nom nuque partie inférieure de la nuque et des côtés partie supérieure de la nuque et des côtés sommet Nom nuque pa...

Page 40: ...DƒŸG áà ù d áØ àfl ƒW á Vh ΩGóîà SÉH QÉÑàN G æµÁ ô û d äÉ üb ÑH á UÉÿG ƒ dG á Vh ôcòJ Y JóYÉ ùŸ ä ɪàM G øe ójó dG Éæg CG iôJ ƒ S YC G Ö àµdG Gòg ájÉ f óæY ÉàdG üî ûdG äÉ VƒdG hóL áÄÑ àH ºb øjôNBÉH h H á á ü üî î û ûd dGG ä äÉ É V Vƒ ƒd dGG h hó óL L º S G æ dG ôNDƒe aGôWCG h SCGôdG ôNDƒŸ πØ SC G Aõ G aGôWCG h SCGôdG ôNDƒŸ YC G Aõ G YC G º S G æ dG ôNDƒe aGôWCG h SCGôdG ôNDƒŸ πØ SC G Aõ G aGôWCG h ...

Page 41: ... QɵàH áeóîà ùŸG á VƒdG g IQƒ üdG É dG ô TDƒŸG ΩÉbQC G G ô ûdG Öjò ûàd áëjô ùJ ù ùH H h h Ò Ò ü üb b IÒ üdG IÉ TôØdG Ωóîà SG ô ô û ûd dGG ƒ ƒW W á á V Vh h º e 9 GôWC G º e 18 YC G S SCCGGô ôd dGG GGô ôW WCCGG ó óæ æY Y Ò Ò ü üb b h h Y YCC GG ó óæ æY Y π πj jƒ ƒW W ô ô û ûd dGG ƒ ƒW W á á V Vh h º e 9 aGôWCG h SCGôdG ôNDƒŸ πØ SC G Aõ G º e 18 aGôWCG h SCGôdG ôNDƒŸ YC G Aõ G º e 41 YC G ä äÉ Éë ë ...

Page 42: ...H Ió H Öjò ûàdG RÉ L Éæ SCG ƒµJ CG Y ÉehO ßaÉM ô ûdG GôWCG ü dG IGOCG øe GóMGh ÉaôW a ùeÓj å ëH Öjò ûàdG dGƒ ùdG Öjò ûJ π πØ Ø S SCC GG É ÉŒ ŒÉ ÉH H ü ü d dGGI IGGO OCCGG ƒ ƒµ µJ J å å ë ëH H µ µ ù ùe eGG h h Ö Öj jò ò û ûà àd dGG R RÉ É L L Q QO OCCGG P PCC GG ø øe e É ÉÑ Ñj jô ôb b ô ô û ûd dGG N N ƒ ƒµ µj j CCGG Ö Öé éj j a a ô ô û ûd dGG GGô ôW WCCGG ü ü H H º ºb b æ dG ôNDƒe N ójó É ÉŒ ŒÉ ÉH ...

Page 43: ...H H Ö Öj jò ò û ûà àd dGG R RÉ É L L ô ôj jô ôª ªà àH H º ºb b S SCCGGô ôd dGG ê êÉ ÉJ J Ö Öj jò ò û ûJ J ó óæ æY Y I Ió óM Mƒ ƒe e ü üb b á áé é à àf f Y Y ƒ ƒ ü üë ë d d ü üb b Ö Öé éj j ò òd dGG ô ô û ûd dGG π πµ µd d R RÉ É GG É É à àd dGG ø øe e ó óc cCCÉ Éà à d d É É J JGGP P á á æ æŸ ŸGG Y Y GGQ QGGô ôe e R RÉ É GG ô ôj jô ôª ªà àH H º ºb b ô ô û ûd dGG É É à àd dGG ø øe e R RÉ É GG ø øµ µª...

Page 44: ...GG Ωƒ J SCGôdG øe JGP ó ÑdG Y ü dG IGOCG ÑJ µd É Uƒ üN IÉ TôØdG º ª üJ ó d ádƒ ùH ô ûdG OhóM ÉÑqJÉH áfôŸG IÉ TôØdG ô T GƒWCG Y ƒ ü G æµÁ IÉ TôØdG IGOCG e ô ûdG Öjò ûJ RÉ L Ωóîà ùJ âæc GPG áØ àfl ƒW á Vh 41 Éjƒ S ôaƒJ ÚJÉ Tôa e RÉ G ôaƒàj 14 ÉgÉ übCG áØ àfl hó G LGQ IÉ TôØdG IGOCG áYQPCG Y äGΪ ŸÉH É dG ô TDƒe ô ûdG ƒW á Vh G ܃ZôŸG ô ûdG ƒW á Vh QÉ àNG h RÉ G G IÉ TôØdG IGOCG Ö côJ áWÉ ùÑH æµÁ É H ü...

Page 45: ... à ù ùe e Y Y ü üî î û ûd dGG d dP P S SCCGGQ Q CCGG ó óc cCCÉ ÉJ J É É d dGG ƒ ƒ U Uƒ ƒd dGG á á S S h h ô ô û ûd dGG Ö Öj jò ò û ûà àd d GGó ó à à ù ùe e BB GG â âë ëÑ Ñ U UCCGG ƒ ƒ É ÉŒ ŒÉ ÉH H ô ô û ûd dGG û ûª ªà àH H º ºb b ÉL ô T Y ô ûdG Öjò ûJ RÉ L Ωóîà SG èFÉàædG π aCG Y ƒ üë d áë üf Iõ Lh IÎa òæe ƒ ù e ô T Y eóîà ùJ 3 2 1 á á S SÉ É S SCCG G Ö Öj jò ò û ûJ J Ö Ö d dÉ É S SCCG G Ö Öj jò ò...

Page 46: ...48 41 21 15 6 ...

Page 47: ...49 32 18 12 9 41 18 9 18 9 ...

Page 48: ...50 ...

Page 49: ...51 ...

Page 50: ...52 ...

Page 51: ...53 ...

Page 52: ...54 4203 000 51981 ...

Reviews: