background image

40

L

language code


38

M

main unit


4

manual setup


10

media formats


30

media sharing


20

menu language


25

musical slideshows


19

N

network


12

night mode


26

O

one-touch play


11

one-touch standby


11

options


17

P

parental control


26

PBC (play back control)


26

picture options


18

picture resolution


25

picture settings


25

picture-in-picture


15

play disc


14

play from PC


22

play USB storage device


17

power settings


26

predefined sound mode


24

preference


25

R

radio


19

remote control


5

repeat


18

S

shuffle


18

sleep timer


26

slide animation


18

software update


28

software version


28

sound


23

speaker position


7

speaker setup


10

speaker specifications


30

subtitle language


25

subtitle position


26

surround sound


24

synchronize picture and sound


15

T

troubleshooting (picture)


34

troubleshooting (play)


35

troubleshooting (sound)


34

tuning grid


20

U

update software (through Internet)


29

USB storage device


17

V

VCD


26

video connection (HDMI ARC)


8

video connection (standard HDMI)


9

video formats


32

video options


18

video settings


25

VOD code (DivX)


17

W

watch 3D


15

wired network


12

EN

Summary of Contents for HTB3581/93

Page 1: ...www philips com support User manual Always there to help you Register your product and get support at Question Contact Philips HTB3581 93 ...

Page 2: ... or elements contained in electronic information products will not leak or mutate so that the use of these substances or elements will not result in any severe environmental pollution any bodily injury or damage to any assets This logo refers to the period 5 years during which the toxic or hazardous substances or elements contained in the battery will not leak or mutate so that the use of these su...

Page 3: ... 16 USB storage devices 17 Audio video and picture options 17 Radio 19 External audio device 20 Voole 20 Browse PC through DLNA 20 Karaoke 23 Choose sound 23 5 Change settings 25 Language settings 25 Picture and video settings 25 Audio settings 26 Parental control settings 26 Display settings 26 Energy saving settings 26 Speaker settings 27 Restore default settings 27 6 Update software 28 Check so...

Page 4: ... of short circuit or fire Before you connect the product to the power outlet ensure that the power voltage matches the value printed on the back or bottom of the product Never connect the product to the power outlet if the voltage is different Risk of injury or damage to the home theater For wall mountable products use only the supplied wall mount bracket Secure the wall mount to a wall that can s...

Page 5: ...atteries always keep all new and used batteries out of reach of children Ensure that the battery compartment is completely secure after you replace the battery If the battery compartment cannot be completely secured discontinue use of the product Keep out of reach of children and contact the manufacturer This is CLASS II apparatus with double insulation and no protective earth provided Care for yo...

Page 6: ...ity for example driving a car until your symptoms have disappeared If symptoms persist do not resume watching 3D without consulting a medical professional first Parents should monitor their children during 3D viewing and ensure they do not experience any discomfort as mentioned above Watching 3D is not recommended for children under six years of age as their visual system is not fully developed ye...

Page 7: ...pop up menu when you play a disc e Navigation buttons Navigate menus In radio mode press left or right to start auto search In radio mode press up or down to tune the radio frequency f OK Confirm an entry or selection g Return to a previous menu screen In radio mode press and hold to erase the current preset radio stations h Color buttons Select tasks or options for Blu ray discs i Load or eject t...

Page 8: ...c w RADIO Switch to radio source Connectors This section includes an overview of the connectors available on your home theater Front connectors a MIC 1 Audio input from a microphone b MIC 2 Audio input from a microphone c AUDIO IN Audio input from an external device such as MP3 player 3 5mm jack d USB Audio video or picture input from a USB storage device Connect a USB mass storage to access BD Li...

Page 9: ... helps you connect your home theater to aTV and other devices and then set it up For information about the basic connections of your home theater and accessories see the quick start guide Note For identification and supply ratings see the type plate at the back or bottom of the product Before you make or change any connections make sure that all devices are disconnected from the power outlet Conne...

Page 10: ... seating position REAR RIGHT FRONT LEFT FRONT CENTER FRONT RIGHT REAR LEFT SUB WOOFER 4 REAR LEFT rear left and REAR RIGHT rear right speakers Place the rear surround speakers to the left and right side of your seating position either in line with it or slightly behind it 5 SUBWOOFER subwoofer Place the subwoofer at least one meter to the left or right of theTV Leave about 10 centimeter clearance ...

Page 11: ...ect an audio cable to hear theTV audio through your home theater see Connect audio fromTV and other devices on page 9 TV 3 On yourTV turn on HDMI CEC operations For details see theTV user manual HDMI CEC is a feature that enables CEC compliant devices that are connected through HDMI to be controlled by a single remote control such as volume control for both theTV and the home theater see Set up Ea...

Page 12: ...connector might be labeled DIGITAL AUDIO OUT TV Option 3 Connect audio through analog audio cables Basic quality audio 1 Using an analog cable connect the AUDIO IN AUX connectors on your home theater to the AUDIO OUT connectors on theTV or other device Set up speakers Set up the speakers manually to experience customized surround sound Before you start Make the necessary connections described in t...

Page 13: ...e the user manual of the TV or other devices On yourTV set the audio output to Amplifier instead ofTV speakers For details see theTV user manual EasyLink controls With EasyLink you can control your home theater TV and other connected HDMI CEC compliant devices with a single remote control One Touch Play One touch play When a video disc is in the disc compartment press Play to wake up theTV from st...

Page 14: ...ur home theater Connect and set up a home network Connect your home theater to a network router for a network setup and enjoy Streamed multimedia content see Browse PC through DLNA on page 20 Voole see Voole on page 20 BD Live applications see BD Live on Blu ray on page 15 Software update see Update software through the Internet on page 29 Caution Familiarize yourself with the network router media...

Page 15: ... Use your home theater This section helps you use the home theater to play media from a wide range of sources Before you start Make the necessary connections described in the quick start guide and the user manual Complete the first time setup First time setup appears when you turn on your home theater for the first time or if you do not complete the setup Switch theTV to the correct source for you...

Page 16: ...CDs CDs and Blu ray discs It can also play discs that you ve made at home such as CD R discs of photos videos and music 1 Insert a disc into the home theater 2 If the disc does not play automatically press DISC MENU to select disc source or select Play disc from the home menu 3 Use the remote control to control play It is normal to hear a little noise when you play a Blu ray disc This does not mea...

Page 17: ...uring video search and in certain play modes the video is displayed in 2D The video display returns to 3D when you resume play Note To avoid flickering change the brightness of the display BonusView on Blu ray On Blu ray discs that support the Bonus View enjoy extra content such as commentaries in a small screen window BonusView is also known as picture in picture 1 Enable BonusView in the Blu ray...

Page 18: ... your home theater see File formats on page 30 1 Play the files from a disc or USB storage device 2 To stop play press To resume the video from where you stopped press Play To play the video from the start press OK Note To play DivX DRM protected files connect your home theater to aTV through an HDMI cable Subtitles If your video has subtitles in multiple languages select a subtitle language Note ...

Page 19: ...n press OK 3 Select Advanced DivX VOD Code The DivXVOD registration code for your home theater is displayed USB storage devices Enjoy pictures audio and video stored on a USB storage device such as an MP4 player or digital camera What you need A USB storage device that is formatted for FAT or NTFS file systems and complies with the Mass Storage Class A media file in one of the supported file forma...

Page 20: ...scene 2nd audio language Select the second audio language for Blu ray video 2nd subtitle language Select the second subtitle language for Blu ray video Titles Select a specific title Chapters Select a specific chapter Karaoke Change the karaoke settings Angle list Select a different camera angle Menus Display the disc menu PIP selection Display Picture in Picture window when playing a Blu ray disc...

Page 21: ...ten to FM radio on your home theater and store up to 40 radio stations Note AM and digital radio are not supported If no stereo signal is detected you are prompted to install the radio stations again 1 Connect the FM antenna to the FM ANTENNA on your home theater For the best reception place the antenna away from yourTV or other sources of radiation 2 Press RADIO to switch to radio source If you h...

Page 22: ...ctor on your home theater 2 Press SOURCE repeatedly until AUDIO IN appears on the display panel 3 Press the buttons on the external audio device to select and play audio files Voole With this home theater connected to the Internet you can stream movies andTV episodes to yourTV 1 Connect your home theater to a home network with high speed Internet access see Connect and set up a home network on pag...

Page 23: ...ible devices to the same home network Make sure that your PC firewall allows you to run Media Player programs or the firewall s exemption list has the media server software included Switch on your computer and the router Microsoft Windows Media Player 11 1 Start Windows Media Player on your PC 2 Click the Library tab and then select Media Sharing 3 The first time you select Media Sharing on your P...

Page 24: ...ic Library Locations screen is displayed 8 Follow the onscreen instructions to add the other folders that contain your media files Macintosh OS XTwonky Media v4 4 2 1 Visit www twonkymedia com to purchase the software or download a free 30 day trial to your Macintosh 2 StartTwonky Media on the Macintosh 3 In theTwonky Media Server screen select Basic Setup and First Steps The First steps screen is...

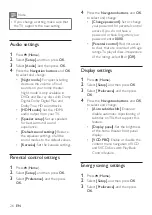
Page 25: ... disc press The options menu is displayed 2 Press the Navigation buttons to select Karaoke and then press OK The karaoke setup menu is displayed 3 Press the Navigation buttons up down and OK to change the following settings Microphone 1 Turn the microphone on or off Microphone 2 Turn the microphone on or off Microphone 1 volume Change the microphone volume Microphone 2 volume Change the microphone...

Page 26: ...select a sound setting based on the sound stream Balanced Experience the original sound of your movies and music without added sound effects Powerful Enjoy thrilling arcade sounds ideal for action packed videos and loud parties Bright Spice up your dull movies and music with added sound effects Clear Hear every detail in your music and clear voices in your movies Warm Experience spoken words and m...

Page 27: ...r the 4 digit language code found at the end of this user manual see Language code on page 38 If you select a language that is not available on a disc the home theater uses the default language of the disc Picture and video settings 1 Press Home 2 Select Setup and then press OK 3 Select Video and then press OK 4 Press the Navigation buttons and OK to select and change TV display Select a picture f...

Page 28: ... then press OK 3 Select Preference and then press OK 4 Press the Navigation buttons and OK to select and change Change password Set or change your password for parental control access If you do not have a password or have forgotten your password enter 0000 Parental control Restrict access to discs that are recorded with age ratings To play all discs irrespective of the ratings select 8 or Off Disp...

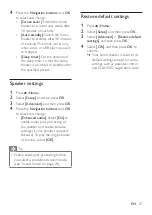
Page 29: ...OK 3 Select Advanced and then press OK 4 Press the Navigation buttons and OK to select and change Enhanced audio Select On to enable audio post processing at the speaker and enable karaoke settings if your product supports Karaoke To play the original audio of the disc select Off Tip Enable audio post processing before you select a predefined sound mode see Sound mode on page 24 Restore default se...

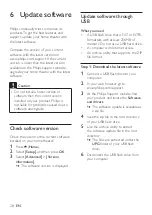
Page 30: ...Home 2 Select Setup and then press OK 3 Select Advanced Version information The software version is displayed Update software through USB What you need A USB flash drive that is FAT or NTFS formatted with at least 256MB of memory Do not use a USB hard drive A computer with Internet access An archive utility that supports the ZIP file format Step 1 Download the latest software 1 Connect a USB flash...

Page 31: ...oftware through the Internet 1 Connect your home theater to a home network with a high speed Internet access see Connect and set up a home network on page 12 2 Press Home 3 Select Setup and then press OK 4 Select Advanced Software update Network If an upgrade media is detected you are prompted to start or cancel the update Downloading of the upgrading file may take long depending on your home netw...

Page 32: ...g 3gp rmvb rm rv Picture jpg jpeg gif png C Audio formats Your home theater supports the following audio files Exten sion Con tainer Audio codec Bit rate mp3 MP3 MP3 Up to 320 kbps wma ASF WMA Up to 192 kbps WMA Pro Up to 768kbps aac AAC AAC HE AAC Up to 192 kbps wav WAV PCM 27 648 Mbps m4a MKV AAC 192 kbps ALAC Up to 192kHz sampling rate mka MKA PCM 27 648 Mbps AC 3 640kbps DTS core 1 54 Mbps MPE...

Page 33: ... 6 x 10 Mbps max mp4 or m4v files in MP4 container Audio codec Video codec Bit rate AC 3 MPEG MP3 AAC HE AAC DD MPEG 1 MPEG 2 40 Mbps MPEG 4 ASP 38 4 Mbps H 264 AVC up to HiP 5 1 25 Mbps mov files in MOV container Audio codec Video codec Bit rate AC 3 MPEG MP3 AAC HE AAC MPEG 1 MPEG 2 40 Mbps MPEG 4 ASP 38 4 Mbps H 264 AVC up to HiP 5 1 25 Mbps mkv files in MKV container Audio codec Video codec Bi...

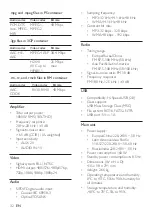
Page 34: ...C 60958 3 Optical TOSLINK Sampling frequency MP3 32 kHz 44 1 kHz 48 kHz WMA 44 1 kHz 48 kHz Constant bit rate MP3 32 kbps 320 kbps WMA 48 kbps 192 kbps Radio Tuning range Europe Russia China FM 87 5 108 MHz 50 kHz Asia Pacific Latin America FM 87 5 108 MHz 50 100 kHz Signal to noise ratio FM 50 dB Frequency response FM 180 Hz 12 5 kHz 3 dB USB Compatibility Hi Speed USB 2 0 Class support USB Mass ...

Page 35: ...ront rear Dimensions W x H x D 250 x 1140 x 250 mm front rear Weight 3 86 kg each front rear Cable length front 3 m Cable length rear 10 m Subwoofer Output power 166 W RMS 10 THD Impedance 3 ohm Speaker drivers 165 mm 6 5 woofer Dimensions W x H x D 237 x 293 x 308 mm Weight 3 8 kg Cable length 3 m Remote control batteries 2 x AAA R03 1 5V Laser LaserType Diode InGaN AIGaN BD AIGaInP DVD CD Wave l...

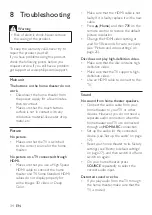
Page 36: ...t the HDMI cable is not faulty If it is faulty replace it with a new cable Press Home and then 731 on the remote control to restore the default picture resolution Change the HDMI video setting or wait for 10 seconds for auto recovery see Picture and video settings on page 25 Disc does not play high definition video Make sure that the disc contains high definition video Make sure that theTV support...

Page 37: ...t the format of the USB storage device is compatible with the home theater Make sure that the file system on the USB storage device is supported by the home theater No entry or x sign appears on the TV The operation is not possible EasyLink does not work Make sure that the home theater is connected to a Philips brand EasyLink TV and the EasyLink option is turned on see Set up EasyLink HDMI CEC con...

Page 38: ...technology is provided at the Cinavia Online Consumer Information Center at http www cinavia com To request additional information about Cinavia by mail send a postcard with your mailing address to Cinavia Consumer Information Center P O Box 86851 San Diego CA 92138 USA Open source software Philips Electronics Singapore hereby offers to deliver upon request a copy of the complete corresponding sou...

Page 39: ...the source code or otherwise replicate the functionality of the Real Format Client Code except to the extent that this restriction is expressly prohibited by applicable law RealNetworks Inc disclaims all warranties and conditions other than those set forth in this Agreement which are in lieu of all other warranties whether express and implied including but not limited to any implied warranties or ...

Page 40: ...a 7574 Kurdish 7585 Lao 7679 Latina 7665 Latvian 7686 Letzeburgesch 7666 Limburgan Limburger 7673 Lingala 7678 Lithuanian 7684 Luxembourgish 7666 Macedonian 7775 Malagasy 7771 Magyar 7285 Malayalam 7776 Maltese 7784 Manx 7186 Maori 7773 Marathi 7782 Marshallese 7772 Moldavian 7779 Mongolian 7778 Nauru 7865 Navaho Navajo 7886 Ndebele North 7868 Ndebele South 7882 Ndonga 7871 Nederlands 7876 Nepali ...

Page 41: ...btitle shift 26 auto volume 24 B batteries 33 BD Live 15 Blu ray 14 BonusView 15 brightness 26 C change password 26 character set 16 clear BD Live memory 15 connect to TV 8 connectors 6 control buttons disc 14 control buttons USB 14 D data files 16 deep color 25 default settings 27 device name 13 disc language 25 disc menu 25 display panel 26 DivX 16 E Easylink HDMI CEC 11 eject disc 4 enhanced au...

Page 42: ... 24 preference 25 R radio 19 remote control 5 repeat 18 S shuffle 18 sleep timer 26 slide animation 18 software update 28 software version 28 sound 23 speaker position 7 speaker setup 10 speaker specifications 30 subtitle language 25 subtitle position 26 surround sound 24 synchronize picture and sound 15 T troubleshooting picture 34 troubleshooting play 35 troubleshooting sound 34 tuning grid 20 U...

Page 43: ... the HDMI Logo are trademarks or registered trademarks of HDMI Licensing LLC in the United States and other countries RealNetworks Real the Real logo RealPlayer and the RealPlayer logo are trademarks or registered trademarks of RealNetworks Inc CLASS 1 LASER PRODUCT Blu ray 3D and Blu ray 3D logo are trademarks of Blu ray Disc Association DVDVideo is a trademark of DVD Format Logo Licensing Corpor...

Page 44: ...Specifications are subject to change without notice 2014 Koninklijke Philips N V All rights reserved Trademarks are the property of Koninklijke Philips N V or their respective owners HTB3581_93_UM_V1 0 ...

Reviews: