background image

EN

 - 

21

EN

5.

BEFORE YOU START

5.1. Finding the Viewing Channel / 

Source on Your TV

After you have completed all the connections, you must 
find the viewing channel (external input source) on your 
TV.
1. After you have made all the necessary connections, 

press 

[ (standby/on)]

 to turn on the unit.

2. Turn on your TV.
3. Press the button on the TV’s remote control that 

accesses the external input channel. It may be labeled 
“SOURCE”, “AV”, “AUX” or “SELECT” (refer to your 
TV’s user manual). Or press “2” on the TV’s remote 
control, then press channel down button repeatedly 
until you see the Philips splash screen.

This is the correct viewing channel (external input 
source).
• If the TV is connected by an HDMI cable, it may take 

a while for the Philips splash screen to come up.

• If a certain amount of time has passed since you 

turned on the unit, welcome screen appears the first 
time you turn on this unit.

5.2. Initial Setup

Please follow the instructions below to complete the initial 
setup.
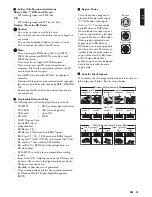
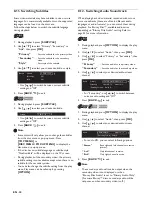
1. While welcome screen is displayed, use 

[

]

 to 

select “Next”, then press 

[OK]

.

2. Language setup screen will appear. Use 

[

]

 to 

select your language, then press 

[OK]

.

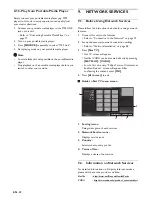
3. Quick start mode setup screen will appear. Use 

[

]

 to select the desired mode, then press 

[OK]

.

4.  Auto software update setup screen will appear. Use 

[

]

 to select the desired mode, then press 

[OK]

.

5. Network setup screen will appear. Use 

[

]

 to 

select the desired mode, then press 

[OK]

.

• If you select “Wired”, refer to “Wired” on page 38 

for further operation.

• If you select “Wireless”, refer to “Wireless” on 

page 40 for further operation.

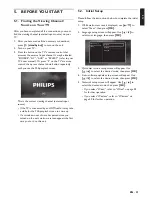
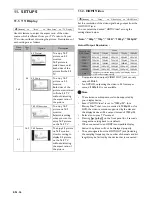
Please select your 
language for on-screen 
display.

English

Español

Français

Summary of Contents for HTS3106/F7 C

Page 1: ...uniquez avec le centre de service à la clientèle de votre pays Pour obtenir de l aide aux États Unis au Canada à Puerto Rico ou aux Îles Vierges américaines communiquez avec le centre de service à la clientèle Philips au 1 866 309 0866 ES Para obtener más información llame al servicio de soporte al cliente de su país Para obtener asistencia en los Estados Unidos en Canadá Puerto Rico o en las Isla...

Page 2: ...on and special offers for which you qualify plus easy access to accessories from our convenient home shopping network Most importantly you can count on our uncompromising commitment to your total satisfaction All of this is our way of saying welcome and thanks for investing in a Philips product P S To get the most from your Philips purchase be sure to complete and return your Product Registration ...

Page 3: ...equipment generates uses and can radiate radio frequency energy and if not installed and used in accordance with the instructions may cause harmful interference to radio communications However there is no guarantee that interference will not occur in a particular installation If this equipment does cause harmful interference to radio or television reception which can be determined by turning the e...

Page 4: ...ntative If you believe the representative will need to help you with operations please stay near the product Our representatives will be happy to assist you For online reference please visit our website at www philips com support Cleaning the Cabinet Wipe the front panel and other exterior surfaces of the unit with a soft cloth Never use a solvent thinner benzene or alcohol to clean the unit Do no...

Page 5: ... com support to ensure Product Safety Notification By registering your product you receive notification directly from the manufacturer in the rare case of a product recall or safety defect Additional Benefits of Product Ownership Registering your product guarantees that you receive all of the privileges to which you re entitled including special money saving offers For further assistance For furth...

Page 6: ...or registered trademarks of HDMI Licensing LLC in the United States and other countries x v Color and x v Color logo are trademarks of Sony Corporation Java and all Java based trademarks and logos are trademarks or registered trademarks of Oracle and or its affiliates Windows Media and the Windows logo are trademarks or registered trademarks of Microsoft Corporation in the United States and or oth...

Page 7: ...EN EN 7 Kodak and KODAK Picture CD Compatible are trademarks of Kodak used under license The Wi Fi CERTIFIED Logo is a certification mark of the Wi Fi Alliance ...

Page 8: ...D Card 26 Using the Title Disc Pop up Menu 26 SPECIAL PLAYBACK 27 Fast Forward Fast Reverse 27 Slow Forward Playback 27 Step by Step Playback 27 Repeat Playback 27 Slide Show 28 PiP BONUSVIEW Setting 28 Enjoying BD Live Discs Using the Internet 28 Title Chapter Search 29 Track Search 29 Time Search 29 Switching Subtitles 30 Switching Audio Soundtrack 30 Switching Camera Angles 31 Black Level 31 No...

Page 9: ...ily connect to your home theater system or amplifier About EasyLink HDMI CEC Consumer Electronics Control EasyLink allows you to operate the linked functions of this home theater system with Philips brand TV with EasyLink feature Philips does not guarantee 100 interoperability with other brands of HDMI CEC compliant devices PiP BONUSVIEW Some BD videos have the PiP function which enables you to di...

Page 10: ...ates 2 2 Version Info Version Info screen provides information about this unit s software version You can also download the latest software from the Philips website and update it yourself if it is newer than the version currently on your unit The current version of software on your unit can be seen on the Version Info screen To access Version Info follow the procedure below 1 Press home 2 Use to s...

Page 11: ...lot Insert an SD card and play back the contents in it 3 2 Rear Panel 1 AC power cord Connect to a standard AC outlet to supply power to this unit Unplug this cord from the AC outlet to completely turn off the unit 2 5 1ch Audio Out jacks SPEAKERS 4Ω Use to connect supplied 5 1ch speakers 3 LAN terminal Use to connect to network provisioning equipment such as a router or a modem with a LAN cable 4...

Page 12: ...reen function 10 play button Press to start playback or resume playback 11 previous button During playback press once to return to the beginning of the current title chapter track or file During playback press twice to return to the previous title chapter track or file During the JPEG playback press to return to the previous file 12 reverse button During playback press to fast reverse the playback...

Page 13: ...o not use different kinds of batteries together Although they may look similar different batteries may have different voltages Make sure that the and ends of each battery match the indications in the battery compartment Remove batteries from battery compartment when the remote is not going to be used for a month or more When disposing of used batteries please comply with governmental regulations o...

Page 14: ...y menu e g Blu ray Disc Display Mode Home menu Aux mode Coaxial mode Indicating the elapsed time of playback Current chapter is in chapter repeat mode during playback of disc Loading a disc or SD card Network media mode menu is displayed Play Disc Initiates playback of inserted disc displays a list of tracks files or the media filter menu Browse SD Card Displays a list of tracks files on the inser...

Page 15: ... speakers are labeled as FRONT LEFT or FRONT RIGHT For speaker setup refer to Speaker Setup on page 33 4 2 Connection to the TV HDMI Connection Supports up to 1080i 1 1080p 2 1080p 24 resolution No analog audio connection required Do not tilt the connector when inserting it into the HDMI jack and make sure the shapes of the jack and the connector are matched When connected to an HDCP incompatible ...

Page 16: ...o the matching sockets at the rear of the main unit Make sure that the colors of the cables and sockets match D Note To prevent unwanted noise never place the speakers too close to the main unit subwoofer AC power adapter TV or any other radiation sources LAN SUB WOOFER FRONT CENTER REAR FRONT SPEAKERS 4 HDMI OUT VIDEOOUT DIGITAL AUDIO IN COAXIAL AUDIO IN AUX VIDEO IN Your TV Video cable supplied ...

Page 17: ...device D Note To listen to the audio output from these connections select Speakers in Audio Output refer to page 33 and change the active source mode to the connected input Refer to Switching Active Source Mode on page 46 4 5 Connecting Portable Media Player Connect a 3 5mm stereo audio cable not supplied to the MP3 LINK jack on this unit and the headphone jack on your portable media player D Note...

Page 18: ...contains the primary audio the audio output will be the same case as Primary Audio Only even if Blu ray Disc Audio is set to Mix Audio Output home A Setup A Audio Setup A Audio Output Audio Output setting HDMI Normal HDMI LPCM Blu ray Disc Audio setting A Primary Audio Only Mix Audio Output Primary Audio Only Mix Audio Output Media ª Audio Source ª Which audio format can be output depends on the c...

Page 19: ...C directly to the LAN terminal of this unit D Note After you made a wired connection set up necessary network settings For network setting of wired connection refer to Wired on page 38 If your modem does not have router functions connect a wired router If your modem has router functions but there is no vacant port add a hub For a wired router use a router which supports 10BASE T 100BASE TX ETHERNE...

Page 20: ...a Wi Fi router use a router which supports IEEE 802 11 b g n n type is recommended for stable operation of the Wi Fi network Set the Wi Fi router to Infrastructure mode This unit does not support Ad hoc mode Other radio devices or obstacles may cause interference to the Wi Fi network connection LAN WAN LAN cable not supplied Internet Networking equipment modem etc Wi Fi router ...

Page 21: ... a while for the Philips splash screen to come up If a certain amount of time has passed since you turned on the unit welcome screen appears the first time you turn on this unit 5 2 Initial Setup Please follow the instructions below to complete the initial setup 1 While welcome screen is displayed use to select Next then press OK 2 Language setup screen will appear Use to select your language then...

Page 22: ... ver 2 1 Recorded in BDMV format BD R ver 1 1 1 2 1 3 Recorded in BDMV format Unfinalized disc may not be played back DVD video DVD RW finalized video mode discs only DVD R finalized video mode discs only CD DA audio CD CD RW CD R KODAK Picture CD DTS CD Playable files Media AVCHD DVD RW R SD Memory Card miniSD Card microSD Card SDHC Memory Card miniSDHC Card microSDHC Card MP3 BD RE R DVD RW R CD...

Page 23: ...lu ray Disc DVD hybrid disc played back as a BD video only DVD RW R recorded in non compatible recording format Super Audio CD Only the sound on the CD layer can be heard The sound on the high density Super Audio CD layer cannot be heard Playability of dual discs is not guaranteed This unit cannot play back the disc contents protected by Windows Media Digital Rights Management DRM Region Codes Hin...

Page 24: ...4 Image 5 Group folder File list thumbnails 6 3 How to Insert a Disc 1 Press open close to open the disc tray 2 Place the disc on the disc tray with its label side facing up 3 Press open close to close the disc tray It may take a while to load the disc 5 4 2 3 1 7 6 DATA CD 1 25 0 00 12 MP3_ Audio MP3_1 mp3 MP3_2 mp3 MP3_3 mp3 MP3_4 mp3 MP3_5 mp3 MP3_6 mp3 File List Track Time Disc Page Up Page Do...

Page 25: ...art from the point where it is stopped next time you press play If you press OK instead of play playback will start from the beginning of the track file instead of resuming from the stop point MP3 WMA JPEG KODAK Picture CD Playback will start from the beginning of the current file next time you press play or OK D Note Playback will also stop and the home menu will appear when you press home For BD...

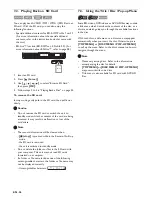
Page 26: ...n stop is pressed while in the Resume On Stop mode the SD card is removed the unit is switched to standby mode Do not delete the folders or files in the SD card with your computer This unit may not read SD cards formatted on a computer If a folder or file name includes one of the following unrecognizable characters the folder or file name may not be displayed correctly Unrecognizable characters 7 ...

Page 27: ...p by Step Playback 1 In pause mode press next repeatedly Every time you press next playback will advance one step at a time 2 Press play or pause to return to normal playback D Note Only step by step forward is available 8 4 Repeat Playback Available repeat function varies depending on the discs 1 During playback press REPEAT 2 Use to select the desired repeat mode 3 Press BACK to exit D Note The ...

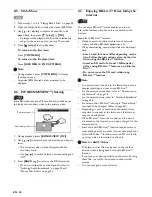
Page 28: ...l content such as movie trailers subtitles BD Java applications etc While downloading special video data may be played back Service and functions differ depending on the disc Follow the instructions given by the disc when using the BD Live function Insert an SD card of at least 1 GB capacity before using BD Live features on a Blu ray Disc Do not remove the SD card while using BD Live features D No...

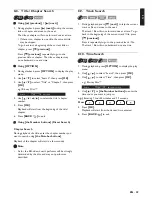
Page 29: ...Search During playback of a title enter the chapter number you want to search using the Number buttons Playback of the chapter will start in a few seconds D Note As for the BD video how it performs will be strongly determined by the disc and may not perform as described 8 9 Track Search 1 During playback press next to skip the current track or file and move to the next The track file will move for...

Page 30: ...t audio languages or audio formats you can switch them during playback For Blu ray Disc available audio varies depending on Blu ray Disc Audio setting Refer to page 33 for more information 1 During playback press OPTION to display the play menu 2 Use to select Audio then press OK 3 Use to select Primary or Secondary then press OK 4 Use to select your desired audio stream channel For Secondary use ...

Page 31: ...ed angle 4 Press BACK to exit D Note If Angle Icon setting is set to Off will not appear on the TV screen refer to page 35 8 14 Black Level You can adjust the black level setting to make the black parts of the pictures as bright as you prefer You can select On or Off 1 During playback press OPTION to display the play menu 2 Use to select Black Level then press OK 3 Use to select your desired setti...

Page 32: ...is unit to the Internet Refer to Connection to the Network on page 19 2 Set up the necessary network connection settings Refer to Network Installation on page 38 3 Press Net TV Net TV screen will appear Netflix VUDU can be accessed directly by pressing NETFLIX VUDU For the first time only Philips Terms of Use Internet Enabled Product screen will appear After confirming the content press OK 4 Press...

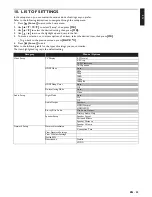
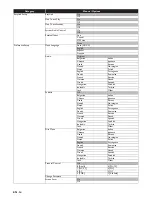
Page 33: ...ress home to exit Refer to the following table for the types of settings you can customize The item highlighted in gray is the default setting Category Menus Options Video Setup TV Display 4 3 Normal 4 3 Crop 16 9 Widescreen 16 9 Squeeze HDMI Video Auto 480p 720p 1080i 1080p 1080p 24 HDMI Deep Color Auto Off De interlacing Mode Auto Video Audio Setup Night Mode Auto On Off Audio Output Speakers HD...

Page 34: ...eek Spanish Hungarian Swedish Icelandic Turkish Irish Other Subtitle Off Bulgarian Italian Chinese Japanese Czech Korean Danish Norwegian Dutch Polish English Portuguese Finnish Romanian French Russian German Slovak Greek Spanish Hungarian Swedish Icelandic Turkish Irish Other Disc Menu Bulgarian Italian Chinese Japanese Czech Korean Danish Norwegian Dutch Polish English Portuguese Finnish Romania...

Page 35: ...con On Off Display Panel Auto Bright Dimmer Advanced Setup Auto Power Off On Off Software Update Disc Network SD Card Automatically check for latest software On Off Quick Start Mode On Off Version Info Restore default settings Reset Settings Format SD Card Unit Erase Saved BD ROM Data SD Card Erase Saved BD ROM Data Reset Network Settings OSS ...

Page 36: ...yed properly The audio signals from the HDMI OUT jack including the sampling frequency the number of channels and bit length may be limited by the device that is connected home A Setup A Video Setup A TV Display Video source Your TV Option Description 16 9 4 3 4 3 Normal To enjoy 16 9 picture on 4 3 monitor 16 9 picture is scaled down until both sides of the picture fits the 4 3 TV 4 3 Crop To enj...

Page 37: ...video in 1080p 24 picture will not be output from the VIDEO OUT jack Copyright protection system To play back the digital video images of a BD video or DVD video via an HDMI connection it is necessary that both the player and the display device or an AV receiver amplifier support a copyright protection system called HDCP high bandwidth digital content protection system HDCP is copy protection tech...

Page 38: ...any other network device e g a router PC etc you may have to power cycle the modem to reset the settings on the modem Wired Select Wired if you made a wired connection and set the setting to Auto Setup or Manual Setup in accordance with your network environment Auto Setup Select Auto Setup to set the network setting automatically 1 Follow steps 1 to 3 in Connection Test on page 38 2 Use to select ...

Page 39: ...ection test and the test result will appear right after the connection test finishes 16 Press OK to go back to the setup menu or press home to exit D Note for IP Address Subnet Mask Default Gateway Primary DNS and Secondary DNS The range of input numbers is between 0 and 255 If you enter a number larger than 255 the number will automatically be reset to 255 When you enter a wrong number select Cle...

Page 40: ...11 b g n Frequency spectrum 2 4 GHz Security protocol WEP WPA WPA2 Manual Entry Set up the connection to the Wi Fi network manually by entering the Wi Fi network name SSID 1 Follow steps 1 to 2 in Auto Scan on page 40 2 Use to select Manual Entry then press OK 3 Access Point Setting Manual Entry screen will appear Enter the SSID using cursor buttons number buttons and color key then press Red 4 Se...

Page 41: ... 3 Press home to exit Netflix ESN You can view the ESN number which is a serial number used by Netflix to identify a device Netflix customer service might ask you for this number during troubleshooting 1 Follow steps 1 to 2 in Connection Test on page 38 2 Use to select Netflix ESN then press OK 3 Press home to exit 11 4 EasyLink Setup This unit supports Philips EasyLink which enables your TV limit...

Page 42: ...n press OK 2 Use to select EasyLink Setup then press OK 3 Use to select External Input then press OK 4 Use to select the correct input then press OK 5 Press home to exit 11 6 Parental Control Some BD videos or DVD videos feature parental lock levels Playback will stop if the ratings exceed the levels you set it will require you to enter a password before the disc will play back This feature preven...

Page 43: ...r of your Home Theater System e g HTS3106 to find information Disc SD Card Update You can update the software by using a disc or SD card 1 Use to select Setup in the home menu then press OK 2 Use to select Advanced Setup then press OK 3 Use to select Software Update then press OK 4 Use to select Disc or SD Card then press OK 5 Use to select Yes then press OK 6 Insert the disc or SD card for softwa...

Page 44: ...flix is available when updating the software 11 8 Restore Default Settings Menus to reset player settings format SD card local storage and clear network settings 1 Use to select Setup in the home menu then press OK 2 Use to select Advanced Setup then press OK 3 Use to select Restore default settings then press OK 4 Use to select the desired setting then press OK Reset Settings All the settings exc...

Page 45: ...e desired surround mode The setting does not appear on the TV screen The availability of surround sound modes will depend on the audio source In disc or SD card mode pressing SURROUND does not work while in the Resume On Stop mode Pressing SURROUND does not work during playback of JPEG files This function is effective only for the audio output from 5 1ch speakers The volume will be restored If you...

Page 46: ...p timer Press SLEEP repeatedly to select the desired preset time SLP Off Turns off the sleep timer SLP 15min Set the preset turn off time to 15 minutes SLP 30min Set the preset turn off time to 30 minutes SLP 60min Set the preset turn off time to 60 minutes SLP 90min Set the preset turn off time to 90 minutes SLP 120min Set the preset turn off time to 120 minutes SLP 150min Set the preset turn off...

Page 47: ...xternal audio input No 5 1 channel audio from the speaker system Does the disc contain 5 1 channel audio The 5 1 channel audio is not available when the disc does not contain it Set Audio Output to Speakers in the settings menu Make sure that the surround mode is not set to 2 1ch Stereo When listening to a stereo 2 channel source press SURROUND and select Dolby Pro Logic II Music or Dolby Pro Logi...

Page 48: ...work connection is properly made Turn on the modem or router Check the network settings Check if the router and or modem is correctly connected Check the BD Live setting in Manual Setup on page 38 When connecting directly to a modem via a LAN cable you might need to power cycle the modem to reset settings on the modem Cannot use the Wi Fi connection Once you have activated the Wi Fi connection ple...

Page 49: ...ser manuals 14 2 Contact Us If you cannot resolve your problem refer to the FAQ for this Home Theater System at www philips com support If the problem remains unresolved contact the Customer Support Center in your country D Note Do not attempt to repair the Home Theater System yourself This may cause severe injury irreparable damage to your Home Theater System or void your warranty Please have you...

Page 50: ...xtension to Dolby Digital Blu ray Disc supports 7 1 multi channel surround sound output Dolby Pro Logic II Dolby Pro Logic II technology processes any high quality stereo two channel movie and music audio into five playback channels of full bandwidth surround sound A matrix surround decoding technology Dolby Pro Logic II detects the directional cues that occur naturally in stereo content and uses ...

Page 51: ... rate which sound is measured by a specified interval to turn into digital audio data The numbers of sampling in one second defines as sampling frequency The higher the rate the better the sound quality Subnet Mask A mask which is used to determine what subnet an IP address belongs to Title A collection of chapters on BD video or DVD video See also Chapter Track Audio CD uses tracks to divide up t...

Page 52: ...la 4860 I K Occitan 6149 Telugu 6651 Bhutani 5072 Icelandic ICE 5565 Oriya 6164 Thai 6654 Bihari 4854 Indonesian 5560 Oromo Afan 6159 Tibetan 4861 Bislama 4855 Interlingua 5547 Panjabi 6247 Tigrinya 6655 Breton 4864 Interlingue 5551 Pashto Pushto 6265 Tonga 6661 Bulgarian BUL 4853 Inupiak 5557 Persian 5247 Tsonga 6665 Burmese 5971 Irish GLE 5347 Polish POL 6258 Turkish TUR 6664 Byelorussian 4851 I...

Page 53: ...range satellite Impedance 4Ω Frequency response 180 Hz 20 kHz Dimensions 3 9 x 5 1 x 4 0 inches 100 x 130 x 100 5 mm Speaker cable length front 9 8 feet 3 m rear 30 feet 9 15 m Weight front 1 19 lbs 0 54 kg rear 1 13 lbs 0 51 kg Center speaker System Full range satellite Impedance 4Ω Frequency response 180 Hz 20 kHz Dimensions 3 9 x 5 1 x 4 0 inches 100 x 130 x 100 5 mm Speaker cable length 9 8 fe...

Page 54: ...arranty This warranty does not apply a to damage caused by accident abuse misuse neglect misapplication or non Philips product b to damage caused by service performed by anyone other than an Authorized Service Location c to a product or a part that has been modified without written permission or d if any serial number has been removed or defaced or e product accessories or consumables sold AS IS w...

Page 55: ...s A work based on the Library means either the Library or any derivative work under copyright law that is to say a work containing the Library or a portion of it either verba tim or with modifications and or translated straightforwardly into another language Hereinafter translation is included without limitation in the term modification Source code for a work means the preferred form of the work f...

Page 56: ... Philips at the Internet http www philips com support P F USA Inc PO Box 430 Daleville IN 47334 0430 Philips and Philips Shield are used under license of Koninklijke Philips Electronics N V EDA02UD EDA00UD ...

Reviews: