


Step 3. Set Up Your Service PC.
IntelliVue Telemetry System Infrastructure Installation and Service Guide
3
-
7
Step 3. Set Up Your Service PC.
To prepare your service PC to configure the APCs, you must:
• Configure your PC to connect to the ITS Wireless Subnet.
• Copy the Philips Upgrade Wizard tool and the latest ITS APC and AP firmware
files to your PC from the Philips Network Infrastructure Tools CD-ROM.
Configuring Your PC to Connect to the ITS Wireless Subnet
To configure your PC to connect to the ITS wireless subnet:
1. Configure your Service PC’s network adapter for 100 Mbs full duplex
communications and assign a fixed IP address to your Service PC that falls
within the ITS subnet address space:
a) Disconnect all network connections from your PC.
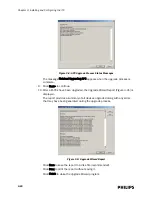
b) Select Start/Settings/Network Connections/Local Area Connection from
the Windows desktop.
The Local Area Connection Status dialog appears.
c) Click Properties.
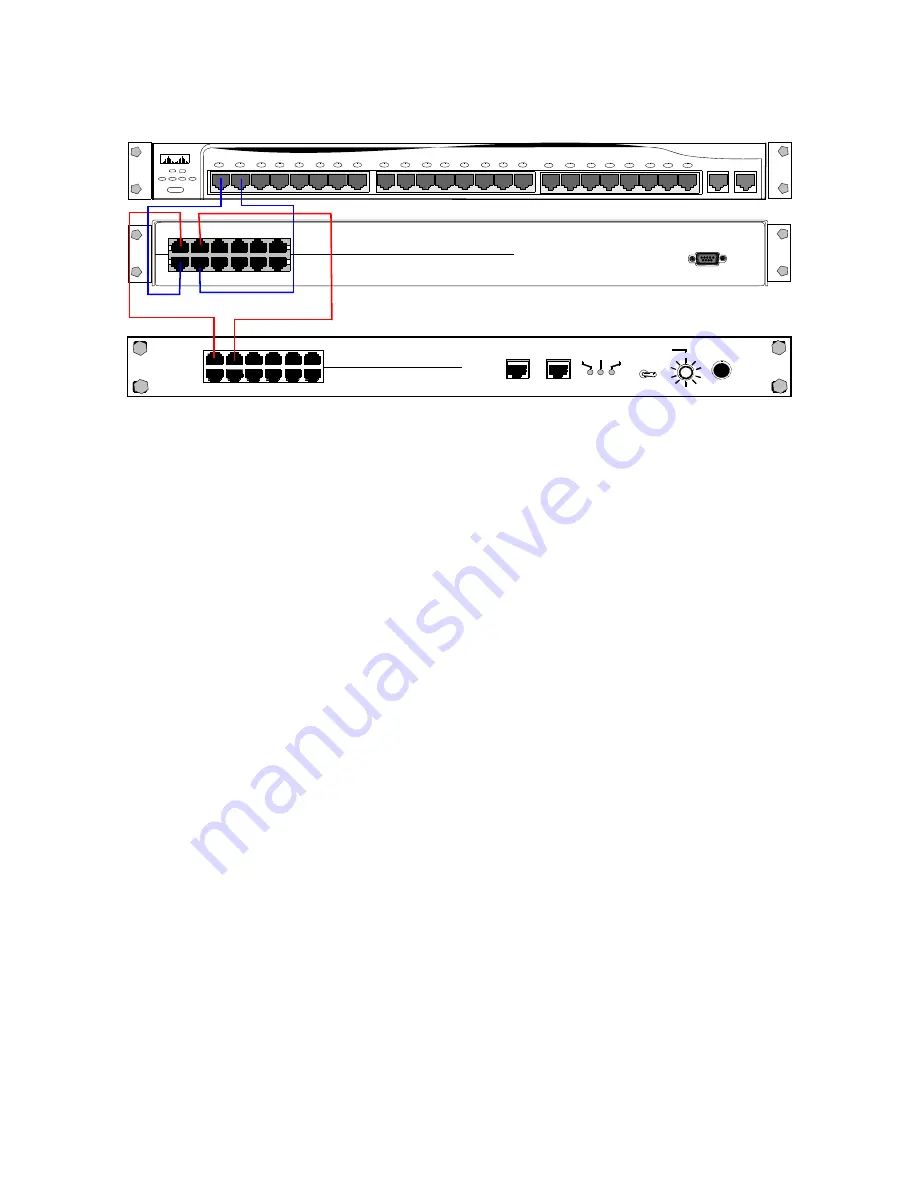
Figure 5: ITS PoE Unit to ITS Synchronization Unit Cable Connections
ICN Network Switch
ITS Power over Ethernet Unit
Data & Power Ports (To APs)
Data Ports (To ICN Network Switch)
ITS Synchronization Unit
- From Power Hub (PoE Unit)
- From Access Points
Master/Slave
1 2 3 4 5 6
1 2 3 4 5 6
1 2 3 4 5 6
1 2 3 4 5 6
1
24
2
Summary of Contents for IntelliVue Telemetry System Infrastructure
Page 8: ...viii Contents ...
Page 14: ...xiv About This Guide ...
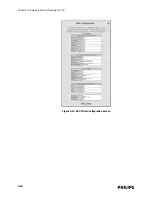
Page 100: ...3 22 Chapter 3 Installing and Configuring the ITS Figure 3 10 APC Filter Configuration Screen ...
Page 162: ...5 12 Chapter 5 Troubleshooting and Testing ...
Page 168: ...A 6 Chapter A Installing Multiple ITSs at a Single Hospital Site ...
Page 180: ...Index 8 Index ...


