Service Modes, Error Codes, and Fault Finding
5.
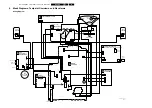
Picture Ok, No Sound
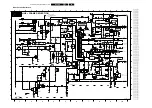
Figure 5-11 Fault finding tree “Picture ok, no sound”
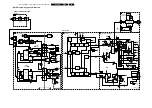
Unable To Perform Tuning
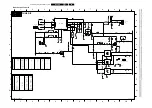
Figure 5-12 Fault finding tree “Unable to perform tuning”
5.8.6
Controller
Below are some guidelines for troubleshooting of the Micro
Controller function. Normally Micro Controller should be
checked when there is a problem of startup.
1.
Check that both +3.3 V_dc and +1.8 V_dc are present.
2.
Check that crystal oscillator is working.
3.
Check that Power Good signal is at “high” logic, normal
operation.
4.
Check that HERCULES is not in standby mode. Pin 15 of
HERCULES should be 0 V_dc.
5.
Make sure H-drive pulse is there. This can be checked at
resistor R3239. If H-drive does not exist, remove resistor
R3239 to check if there is loading.
Note: When the set shuts down after a few second after power
“on”, the main cause is that Vg2 not aligned properly, try
adjusting Vg2 during the few seconds of power “on”.
5.8.7
Video Processing
No Picture
When “no picture in RF”, first check if the microprocessor is
functioning ok in section “Controller”. If that is ok, follow the
next steps.
When “no picture in AV”, first check if the video source
selection is functioning ok in section “Source Selection”. If that
is ok, follow the next steps.
1.
Check that normal operating conditions are met.
2.
Check that there is video signal at pin 81. If no video,
demodulator part of the HERCULES is faulty, replace with
new HERCULES.
3.
If video signal is available at pin 81, check pin 56, 57, and
58 for the RGB signal.
4.
If signal is not available, try checking the BRIGHTNESS
and/or CONTRAST control, and make sure it is not at zero.
5.
If still with the correct settings and no video is available,
proceed to the CRT/RGB amplifier diagram.
For sets with TDA9178, follow steps below:
1.
Put Option Byte 2 bit 4 to “0”; if video signal is not available,
then check fault finding section “Controller”, Section
“Source Selection”, and steps above.
2.
If video is available but not correct, put Option Byte 2 bit 4
to “1”, then check if LTI panel is present. If not, put LTI
panel in the main chassis (connector 1221).
3.
If LTI panel is in main chassis, check cable between LTI
panel and main chassis (position is 1206). If it is
connected, then the LTI panel is faulty, replace it.
For sets with Scavem, and Scavem does not work, follow steps
below:
1.
Check Scavem coil connector (position is 1361) if
connected; if not, connect it.
2.
If connected, check NVM “bit storage” byte 1 bit 7; if it is not
“1”, set it to “1”.
3.
If it is “1”, then check the data of the NVM addresses as in
the next table. If the data is not correct, then set these
addresses to diagram values.
4.
If it still not works, track Scavem output from pin64 of
HERCULES to CRT panel.
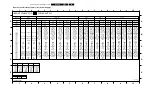
Table 5-5 NVM default values for Scavem
Picture Ok,
No Sound
Check IF output of
tuner, pin 11
CVBS
present?
Refer to fig.
"Power Supply:
Set not working"
No
Check SAW filter output
(pin 4&5)
EU/AP/CH (QSS)- 1001
NA/LA/AP INT - 1002
Yes
Output Ok?
Replace SAW
filter
No
Check other
functional area
Yes
E_14480_063.eps
170204
Enter SDM
check optionbyte 1
Check if tuner
Supply Voltage
pin 7
Enter SDM and change
to the appropriate byte
5V
Check Tuner
Supply Voltage
Yes
33V
Check Power
Supply
No
Check I2C at pin
4 & 5 and tuner
Check other
functional area
Ok
I2C
Check I2C
circuit
Not Ok
Tuner
Replace
Tuner
Not Ok
Incorrect
Correct
Yes
No
Unable to
perform tuning
Not Ok
Not Ok
E_14480_064.eps
170204
Description
Address (dec) Address (hex) Value (hex)
SPR, WS
140
8C
00
VMA, SVM
141
8D
32
NVM_SOC_SMD
142
8E
03
Summary of Contents for L04LAA
Page 36: ...Service Modes Error Codes and Fault Finding EN 36 L04L AA 5 E_06532_012 eps 130204 ...
Page 58: ...58 L04L AA 7 Circuit Diagrams and PWB Layouts Layout Mono Carrier Part 1 Bottom Side Part 1 ...
Page 93: ...Spare Parts List EN 93 L04L AA 10 10 Spare Parts List Not applicable ...
Page 94: ...Revision List EN 94 L04L AA 11 11 Revision List First release ...


