Alignments
8.
8.3.2
Tuner
Note: Described alignments are only necessary when the NVM
(item 7601) is replaced.
IF PLL
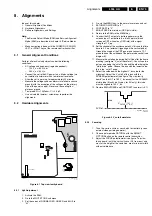
This adjustment is auto-aligned. Therefore, no action is
required.
AGC (AGC take over point)
1.
Set the external pattern generator to a color bar video
signal and connect the RF output to aerial input. Set
amplitude to 10 mV and set frequency to 61.25 MHz
(channel 3).
2.
Connect a DC multimeter to pin 1 of the tuner (item 1000
on the main panel).
3.
Activate the SAM.
4.
Go to the TUNER sub menu.
5.
Select AGC with the UP/DOWN cursor keys.
6.
Adjust the AGC-value with the LEFT/ RIGHT cursor keys
until the voltage at pin 1 of the tuner lies between 3.8 and
2.3 V (default value is “20”).
7.
Switch the set to STANDBY, in order to store the
alignments.
CL (Cathode drive level)
Always set to “5”.
8.3.3
White Tone
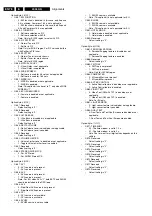
In the WHITE TONE sub menu, the values of the black cut off
level can be adjusted. Normally, no alignment is needed, and
you can use the given default values.
The color temperature mode (NORMAL, COOL and WARM)
and the color (R, G, and B) can be selected with the UP/DOWN
RIGHT/LEFT cursor keys. The value can be changed with the
LEFT/RIGHT cursor keys. First, select the values for the
NORMAL color temperature. Then select the values for the
COOL and WARM mode. After alignment, switch the set to
STANDBY, in order to store the alignments.
Default settings:
•
NORMAL:
–
NORMAL R= “26”
–
NORMAL G= “32”
–
NORMAL B= “27”
•
COOL:
–
DELTA COOL R= “-3”
–
DELTA COOL G= “0”
–
DELTA COOL B= “5”
•
WARM:
–
DELTA WARM R= “2”
–
DELTA WARM G= “0”
–
DELTA WARM B= “-6”
8.3.4
Geometry
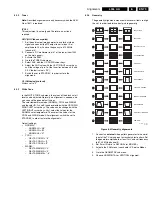
The geometry alignments menu contains several items to align
the set, in order to obtain correct picture geometry.
Figure 8-4 Geometry alignments
1.
Connect an external video pattern generator to the aerial
input of the TV-set and input a crosshatch test pattern. Set
the generator amplitude to at least 1 mV and set frequency
to 61.25 MHz (channel 3).
2.
Set 'Smart Picture' to NATURAL (or MOVIES).
3.
Activate the SAM menu (see chapter 5 “Service Modes,
...”).
4.
Go to the GEOMETRY sub menu.
5.
Choose HORIZONTAL or VERTICAL alignment.
E_06532_010.eps
110204
1
2
3
4
5
6
7
8
9
10
11
12
VERT. SLOPE
VERT. SHIFT
VERT. AMPLITUDE
V.S-CORRECTION
HOR. SHIFT
HOR. AMPLITUDE
E/W PARABOLE
UPPER E/W CORNER
LOWER E/W CORNER
E/W TRAPEZIUM
HOR. PARALLELOGRAM
HOR. BOW
Summary of Contents for L04LAA
Page 36: ...Service Modes Error Codes and Fault Finding EN 36 L04L AA 5 E_06532_012 eps 130204 ...
Page 58: ...58 L04L AA 7 Circuit Diagrams and PWB Layouts Layout Mono Carrier Part 1 Bottom Side Part 1 ...
Page 93: ...Spare Parts List EN 93 L04L AA 10 10 Spare Parts List Not applicable ...
Page 94: ...Revision List EN 94 L04L AA 11 11 Revision List First release ...


