background image

26

English

SLEEP

SLEEP

You can set a certain period of time after which
the set will switch off.

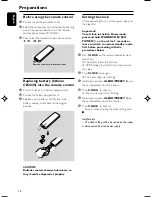
On the remote control, press 

SLEEP

repeatedly to select the desired time period
options (in minutes):


Display shows in sequence: 

SLEEP OFF,

120, 90, 60, 45, 30, 15, 5, SLEEP OFF...


Display shows the selected option briefly and

returns to its previous status. The icon 


appears.

To review the remaining sleep time, press

SLEEP

.

Notes:
–  If you press SLEEP again, this will change your
sleep time period to the next shorter preset option.

To deactivate the sleep timer

, press

SLEEP

 repeatedly to 

SLEEP OFF.

.


The icon 

 disappears.

or

Press 

STANDBY-ON

ECO POWER

 to

switch off the set  (or 

on the remote control).

Helpful hints:
–  The SLEEP function does not affect your alarm
time setting.

P001-P029_MCB279_05_Eng

2008.5.8, 16:23

26

Summary of Contents for MCB279

Page 1: ...MCB279 Micro Hi Fi System User manual Benutzerhandbuch Manuale dell utente Brukerhåndbok Brugervejledning Register your product and get support at www philips com welcome ...

Page 2: ...How to connect a plug The wires in the mains lead are coloured with the following code blue neutral N brown live L As these colours may not correspond with the colour markings identifying the terminals in your plug proceed as follows Connect the blue wire to the terminal marked N or coloured black Connect the brown wire to the terminal marked L or coloured red Do not connect either wire to the ear...

Page 3: ...3 3 4 5 2 1 6 8 7 9 0 ...

Page 4: ...ONFORMITA Si dichiara che l apparecchio MCD289 Philips risponde alle prescrizioni dell art 2 comma 1 del D M 28 Agosto 1995 n 548 Fatto a Eindhoven Philips Consumer Electronics Philips Glaslaan 2 5616 JB Eindhoven The Netherlands DK Advarsel Usynlig laserstråling ved åbning når sikkerhedsafbrydere er ude af funktion Undgå utsættelse for stråling Bemærk Netafbryderen er sekundært indkoblet og ofbry...

Page 5: ...5 English Deutsch Italiano Bokmål Dansk Index English 6 Deutsch 30 Italiano 56 Bokmål 80 Dansk 104 ...

Page 6: ...electing a different track Finding a passage within a track during playback Programming tracks 17 Reviewing the program Erasing the program Different play modes REPEAT SHUFFLE 18 Display track information MP3 WMA only 18 Tuner Tuning to radio stations 19 Programming radio stations 19 Autostore Automatic programming Manual programming To listen to a preset station RDS Radio Data System 19 20 Switch...

Page 7: ...ries or discs to excessive moisture rain sand or heat sources caused by heating equipment or direct sunlight No naked flame sources such as lighted candles should be placed on the apparatus No objects filled with liquids such as vases shall be placed on the apparatus Install this unit near the AC outlet and where the AC power plug can be reached easily If the system is brought directly from a cold...

Page 8: ...an be recycled and reused if disassembled by a specialised company Please observe the local regulations regarding the disposal of packaging materials exhausted batteries and old equipment Hearing Safety Listen at a moderate volume Using headphones at a high volume can impair your hearing This product can produce sounds in decibel ranges that may cause hearing loss for a normal person even for expo...

Page 9: ...layback DAB press to select an option DAB press and hold to start manual tuning 6 IR sensor for the infrared remote control Helpful hints Always point the remote control towards this sensor 7 CD RIP records tracks in a CD or files in an MP3 WMA CD into a USB disk 8 STANDBY ON ECO POWER In standby mode press and hold to switch the set to Eco power mode press to switch the set on In Eco power mode p...

Page 10: ...between FM and DAB In standby mode switches the set on and selects tuner source AUX selects the audio input from an additional connected appliance In standby mode switches the set on and selects the audio input from an additional connected appliance 3 SCAN starts auto scanning for DAB frequencies 4 INFO RDS for FM displays RDS information 5 à á for CD MP3 CD USB fast searches back and forward with...

Page 11: ...CK Clock press once to display time press twice to enter the clock setting mode FM DAB Audio CD USB AUX switches between clock display and playback display CD RIP records tracks in a CD or files in an MP3 WMA CD into a USB disk 9 CD USB stops playback erase a program ALBUM PRESET for MP3 CD USB skips to the beginning of a current previous subsequent album forTuner tunes to preset FM station for cl...

Page 12: ...follows a Press the clip of the red terminal and fully insert the stripped portion of the colored or marked speaker cable into the socket then release the clip b Press the clip of the black terminal and fully insert the stripped portion of the black or unmarked speaker cable into the socket then release the clip B FM DAB antenna connection Hang up one end of theT shape DAB FM antenna and keep the ...

Page 13: ...onnections have been made before switching on the power supply 2 Connect the supplied AC DC power adaptor to the DC jack located on the rear panel of the main set and to the wall socket This switches on the power supply To avoid damage to the set use only the adaptor supplied When the set is switched to standby mode it is still consuming some power To disconnect the system from the power supply co...

Page 14: ... press ALBUM PRESET on the set repeatedly to set the minutes 6 Press CLOCK to confirm To exit without storing the clock setting press 9 Helpful hints The clock setting will be erased when the system is disconnected from the power supply Before using the remote control 1 Pull out the plastic protective sheet 2 Select the source you wish to control by pressing one of the source select keys on the re...

Page 15: ...d settings tuner presets and the volume level up to a maximum volume level of 12 will be retained in the set s memory Auto standby When the set has reached the end of CD playback and remains in the stop position for more than 15 minutes the set will switch off automatically to save power Volume control Volume adjustment Adjust the volume by pressing or holding VOLUME or VOL on the remote control V...

Page 16: ...on dlf are ignored and will not be played DRM protected WMA files WMA files in Lossless orVBR format IMPORTANT Make sure that the file names of MP3 files end with mp3 For DRM protected WMA files use Windows Media Player 10 or later for CD burning conversion Visit www microsoft com for details about Windows Media Player andWM DRM Windows Media Digital Rights Management Playing discs 1 Press SOURCE ...

Page 17: ...f you like store any track more than once 1 In stop position press PROGRAM to start programming PROG flashes 2 Press 4 on the set or í ë on the remote control once or repeatedly until the desired track number appears in the display MP3 WMA press ALBUM PRESET on the set or 3 4 on the remote control and 4 on the set or í ë on the remote control to select the desired album and track 3 Press PROGRAM t...

Page 18: ...ct play modes 2 To return to normal playback press REPEAT or SHUFFLE repeatedly until the various modes are no longer displayed Helpful hints In the shuffle mode press to select tracks CD Display track information MP3 WMA only The ID3 tag is part of an MP3 WMA file and contains various track information such as the track s title or the artist s name During playback press DISPLAY repeatedly on the ...

Page 19: ...ng 1 Tune to your desired station see Tuning to radio stations 2 Press PROG to activate programming PROG flashes 3 Press ALBUM PRESET on the set to allocate a number from 1 to 20 to this station 4 Press PROG to confirm Display shows the preset number waveband and the frequency of the preset station 5 Repeat steps 1 4 to store other stations You can erase a preset station by storing another frequen...

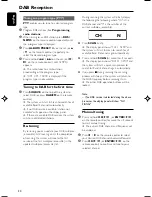
Page 20: ... of scanning the system will tune to the first service of the first multiplex ensemble in the updated multiplex ensemble list DAB Reception During scanning the system will initially display the following the following where CH is the DAB channel and N is the number of the current multiplex ensemble CH N Press SCAN briefly The display panel shows FULL SCAN and the system will start full scan to sea...

Page 21: ... panel 2 Press 4 or 5 6 on the remote control to select an item you want 3 Press OK ÉÅ or ENTER ÉÅ on the remote control to confirm Programming DAB stations You can save up to 20 DAB stations in the system memory 1 Press PROG on the remote control The display shows PN where N stands for the preset n umber 2 Press ALBUM PRESET or on the remote control to select your desired preset number Then press...

Page 22: ...ur Mass storage device required a battery power source Please make sure you have a fresh battery in it or charge the USB device first and then plug it into the micro system again Supported Music type a This device only supports unprotected music with the following file extension mp3 wma b Music bought from on line music stores are not supported because they are secured by Digital Rights Management...

Page 23: ...may differ from what it is displayed through flash players music management software File names or ID3 tags will be displayed as if they are not in English CD Ripping Recording disc files to a USB device The set allows you to copy the music files or spoken contents of a disc to the external USB device You can record one track the whole disc or even selected tracks through the Program function 1 Ch...

Page 24: ... audio files will be stored in the folder named _PHILIPS which is automatically created for recording The recorded audio file will be stored in either mp3 format for the disc of audio or MP3 or wma format forWMA disc Copyright protected CD will not be recorded DRM protectedWMA is not supported Do not directly unplug the USB device to stop recording for a possible loss of some of the recorded conte...

Page 25: ...he minute 5 Press TIMER to confirm TIMER OFF and the hour digits start flashing 6 Hold down or press ALBUM PRESET on the set repeatedly to set the hour 7 Press TIMER to confirm The minute digits start flashing 8 Hold down or press ALBUM PRESET on the set repeatedly to set the minute 9 Press TIMER again The source mode now is available for selection 0 Hold down or press ALBUM PRESET on the set repe...

Page 26: ...ows the selected option briefly and returns to its previous status The icon appears To review the remaining sleep time press SLEEP Notes If you press SLEEP again this will change your sleep time period to the next shorter preset option To deactivate the sleep timer press SLEEP repeatedly to SLEEP OFF The icon disappears or Press STANDBY ON ECO POWER to switch off the set or y on the remote control...

Page 27: ...Ω 1000 Ω CD MP3 CD PLAYER Number of programmable tracks 32 Frequency range 20 20000 Hz Signal to noise ratio 75 dBA Channel separation 50 dBA 1 kHz Total harmonic distortion 0 5 MPEG 1 Layer 3 MP3 CD MPEG AUDIO MP3 CD bit rate 32 256 kbps 192 kbps advised Sampling frequencies16 22 05 24 32 44 1 48 kHz USB PLAYER USB V1 1 Number of albums folders maximum 999 Number of tracks titles maximum 999 TUNE...

Page 28: ... a disc Wait until the moisture condensation at the lens has cleared Replace or clean the disc see Maintenance Use a finalised CD RW or a correct MP3 WMA CD format disc Check if the number of folders exceeds 999 or the number of titles exceeds 999 If the signal is too weak adjust the antenna or connect an external antenna for better reception Increase the distance between the Micro HiFi System and...

Page 29: ...een disconnected Reset the clock timer It is not set in the USB mode Select USB mode The device is not securely connected to the set s USB port Re connect the device The device is not supported by the set or the audio file format stored on the device is not supported by the set Use a compatible device playable audio file format You stop recording when the MP3 or WMA file you want to record is stil...

Page 30: ...sch Português Italiano Bokmål Dansk Italiano Svenska Dansk Suomi Polski Printed in China CLASS 1 LASER PRODUCT MCB279 PDCC JW 0819 Meet Philips at the Internet http www philips com PageBack_MCB279 2008 5 8 17 05 76 ...

Reviews: