background image

25

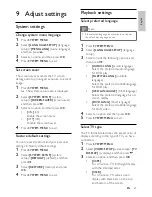
Select progressive scan

Progressive scan produces higher picture quality.

1

 Press 


SYSTEM MENU

.

2

 Select 


[VIDEO SETUP]

 (video setup) > 

[TV MODE]

 (tv mode), and then press   .

3

  Select an option and then press  

OK

.

[P-SCAN]

Select this option for a TV with 
progressive scan function.

[INTERLACE]

 (interlace)

Select this option for a TV without 
progressive scan function.

4

 Press 


SYSTEM MENU

 to exit.

Adjust picture quality

During DVD play , you can adjust brightness, 
contrast, hue, and saturation to improve 
picture quality.

1

 Press 


SYSTEM MENU

.

2

 Select 


[TV MODE]

 (tv mode).

3

  Select one of the following options, and 

then press   .

[BRIGHTNESS]

 (brightness)

Adjust the brightness level.

[CONTRAST]

 (contrast)

Adjust the contrast level.

[HUE]

 (hue)

Adjust the hue level.

[SATURATION]

 (saturation)

Adjust the saturation level.

4

 Press 

   to adjust value and then press 

OK

.

5

 Press 


SYSTEM MENU

 to exit.

Audio settings

Select digital output

Select a suitable setting if you have connected 
an audio/video device to the COAXIAL 
(DIGITAL AUDIO) socket on the unit.

1

 Press 


SYSTEM MENU

.

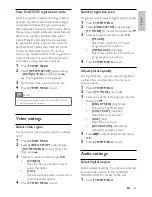
View DivX VOD registration code

DivX is a popular media technology created 
by DivX, Inc. DivX media fi les contain highly 
compressed video with high visual quality 
that maintains a relatively small fi le size. DivX 
fi les can also include advanced media features 
like menus, subtitles, and alternate audio 
tracks. Many DivX media fi les are available 
for download online, and you can rent and 
purchase DivX videos with the DivX VOD 
(Video on Demand) service. To use this 
service, you need the DivX VOD registration 
code of the unit. For more information and 
instructions, visit www.divx.com/vod.

1

 Press 


SYSTEM MENU

.

2

 Select 


[SYSTEM SETUP]

 (system setup) 

>

[DIVX[R] VOD]

, and then press   .

The registration code appears. 

»

3

  Write down the code for future use.

4

 Press 


SYSTEM MENU

 to exit.

Note

All the downloaded videos from DivX® VOD can 

only be played on this unit.

Video settings

Select video signal

You can select video signal output to a display 
or TV.

1

 Press 


SYSTEM MENU

.

2

 Select 


[VIDEO SETUP]

 (video setup) 

>

[COMPONENT]

 (component), and 

then press   .

3

  Select an option and then press  

OK

.

[S-VIDEO]

If the S-Video connection is used, 
select this option 

[YUV]

If the component video connection is 
used, select this option.

4

 Press 


SYSTEM MENU

 to exit.

English

EN

Summary of Contents for MCD170

Page 1: ...Register your product and get support at www philips com welcome MCD170 EN User manual 3 RU ǝȀǷǻǯǻDZǾǿǯǻ ǼǻǸȉǴǻǯǭǿDzǸȌ 35 ...

Page 2: ... 32 Contents 1 Important 4 Safety 4 Notice 6 2 Your DVD Micro Theater 7 Introduction 7 What s in the box 7 Overview of the main unit 8 Overview of the remote control 9 3 Connect 11 Preparations 11 Connect speakers 11 Connect audio cables 11 Connect video cables 12 Connect the MW antenna 13 Connect power 13 4 Get started 14 Prepare the remote control 14 Auto install radio stations 14 Set clock 14 T...

Page 3: ...s used as the disconnect device the disconnect device shall remain readily operable Know these safety symbols 1 Important Safety a Read these instructions b Keep these instructions c Heed all warnings d Follow all instructions e Do not use this apparatus near water f Clean only with dry cloth g Do not block any ventilation openings Install in accordance with the manufacturer s instructions h Do no...

Page 4: ...lly hazardous situations Do not use headphones while operating a motorized vehicle cycling skateboarding etc it may create a traffic hazard and is illegal in many areas This bolt of lightning indicates uninsulated material within your unit may cause an electrical shock For the safety of everyone in your household please do not remove product covering The exclamation point calls attention to feature...

Page 5: ...oduct complies with the requirements of the following directives and guidelines 2004 108 EC 2006 95 EC Any changes or modifications made to this device that are not expressly approved by Philips Consumer Lifestyle may void the user s authority to operate the equipment Recycling Your product is designed and manufactured with high quality materials and components which can be recycled and reused When...

Page 6: ...port that Philips offers register your product at www Philips com welcome Introduction With this DVD MicroTheater you can enjoy Video from DVDs VCDs and DivX files that are stored on USB devices Audio from audio CDs radio external devices and MP3 WMA files that are stored on USB devices Pictures from picture discs or stored on USB devices The DVD MicroTheater offers you multiple sound effect setting...

Page 7: ...y f Search fast forward or fast backward Tune to a radio station Overview of the main unit a PULL TO OPEN Open or close the disc tray b STANDBY ON Turn on the DVD Micro Theater switch to standby mode or switch to Eco Power Standby c DSC Select a preset sound setting EN ...

Page 8: ...ape play Fast rewind wind the tape Stop the tape play or open the tape door Pause tape play or pause recording j Tape button cover Pull to open the tape button cover k VOLUME Adjust volume l MP3 LINK Jack for an external audio device m Stop play or erase a program n CLOCK Set the clock During play select display information View the clock o PROG Program radio stations Program tracks Select 12 hour...

Page 9: ... source c MODE Select a repeat shuffle play mode d SYSTEM MENU Access or exit the system setup menu e REPEAT A B Mark the section for repeat play or turn off repeat mode f Search fast forward or fast backward Tune to a radio station Navigate left right in the disc menu or system setup menu Adjust time g DSC Select a preset sound setting h Start or pause play i Skip to the previous next title chapte...

Page 10: ...connect analog audio cables 1 Connect an audio cable red white ends to the audio input sockets on an audio device 3 Connect Preparations 1 Place a soft cloth on a hard flat stable surface 2 Place the unit onto the cloth 3 Remove the socket cover Connect speakers Note Insert the stripped portion of each speaker wire into the socket completely Connect only speakers with impedance that is the same or ...

Page 11: ...e TV user manual 1 Connect component vide cables red blue green not supplied to the component input sockets on the TV Option 3 connect headphone 1 Connect the headphone to HEADPHONE socket Connect video cables You can select the best video connection that yourTV supports Option 1 connect to the S Video socket for a standard TV Option 2 connect to the composite video CVBS socket for a standard TV O...

Page 12: ...power Caution Risk of product damage Ensure that the power supply voltage corresponds to the voltage printed on the back or the underside of the unit Before connecting the AC power cord ensure you have completed all other connections 1 Connect the AC power cord to the wall socket En g li sh EN ...

Page 13: ...our or 24 hour format is displayed 2 Press PROG repeatedly to select 12 hour or 24 hour format 3 Press CLOCK DISPLAY to confirm The hour digits are displayed and begin to blink 4 Press to set the hour 5 Press CLOCK DISPLAY to confirm The minute digits are displayed and begin to blink 4 Get started Caution Use the controls only as stated in this user manual Always follow the instructions in this chap...

Page 14: ...ight on the display panel turns off 6 Press to set the minute 7 Press CLOCK DISPLAY to confirm Tip To view the clock during play press CLOCK DISPLAY repeatedly until the clock is displayed Turn on 1 Press Set up the TV 1 Turn on the DVD Micro Theater 2 Press DISC to select DISC source 3 Turn on the TV and then select the correct video in channel You should see the blue Philips DVD background screen...

Page 15: ...r resume play press 5 Play Caution Risk of damage to the unit During play never move the unit Note If INVALID KEY is displayed the function is unavailable on this disc file at this moment Play discs Caution Never look at the laser beam inside the unit Risk of product damage Never play discs with accessories such as disc stabilizer rings or disc treatment sheets Do not push on the disc tray or put a...

Page 16: ...ode For VCD MP3 CD DivX REP 1 repeat 1 repeat the current track Play DivX video You can play DivX files copied onto a CD R RW recordable DVD or USB device 1 Insert a disc or connect a USB device 2 Select a source For discs press DISC For USB devices press USB 3 Select a file to play and press OK To stop play press To pause or resume play press To change a subtitle language press SUBTITLE Note Subtit...

Page 17: ...tch between camera angles REP DIR repeat directory for MP3 disc only repeat the current folder REP ALL repeat all repeat the disc SHUF shuffle play the disc in random order OFF off switch off the repeat mode 2 To return to normal play press MODE repeatedly until play mode is no longer displayed Note Shuffle play cannot be selected when you play programmed tracks Repeat A B DVD VCD CD MP3 WMA 1 Durin...

Page 18: ...elected audio channels is unavailable the default disc audio channel is used Note For some DVDs the language can only be changed from the disc menu Press DISC MENU to access the menu Zoom in out image 1 During video picture play press ZOOM repeatedly to zoom in out the image When the image is zoomed in you can press to pan through the image En g li sh EN ...

Page 19: ...VCR or other radiation source For optimal reception fully extend and adjust the position of the antenna 6 Listen to radio Tune to a radio station 1 Press TUNER repeatedly to select FM or MW 2 Press and hold for more than 2 seconds SEARCH is displayed The radio tunes to a station with strong reception automatically 3 Repeat step 2 to tune to more stations To tune to a weak station press repeatedly ...

Page 20: ... again To stop recording press 7 Record Note To record use only Normal IEC type I tapes on which the write protect notches tabs are not broken Tip When you play or record a tape the sound source cannot be changed The best recording level is set automatically Change of volume and sound effect does not affect recording Note The quality of recorded sound can differ depending on the source and the tap...

Page 21: ...ivated DBB is displayed Mute sound 1 During play press MUTE to mute unmute sound 8 Adjust sound Adjust volume level 1 During play press VOL to increase decrease the volume level Select a preset sound effect 1 During play press DSC repeatedly to select POP pop JAZZ jazz CLASSIC classic ROCK rock EN ...

Page 22: ... option and then press OK 4 3PS For 4 3 screen TV full height display with the trimmed sides 4 3LB For 4 3 screen TV wide screen display with black bars on the top and bottom of the screen 9 Adjust settings System settings Change system menu language 1 Press SYSTEM MENU 2 Select LANGUAGE SETUP language setup MENULANG menu language and then press 3 Select an option and then press OK 4 Press SYSTEM ...

Page 23: ...ct TV system Select the color system that matches the conneted TV 1 Press SYSTEM MENU 2 Select SYSTEM SETUP system setup TV SYSTEM tv system and then press 3 Select an option and then press OK NTSC For TV with NTSC color system PAL For TV with PAL color system AUTO auto For TV with multiple color systems 4 Press SYSTEM MENU to exit Restrict DVD play Some DVDs may have a parental level assigned to ...

Page 24: ...U View DivXVOD registration code DivX is a popular media technology created by DivX Inc DivX media files contain highly compressed video with high visual quality that maintains a relatively small file size DivX files can also include advanced media features like menus subtitles and alternate audio tracks Many DivX media files are available for download online and you can rent and purchase DivX videos ...

Page 25: ...ll dynamic range 4 Press SYSTEM MENU to exit 2 Select AUDIO SETUP audio setup DIGITAL OUT digital output and then press 3 Select an option and then press OK DIGITAL OFF digital off Select this option to turn off digital output DIGITAL RAW digital RAW Select this option if the connected device is a multi channel decoder receiver DIGITAL PCM digital PCM Select this option if the connected device can...

Page 26: ...er features Set the alarm timer This unit can be used as an alarm clock The DISC TUNER or USB is activated to play at a preset time 1 Ensure that you have set the clock correctly 2 In standby mode press and hold TIMER 3 Press DISC TUNER or USB to select a source 4 Press TIMER to confirm The hour digits are displayed and begin to blink 5 Press to set the hour 6 Press TIMER to confirm The minute digit...

Page 27: ... to change without prior notice Specifications Amplifier Rated Output Power 2X5W RMS Frequency Response 60 16kHz 3dB Signal to Noise Ratio 65dB Aux Input 0 5 V RMS 20kohm Disc Laser Type Semiconductor Disc Diameter 12cm 8cm Video Decoding MPEG 2 MPEG 1 Video DAC 10 Bits Signal System PAL NTSC Video Format 4 3 16 9 Video S N 56 dB minimum Composite Video Output 1 0 Vp p 75 ohm S Video output Y 1 0 Vp...

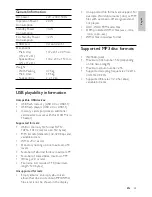
Page 28: ...W x H x D Speaker Box W x H x D 147 x231 x 209 mm 134 x 233 x 153 mm Weight With Packing Main Unit Speaker Box 4 75 kg 1 95 kg 2 x 1 2 kg USB playability information Compatible USB devices USB flash memory USB 2 0 or USB1 1 USB flash players USB 2 0 or USB1 1 memory cards requires an additional card reader to work with this DVD Micro Theater Supported formats USB or memory file format FAT12 FAT16 FAT...

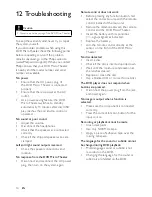
Page 29: ... DVD playback Multi language sound or subtitle is not recorded on the DVD Changing the language for the sound or subtitle is prohibited on the DVD 12 Troubleshooting Caution Never remove the casing of this DVD Micro Theater To keep the warranty valid never try to repair the system yourself If you encounter problems when using this DVD MicroTheater check the following points before requesting servi...

Page 30: ...evice not supported The USB device is incompatible with the DVD Micro Theater Try another one Poor radio reception Increase the distance between the DVD Micro Theater and your TV or VCR Fully extend the FM antenna Timer does not work Set the clock correctly Switch on the timer Clock timer setting erased Power has been interrupted or the power cord has been disconnected Reset the clock timer En g l...

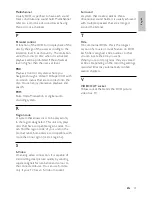
Page 31: ...pression system MP3 is the abbreviation of Motion Picture Experts Group 1 or MPEG 1 Audio Layer 3 With the MP3 format one CD R or CD RW can contain about 10 times more data than a regular CD 13 Glossary A Analog audio Sound that has not been turned into numbers Analog sound is available when you use the AUDIO LEFT RIGHT These red and white jacks send audio through two channels the left and right A...

Page 32: ... the disc by the age of the users according to the limitation level in each country The limitation varies from disc to disc when it is activated playback will be prohibited if the software s level is higher than the user set level PBC Playback Control A system where you navigate through a Video CD Super VCD with on screen menus that are recorded onto the disc You can enjoy interactive playback and...

Page 33: ... 2009 Koninklijke Philips Electronics N V All rights reserved MCD170_58_UM_V1 0 ...

Reviews: