background image

23

English

Basic Operations

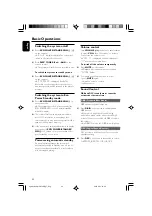
Selecting surround sound

IMPORTANT!
For proper surround sound, make sure
the speakers and subwoofer are
connected (see Connections-Step 3:
Connecting speakers and subwoofer.)

Press 

SURROUND

 to select surround or

stereo mode.

The availability of the various surround sound

modes depends on the number of speakers used
and the sound available on the disc.

  The center and surround speakers operate

only in Multi-channel surround mode.

The available output modes for multichannel

include: Dolby Digital, Dolby Pro Logic or Dolby
Pro Logic II surround sound.

Stereo broadcasts or recordings will produce

some surround channel effects when played in a
surround mode. However, monaural (single
channel sound) sources will not produce any
sound from the rear speakers.

Dimming the display screen

Press 

DIM

 repeatedly to select different levels of

brightness for the display screen.

pg 001-046_MCD759D_37_Eng

2007.6.21, 14:39

23

Summary of Contents for MCD759D

Page 1: ...efois si vous ne parvenez pas à résoudre votre probléme vous pouvez accéder à notre aide en ligne à l adresse www philips com welcome ou formez le 1 800 661 6162 Francophone 1 888 PHILIPS 744 5477 English speaking Veillez à avoir votre produit à portée de main Gracias por escoger Philips Necesita ayuda inmediata Lea primero la Guía rápida del comienzo o el Manual del usuario en donde encontrará co...

Page 2: ...rtified and associated logos are trademarks of DivXNetworks Inc and are used under license Windows Media is a trademark of Microsoft Corporation Canada English This digital apparatus does not exceed the Class B limits for radio noise emissions from digital apparatus as set out in the Radio Interference Regulations of the Canadian Department of Communications Français Cet appareil numérique n emet ...

Page 3: ...purchase will be on file so no additional paperwork will be required from you to obtain warrranty service Product Safety Notification By registering your product you ll receive notification directly from the manufacturer in the rare case of a product recall or safety defect Additional Benefits Registering your product guar antees that you ll receive all of the privileges to which you re entitled i...

Page 4: ...bol indicates that the unit has a double insulation system Clean only with dry cloth Where the MAINS plug or an appliance coupler is used as the disconnet device the disconnet device shall remain readily operable materials 9 pg 001 046_MCD759D_37_Eng 2007 6 21 14 39 4 ...

Page 5: ...5 English Français Español English 6 Index Français 49 Español 92 pg 001 046_MCD759D_37_Eng 2007 6 21 15 04 5 ...

Page 6: ...tomatic standby 22 Volume control 22 Sound Control 22 23 DBB Dynamic Bass Boost DSC Digital Sound Control Selecting surround sound Dimming the display screen 23 Disc Operations Playable Discs 24 Playing discs 24 Using the Disc Menu 25 Basic playback controls 25 27 Pausing playback DVD VCD CD MP3 WMA Selecting a track chapter title DVD VCD CD MP3 WMA Resuming playback from the last stopped point DV...

Page 7: ...TUP PREFERENCE PAGE 35 36 PARENTAL DEFAULT PASSWORD SETUP iPod Dock Compatible iPod players 37 Selecting the correct dock adaptor 37 Setup 37 Playing an iPod portable player 38 Charging iPod battery using the dock 38 Other Functions Radio reception 39 Tuning to radio stations Presetting radio stations Listening to preset radio stations Setting the clock 39 Setting sleep wake up timer 40 Sleep time...

Page 8: ... to 525 lines Note To fully enjoy the progressive scan feature you need a progressive scanTV Supplied accessories Remote control with two AAA batteries AM antenna FM wire antenna Audio white red and composite video yellow cables 2 in 1 Control cable Five satellite speakers including speaker wires One active subwoofer including a DIN cable Four speaker stands with screws Two power cords Stand for t...

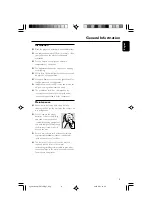
Page 9: ...ld not be impeded by covering the ventilation openings with items such as newpapers table cloths curtains et Maintenance When a disc becomes dirty clean it with a cleaning cloth Wipe the disc from the center out in a straight line Do not expose the player batteries or discs to humidity rain sand or excessive heat caused by heating equipment or direct sunlight Always keep the disc tray closed to av...

Page 10: ...rew Note The surround speakers are labeled as REAR L left or REAR R right Connections Step 2 Placing the speakers and subwoofer 1 3 3 1 4 2 Center speaker and DVD system Surround Subwoofer Speaker Left Surround Speaker Right Front speaker Left Front speaker Right For best possible surround sound all the speakers except subwoofer should be placed at the same distance from the listening position 1 P...

Page 11: ...cables are correctly connected Improper connections may damage the system due to short circuit Step 4 Connecting the control cable Connect the serial port marked CONTROL CABLE at the rear of the DVD player to the same port at the rear of the power amplifier with the supplied flat control cable Step 5 ConnectingTV IMPORTANT You only need to make one video connection from the following options depen...

Page 12: ...on theTV 3 If you are using a Progressive ScanTV TV must indicate Progressive Scan or ProScan capability to activateTV Progressive Scan please refer to yourTV user manual For DVD system Progressive Scan function see Getting Started Setting up Progressive Scan feature Note If yourTV does not support Progressive Scan you will not be able to view the picture Press SYSTEM MENU on the remote to exit th...

Page 13: ...the Antenna IN jack on theTV 3 Connect the Antenna or CableTV service signal to the ANTENNA IN or RF IN jack on the RF modulator It may have been connected to your TV previously Disconnect it from the TV Step 6 Connecting FM AM antennas 1 2 FM antenna AM antenna Fix the claw into the slot 1 Connect the supplied AM loop antenna to the AM jack Place the AM loop antenna on a shelf or attach to a stan...

Page 14: ... Connect one of the system s VIDEO jacks to the correspondingVIDEO IN jack and LINE OUT R L jacks to the AUDIO IN jacks on theVCR This will allow you to make analogue stereo two channel right and left recordings Step 7 Connecting the power cord 1 AC MAINS Power Outlet After everything is connected properly plug in the AC power cords of the main set subwoofer andTV set to the power outlet Make sure...

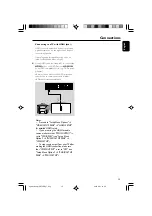
Page 15: ...Adaptor It may take a while for the DVD player and input device to communicate and initialise Playback starts automatically HDMI IN HDMI IN HDTV D Notes Proceed to Setup Menu Options VIDEO SETUP PAGE HDMI SETUP for detailed HDMI setup If you are using the HDMI as audio source make sure that SPDIF OUTPUT is set to SPDIF PCM see Setup Menu Options AUDIO SETUP PAGE SPDIF SETUP To stop sound output fr...

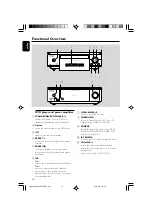
Page 16: ...us next chapter title track Tuner tunes to a higher lower radio frequency press and hold then release the key to start automatic search for a radio frequency downward upward 7 OPEN CLOSE ç opens or closes the disc tray 8 SURROUND selects 2 1 channel output 2 1CH or 5 1 channel output SUR5 1 or DVD5 1 9 SOURCE selects the respective sound source DVD DOCK AUX TUNER FM TUNER AM switches the system on...

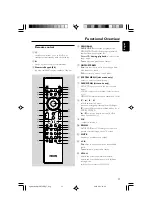
Page 17: ...tem menu 7 DISC MENU disc mode only DVD VCD enters or exits the disc contents menu VCD2 0 switches the playback control mode on or off MP3 WMA switches between Album and Filelist 8 4 3 2 1 selects an item in a menu moves an enlarged picture up down left right 4 selects different slow playback modes for a VCD SVCD DVD 3 4 selects an item in a menu for iPod menu operation only 9 OK confirms a select...

Page 18: ...E selects a DVD camera angle DISPLAY MENU displays information onTV screen during playback in iPod mode is equivalent to the MENU button on your iPod player AUDIO forVCD DivX sets Stereo Mono Left or Mono Right sound mode for DVD selects an audio language A B repeats playback of a specific section on a disc MODE selects various repeat modes or the shuffle play mode for a disc CH LEVEL unavailable ...

Page 19: ...IN orVIDEO See your TV manual for more details Or you may go to channel 1 on yourTV then press the Channel down button repeatedly until you see theVideo In channel Or theTV Remote Control may have a button or switch that chooses different video modes Or set theTV to channel 3 or 4 if you are using an RF modulator Selecting the colour system that corresponds to yourTV This DVD Player is compatible ...

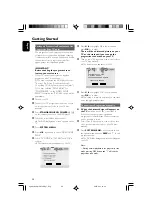
Page 20: ...E 7 Select TV MODE to P SCAN then OK to confirm The instruction menu appears on theTV 8 Press 1 2 to highlight OK in the menu and press OK to confirm There will be a distorted picture on your TV at this state until you turn on the progressive scan mode on yourTV 9 Turn on your TV progressive scan mode refer to yourTV user manual The below menu appears on theTV CONFIRM TO USE P SCAN IF PICTURE IS G...

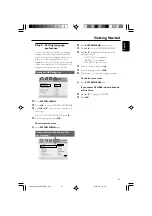
Page 21: ...e in the menu Move to OSD LANGUAGE and press 2 4 Select a language and press OK To exit from the menu Press SYSTEM MENU again Setting the Audio Subtitle and Disc Menu language Getting Started 1 Press SYSTEM MENU in stop mode 2 Press 1 2 to select PREFERENCE PAGE 3 Press 3 4 to highlight the following in the Preference Page AUDIO disc s soundtrack SUBTITLE disc s subtitles DISC MENU disc s menu 4 E...

Page 22: ...Power saving automatic standby As a power saving feature the system will automatically switch to Standby mode if you do not press any buttons within 15 minutes after a disc has stopped playing Volume control Turn VOLUME clockwise or anticlockwise or press VOL on the remote to increase or decrease the volume level VOL XX is displayed on the display panel XX denotes the volume level To switch off th...

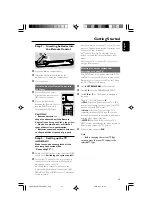
Page 23: ...n the disc The center and surround speakers operate only in Multi channel surround mode The available output modes for multichannel include Dolby Digital Dolby Pro Logic or Dolby Pro Logic II surround sound Stereo broadcasts or recordings will produce some surround channel effects when played in a surround mode However monaural single channel sound sources will not produce any sound from the rear ...

Page 24: ...ormat MP3 Pro and MP3 with ID3 tag Disc Operations Region Codes DVDs must be labeled as shown below in order to play on this DVD system You cannot play discs that are labeled for other regions Note If you are having trouble playing a certain disc remove the disc and try a different one Improper formatted disc will not play on this DVD Player Playing discs 1 Connect the power cords of the system an...

Page 25: ... any chapter track title enter the chapter track title number using the Numeric Keypad 0 9 Resuming playback from the last stopped point DVD VCD CD In stop mode and when a disc has not been removed press É Å To cancel resume mode In stop mode press PRESET 9 9 on the remote again Zoom DVD VCD DivX JPEG Zooming allows you to enlarge or reduce the video image during playback 1 Press ZOOM repeatedly t...

Page 26: ... Filelist 2 When Filelist is on the screen press 3 4 to select the files and press PROGRAM to add the files to the program list 3 Press DISC MENU to display the program list 4 Press PROGRAM to delete unwanted files from the program list Forward Reverse Searching DVD VCD DivX CD MP3 WMA 1 Press 1 2 on the remote control during playback to select the required speed 2X 4X 8X 16X or 32X backward or fo...

Page 27: ...erent subtitle languages Playing MP3 WMA JPEG Picture CD IMPORTANT You have to turn on yourTV and set to the correctVideo In channel See Setting up theTV Playing MP3 WMA disc IMPORTANT For DRM protected WMA files use Windows Media Player 10 or later for CD burning conversion Visit www microsoft com for details about Windows Media Player andWM DRM Windows Media Digital Rights Management General ope...

Page 28: ... features Preview function JPEG This function shows the content of the current folder or the whole disc 1 Press PRESET 9 9 on the remote during playback Thumbnails of 12 pictures appears on theTV screen 2 Use 1 2 3 4 to highlight one of the pictures Slide Show and press OK to start playback slide show To enter the remote key function menu Use 1 2 3 4 to highlight Menu and press OK To display the o...

Page 29: ...le menu will appear on theTV screen for your selection In this case pressing SUBTITLE on the remote control will turn on or off the subtitle If multilingual subtitles are embedded on the DivX disc pressing SUBTITLE will change the subtitle language during playback Note Subtitle files with the following filename extensions srt smi sub ssa ass are supported but do not appear on the file navigation m...

Page 30: ...according to theTV you have connected NORMAL PS panscan If you have a normalTV and want both sides of the picture to be trimmed or formatted to fit yourTV screen NORMAL LB letterbox If you have a normalTV In this case a wide picture with black bands on the upper and lower portions of the TV screen will be displayed WIDE If you have a wide screenTV OSD LANGUAGE See Getting Started Step 3 Setting la...

Page 31: ...ideo onto a CD R for playback on this DVD player Notes All the downloaded videos from DivX VOD can only be played back on this DVD player Time search feature is not available during DivX movie playback AUDIO SETUP PAGE The options included in Audio Setup page are ANALOG AUDIO SETUP SPDIF SETUP DOLBY DIGITAL SETUP 3D PROCESSING HDCD and NIGHT MODE ANALOG AUDIO SETUP The options included in ANALOG A...

Page 32: ...SPDIF Sony Phillips Digital Interface Format SETUP PAGE are OFF SPDIF RAW and SPDIF PCM W W OFF Turns off the SPDIF output SPDIF RAW If you have connected your DIGITAL OUT COAXIAL or OPTICAL to a multi channel decoder receiver SPDIF PCM Only if your receiver is not capable of decoding multi channel audio DOLBY DIGITAL SETUP The option included in DIGITAL AUDIO SETUP is DUAL MONO DUAL MONO Select t...

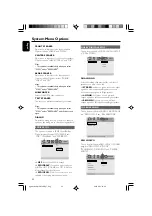
Page 33: ...either towards the front or towards the rear speakers The adjustable range is from SIZE 3 towards the rear to SIZE 3 towards the front CENTERWIDTH Adjusts the center image from all front speakers to varying degrees A larger value adjusts the center image towards the front left and right speakers The adjustable range is from LEVEL 0 center channel sound is output only from center speaker to LEVEL 7...

Page 34: ...PNESS BRIGHTNESS CONTRAST GAMMA HUE SATURATION and LUMA DELAY SHARPNESS Adjusts the sharpness level HIGH MEDIUM and LOW BRIGHTNESS Adjusts the brightness level Range 20 20 CONTRAST Adjusts the contrast level Range 16 16 GAMMA Adjusts the gamma level HIGH MEDIUM LOW and NONE HUE Adjusts the hue level Range 9 9 SATURATION Adjusts the saturation level Range 9 9 LUMA DELAY Adjusts the luma delay 0T an...

Page 35: ...h a rating though the movie rating may be printed on the Disc cover The rating level feature does not work for such Discs Rating explanations 1 KID SAF Kids material recommended especially for children and viewers of all ages 2 G General Audience recommended as acceptable for viewers of all ages 3 PG Parental Guidance suggested 4 PG 13 Material is unsuitable for children under age 13 5 6 PGR R Par...

Page 36: ... its submenu by pressing 2 3 Press OK to open the page for inputting a new password OK OLD PASSWORD NEW PASSWORD CONFIRM PWD 4 Enter the existing 4 digit code 5 Enter the new 4 digit code 6 Enter the new 4 digit code a second time to confirm The new 4 digit code will take effect 7 Press OK to exit Notes If the password has been changed the parental and disc lock code will also be changed The defau...

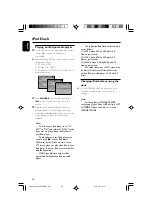
Page 37: ... type as indicated at the back of the adaptor are included to fit the following iPod 20GB 40GB 20 30GB Photo 40 60GB Photo 30GBVideo 60GBVideo 80GBVideo Mini Nano and Nano 2nd generation iPod portable player Setup 1 Connect the iPod docking cradle to the MCD759D micro theater system as shown above 2 Insert a dock adapter corresponding to the portable player you use 2 1 1 To connect with a differen...

Page 38: ...e NTSC mode if you want to play video or photo files in your iPod player To play photos in your iPod player you need to press 2 on your iPod player Otherwise there will be no picture on the TFT screen when you play video files in your iPod player See your iPod user s manual for detailed operation HDMI sound picture output will be unavailable for the docked iPod portable player The supported iPod v...

Page 39: ...ROGRAM on the remote PROG icon flashes Other Functions 3 Press PRESET or PRESET 9 or on the remote to select the desired preset number If PROG icon goes off before you select the desired preset number press PROGRAM on the remote 4 Press PROGRAM on the remote again to store the radio station Repeat steps 1 4 to store other radio stations Listening to preset radio stations In tuner mode press PRESET...

Page 40: ...es the system to switch on automatically at a set time Wake up timer setting IMPORTANT Before setting the timer ensure that the clock is set correctly 1 Press and hold SLEEP TIMER until the time flashes on the display TIME SET scrolls Then the hour digits flash on the display screen 2 Turn VOLUME clockwise or anticlockwise or press VOL on the remote to set the hours 3 Press SLEEP TIMER to confirm ...

Page 41: ...sitivity 20µ V M FM S N 46dB AM Frequency range 520 1710 kHz AM Noise limit sensitivity 3 0 mV m AM S N 40dB Specifications SPEAKERS Front Speakers System 2 way shielded Impedance 4 Ω Speaker drivers 2x4 woofer ribbon tw Dimensions w x h x d 223 mm x 1012 mm x 223 mm Weight 12 95 kg Center Speaker System 2 way shielded Impedance 8 Ω Speaker drivers 4 woofer 2 tw Dimensions w x h x d 392mm x 144 mm...

Page 42: ...to the correctVideo In channel This channel is usually near channel 00 Or you may have a button on theTV remote control that selects Auxiliary or A V IN channel See yourTV owner s manual for details Or change channels at the TV until you see DVD screen on theTV If the progressive scan feature is activated but the connectedTV does not support progressive signals or the cables are not connected acco...

Page 43: ...mode Make sure the center and sound speakers are connected correctly Press SURROUND to select a correct surround sound setting Make sure the sourdce you are playing is recorded or broadcast in surround sound DTS Dolby Digital etc Insert a readable disc with the playback side facing down Check the disc type colour system and regional code Check for any scratches or smudges on the disc Press SYSTEM ...

Page 44: ... Replace the batteries with new ones Check that the batteries are loaded correctly Press DIM again Place the DVD micro system as far away as possible from electrical devices that may be causing interference Check all speakers for correct polarity Check that the output of the video signal is switched to Pr Cr Pb CbY The playback of the docked player cannot be stopped using the 9 button on MCD759D a...

Page 45: ...bout 10 times as much data volume as a regular CD can Multichannel DVD is specified to have all sound tracks constitute one sound field Multichannel refers to a structure of sound tracks having three or more channels Parental control A function of the DVD to limit playback of the disc by the age of the users according to the limitation level in each country The limitation varies from disc to disc ...

Page 46: ...46 pg 001 046_MCD759D_37_Eng 2007 6 21 14 39 46 ...

Page 47: ...hina PDCC JS_JW 0727 CLASS 1 LASER PRODUCT PHILIPS CONSUMER ELECTRONICS NORTH AMERICA P O Box 671539 Marietta GA 30006 0026 Meet Philips at the Internet http www philips com http www philips com support MCD759D C Royal Philips Electronics N V 2007 All rights reserved PageBack_MCD759D 37 2007 6 21 15 14 262 ...

Reviews: