background image

13

English

Preparation

Setting the clock

After connecting MCM761 to the power supply,
set the clock first.

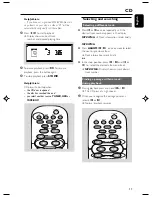
1

On the remote control, press and hold

DISPLAY/CLOCK 

until the clock time starts

flashing

➜ 

The display shows the set time

➜ 

12

:

00


AM 

appears by default if you have not

set the clock

2

Press 

PROGRAM

 repeatedly to change

between 12-hour and 24-hour clock mode

3

Press 

à

 or 

á

 repeatedly to set the hour

4

Press 

ÉÅ


to change to minutes setting, then

press 

à

 or 

á

 repeatedly to set the  minutes

5

Press 

DISPLAY/CLOCK

 again to store the

setting.

The clock will start working.

Helpful hints:

– The clock setting will be erased when the system
is disconnected from the power supply.

– The set will exit from the clock setting mode if
no button is pressed within 90 seconds.
– To set the clock automatically through the time
information in the RDS signal, refer to 

Tuner:

Clock setting via RDS

.

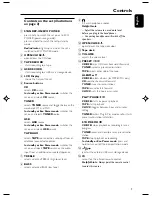
Using the remote control

IMPORTANT!

– Always point the remote control directly
towards IR area.

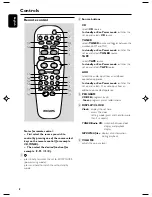
Notes for remote control:
– First select the source you wish to
control by pressing one of the source select
keys on the remote control (for example
CD, TUNER).
– Then select the desired function (for
example 

ÉÅ

,

í

ë

).

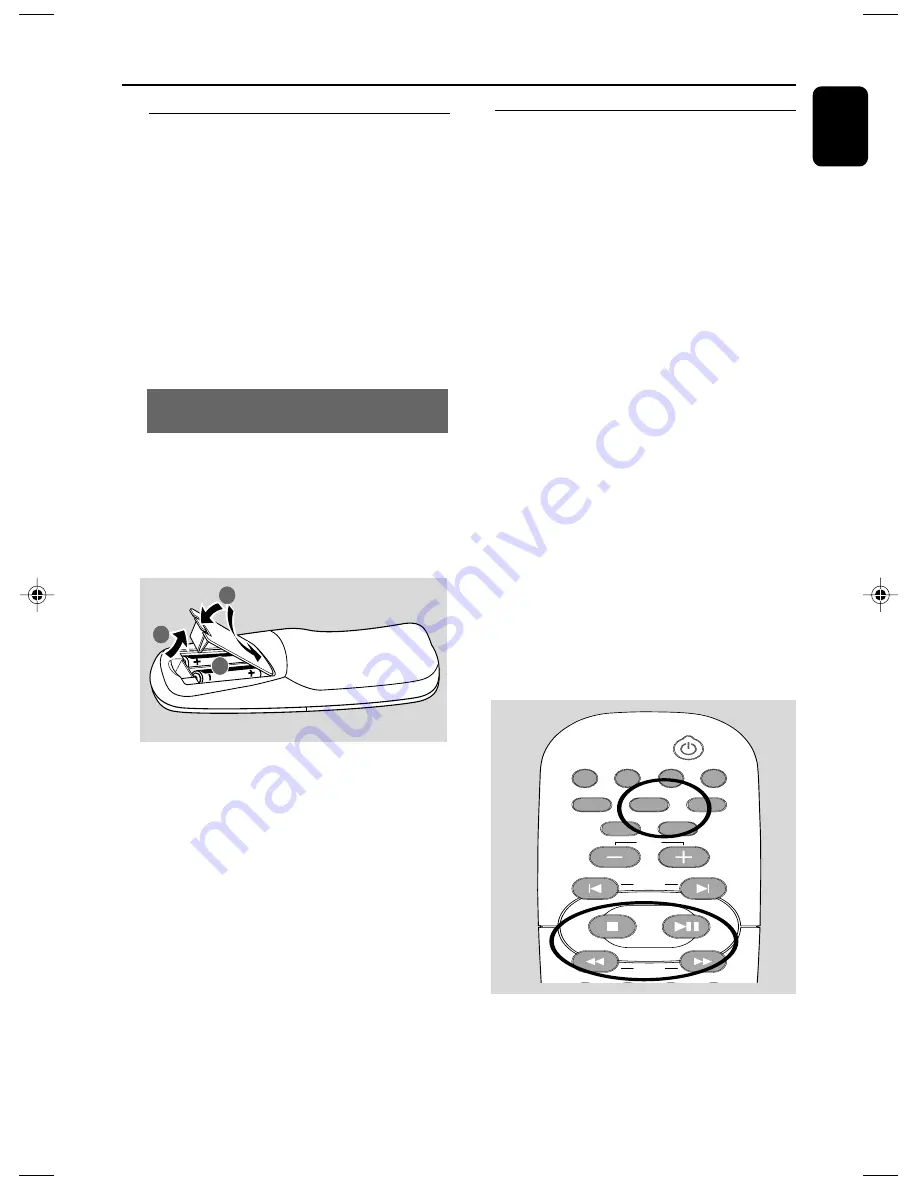
Inserting batteries into the remote
control

1

Open the battery compartment

2

Insert 2 batteries type R06 or AA into the
remote control with the correct polarity as
indicated by the "

+

" and "

-

" symbols inside

the battery compartment

3

Put back the compartment door

1

3

2

CAUTION!
– Remove batteries if they are
exhausted or will not be used for a long
time.
– Do not use old and new or different
types of batteries in combination.
– Batteries contain chemical substances,
so they should be disposed of properly.

CD

TUNER

REPEAT

PROGRAM

TAPE A /B

DISPLAY/CLOCK

SHUFFLE

TAPE

AUX

STANDBY

TAPE REC

USB REC

USB DEL

SNOOZE

PRESET

ALBUM

VOL

p001-032_MCM761_61_Eng

2008.6.26, 10:44

13

Summary of Contents for MCM 761

Page 1: ...MCM761 Micro Hi Fi System User manual Register your product and get support at www philips com welcome ...

Page 2: ...2 CAUTION Use of controls or adjustments or performance of procedures other than herein may result in hazardous radiation exposure or other unsafe operation ...

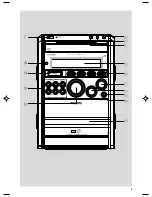
Page 3: ...ECO POWER iR TAPE RECORD USB RECORD OPEN CLOSE ALBUM PRESET STOP DEMO VOLUME BASS TREBLE PLAY PAUSE TUNING CD TUNER USB TAPE AUX USB DIRECT M I C R O S Y S T E M M C M 7 6 1 WMA MP3 CD CD R CD RW COMPATIBLE 2 3 4 5 0 9 8 7 6 1 ...

Page 4: ...4 for tuner installation ...

Page 5: ...laying discs 16 17 Selecting and searching 17 Selecting a different track Finding a passage within a track during playback Programming tracks 18 Erasing the program Different play modes REPEAT SHUFFLE 19 Display track information MP3 WMA only 19 Tuner Tuning to radio stations 20 Programming radio stations 20 21 Plug Play Autostore Automatic programming Manual programming To listen to a preset stat...

Page 6: ...cm 4 inches clearance from the rear and the top of the unit and 5 cm 2 inches from each side The ventilation should not be impeded by covering the ventilation openings with items such as newspapers table cloths curtains etc Do not expose the system batteries or discs to excessive moisture rain sand or heat sources caused by heating equipment or direct sunlight No naked flame sources such as lighte...

Page 7: ...ce 7 TREBLE selects a desiredTREBLE high tone level 8 BASS selects a desired BASS low tone 9 n n n n n 3 5 mm headphone socket Helpful hints Adjust the volume to a moderate level before you plug in the headphones Connecting headphones will switch off the speakers 0 OPEN CLOSEç opens closes the tape deck door Tape deck VOLUME adjusts the volume level PRESET í ë CD USB skips CD tracks backwards forw...

Page 8: ... Power mode switches the set on and selects CD source TUNER selects TUNER source and toggles between the wavebands FM and MW In standby or Eco Power mode switches the set on and selects TUNER source TAPE selects TAPE source In standby or Eco Power mode switches the set on and selects TAPE source AUX selects the audio input from an additional connected appliance In standby or Eco Power mode switche...

Page 9: ...s to radio stations TAPE rewind or fast forward CLOCK sets the hours or minutes 7 SNOOZE Temporarily deactivate the timer 8 TIMER ON OFF turns the timer on off 9 SLEEP TIMER set the sleep timer displays the timer setting enters the timer setting mode press and hold for more than 2 seconds 0 TREBLE Selects a desiredTREBLE high tone level MUTE switches the sound off temporarily USB selects USB sourc...

Page 10: ...cable of the left speaker to L red and black and the cable of the right speaker to R red and black as follows a Press the clip of the red terminal and fully insert the stripped portion of the colored or marked speaker cable into the socket then release the clip b Press the clip of the black terminal and fully insert the stripped portion of the black or unmarked speaker cable into the socket then r...

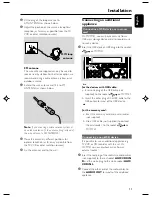
Page 11: ... with USB cable a Insert one plug of the USB cable not supplied to the socket on MCM761 b Insert the other plug of the USB cable to the USB output terminal of the USB device or for the memory card a Insert the memory card into a card reader not supplied b Use a USB cable not supplied to connect the card reader to the socket on MCM761 2 Move the antenna in different positions for optimal reception ...

Page 12: ...getting an electric shock The machine does not contain any user serviceable parts If you disconnect the product from the mains make sure to take the plug out of the wall socket completely Children could seriously injure themselves as the free end of the cable may still be live if only the connector is removed from the MAINS socket at the back of the unit 3 Select AUX mode on MCM761 Helpful hints A...

Page 13: ...rough the time information in the RDS signal refer to Tuner Clock setting via RDS Using the remote control IMPORTANT Always point the remote control directly towards IR area Notes for remote control First select the source you wish to control by pressing one of the source select keys on the remote control for example CD TUNER Then select the desired function for example ÉÅ í ë Inserting batteries ...

Page 14: ...u can select the desired brightness for the display panel On the remote control press DIM repeatedly to select DIM 1 DIM 2 DIM 3 or DIM OFF DIM appears if DIM is activated Displaying the clock During playback press DISPLAY CLOCK on the remote control repeatedly to switch between the clock display and the playback display CD TUNER TAPE AUX STANDBY MUTE USB STANDBY ON ECO POWER CD TUNER REPEAT PROGR...

Page 15: ... control Incredible surround Press INC SURR once or more to turn the surround sound effect on or off INCREDIBLE SURROUND appears if activated IS OFFappears if deactivated Bass Treble The BASS low tone andTREBLE high tone feature enables you to define the sound processor settings Adjust BASS or TREBLE or press BASS TREBLE on the remote control repeatedly to select the desired Bass or Treble level B...
Page 16: ...m that does not contain MP3 WMA files and will not be shown in the display Non supported file formats are skipped This means that e g Word documents doc or MP3 files with extension dlf are ignored and will not be played DRM protected WMA files WMA files in Lossless orVBR format IMPORTANT Make sure that the file names of MP3 files end with mp3 For DRM protected WMA files use Windows Media Player 10...

Page 17: ...o select the next or previous album Track information scrolls briefly or In the stop position press à á and í or ë to select the desired album and track MP3 WMA Display shows current album track number Finding a passage within a track during playback 1 During playback press and hold à or á The CD plays at a high speed 2 When you recognize the passage you want release à or á Normal playback resumes...

Page 18: ... the album track number you just stored Helpful hints The set will return to the stop position if no button is pressed within 20 seconds PROG stops flashing To resume programming press PROGRAM Erasing the program You can erase the contents of the memory by Press 9 once if in the stop position after you stop programming twice during playback Press STANDBY ON ECO POWER y Select another sound source ...

Page 19: ...order 1 Press once or more REPEAT or SHUFFLE to select play modes 2 To return to normal playback press REPEAT or SHUFFLE repeatedly until the various modes are no longer displayed You will also cancel the play modes by pressing USB RECORD CD Helpful hints In the shuffle mode press ë to select tracks Display track information MP3 WMA only During playback press DISPLAY CLOCK repeatedly on the remote...

Page 20: ... the system to the power supply AUTO INSTALL PRESS PLAY appears Or In Eco Power standby standby mode press and hold É Å on the set until AUTO INSTALL PRESS PLAY appears 2 Press É Å on the set to start installation INSTALL TUNER AUTO appears All previously stored radio stations will be replaced After all stations are stored the last preset station will then be played Plug Play allows you to store a...

Page 21: ...l be erased The set will only program stations which are not in the memory already 1 Press the í or ë buttons once or more to select the preset number where programming should start Note If no tuner preset number is selected default is preset 1 and all your presets will be erased 2 Press and hold PROGRAM on the remote control until AUTO appears PROG flashes Available stations are programmed FM sta...

Page 22: ...A files and will not be shown in the display Non supported file formats are skipped This means that e g Word documents doc or MP3 files with extension dlf are ignored and will not be played AAC WAV PCM audio files DRM protected WMA files WMA files in Lossless format How to transfer music files from PC to a USB mass storage device By dragging and dropping music files you can easily transfer your fa...

Page 23: ...Eç again to close the compartment 4 Press í or ë once or repeatedly until the desired track number appears in the display MP3 WMA Press à á and í or ë to select the desired album and track Or Program your desired tracks see CD Programming tracks Make sure you press Ç after finishing programming Recording to a USB mass storage device With MCM761 you can record your favorite CD music to a USB mass s...

Page 24: ...s You can find and playback the ripped tracks in the album _PHILIPS 1 Press USB on the set to select USB 2 Press à á and í or ë to select the desired album and track The audio CD files have been converted to MP3 format and named as FXXX TXXX MP3 where FXXXX denotes folder name and TXXX track name For MP3 WMA files the track information are retained the set only supports the file names in English O...

Page 25: ...ing or fast forwarding To stop playback Press Ç Helpful hints During rewinding or fast forwarding of a tape it is also possible to select another source CD or TUNER for example Recording to a tape General information on recording For recording use only tape of IEC type I normal tape The recording level is set automatically regardless of the position of theVolume Incredible Surround BASS TREBLE and...

Page 26: ...ect the recording source CD TUNER USB or AUX 2 Start playback of the selected source 3 Press TAPE RECORD REC starts flashing 4 To stop recording pressÇon the set CD USB Synchro start recording 1 Select the recording source CD or USB 2 If necessary press í or ë once or repeatedly until the desired track number appears in the display MP3 WMA Press à á and í or ë to select the desired album and track...

Page 27: ... the clock is set before using the timer IMPORTANT if recording is in progress the timer function will not be activated The volume of the timer will increase gradually to the last tuned volume level If the last tuned volume level is too low the set will then increase to a predetermined minimum audible level 29dB 1 On the remote control press and hold SLEEP TIMER icon starts flashing 2 Select the t...

Page 28: ... Timer SLEEP Demonstration mode SLEEP You can set a certain period of time after which the set will switch to ECO POWER 1 On the remote control press SLEEP TIMER repeatedly to select the desired time period options in minutes Display shows in sequence SLEEP 15 30 45 60 90 120 SLEEP OFF Display shows the selected option briefly and returns to its previous status The icon appears 2 To view the time ...

Page 29: ...Headphones 32 Ω 1000 Ω 1 6 Ω 1 kHz 10 THD DISC PLAYER Programmable tracks 99 Frequency response 20 20000 Hz 3 dB Signal to noise ratio 76 dBA Channel separation 55 dB 1 kHz MPEG 1 Layer 3 MP3 CD MPEG AUDIO MP3 WMA CD bit rate 32 256 kbps 128 kbps advised Sampling frequencies 32 44 1 48 kHz TUNER FM wave range 87 5 108 MHz MW wave range 531 1602 kHz Number of presets 40 Antenna FM 75 Ω wire MW Loop...

Page 30: ... the moisture condensation at the lens has cleared Replace or clean the disc see Maintenance Use a finalised CD RW or a correct MP3 WMA CD format disc Check if the number of folders exceeds 99 or the number of titles exceeds 999 Only the completely ripped MP3 WMA file can be found and played by MCM761 Check if the file has been completely ripped Check if the USB device needs extra power supply If ...

Page 31: ...pressing the function button É Å í ë Reduce the distance between the remote control and the system Insert the battery with its polarities signs aligned as indicated Replace the battery Point the remote control directly toward IR sensor on the front of the system Check the set is switched off Set the clock correctly PressTIMER to switch on the timer Power has been interrupted or the power cord has ...

Page 32: ...Printed in China CLASS 1 LASER PRODUCT MCM761 PDCC WP 0823 Meet Philips at the Internet http www philips com English ...

Reviews: