18
English
Clock/Timer
IMPORTANT!
– To set clock in the Eco Power mode,
press and hold STANDBY-ON/ECO
POWER
B
on the set for 3 seconds or
more to switch to normal standby mode
first before proceeding with the
procedures below.
View clock
The clock (if it is set) will be shown in standby
mode.
To view the clock in any source mode
(CD or TUNER for example)
●
Press
DISPLAY/CLOCK
.
➜
The clock is displayed for a few seconds.
➜
If the clock has not been set, "
--
:
--
" is
displayed.
Setting the clock
The clock can be set in either 12-hour or
24-hour mode ("
AM 12
:
00
" or "
00
:
00
" for
example).
1
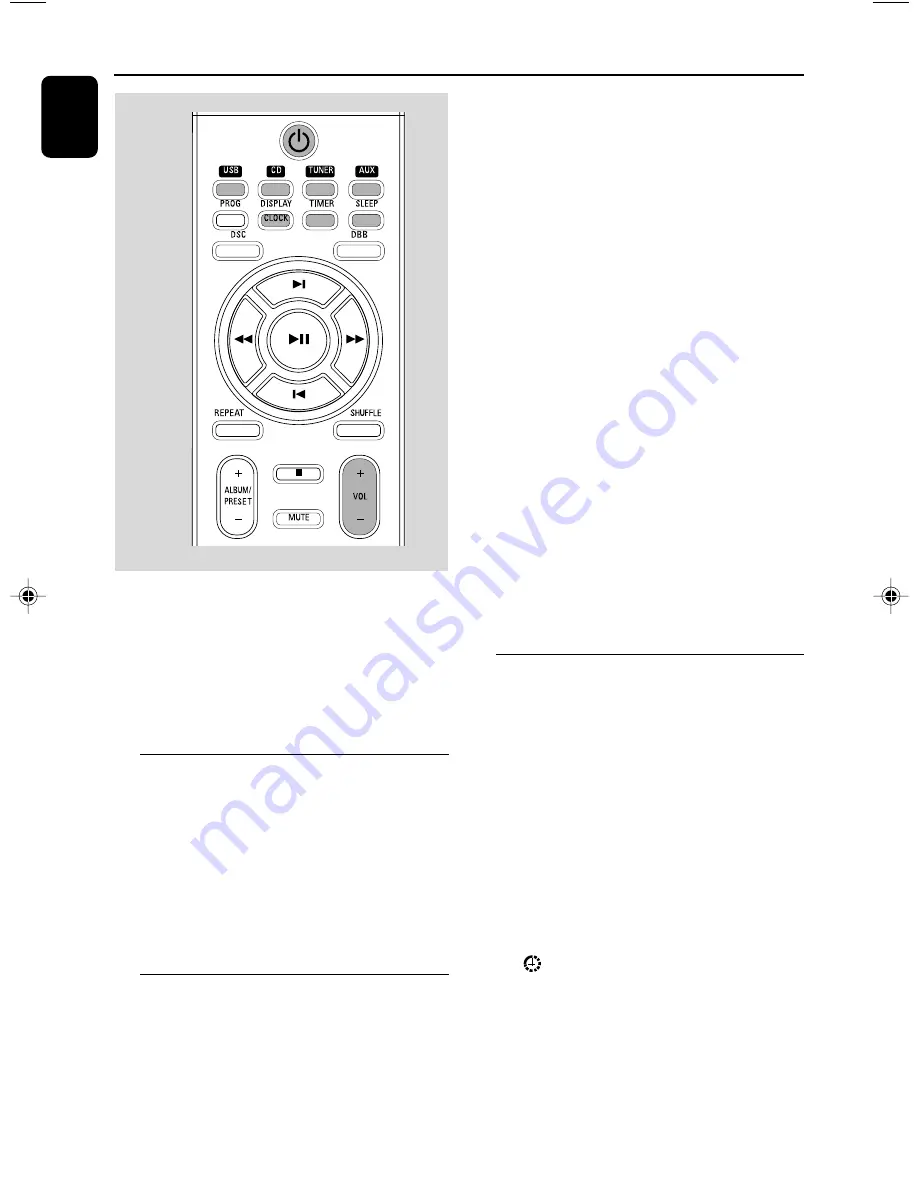
In standby mode, press and hold
DISPLAY/
CLOCK
on the remote control for more than
3 seconds.
➜
SET CLOCK
scrolls on the display.
➜
"
12 HR
" or "
24 HR
" appears, in which “
12
”
or “
24
” flashes.
2
Press
VOLUME
+/-
(
VOL+/-
on the remote)
repeatedly to select clock mode.
➜
The clock digits for the hours flash..
3
Press
VOLUME
+/-
(
VOL+/-
on the remote)
to set the hours.
4
Press
DISPLAY/CLOCK
again.
➜
The clock digits for the minutes flash.
5
Press
VOLUME
+/-
(
VOL+/-
on the remote)
to set the minutes.
6
Press
DISPLAY/CLOCK
to confirm the time.
Notes:
– The backlight for clock display is dim in standby.
– The clock setting will be cancelled when the
power cord is disconnected or if a power failure
occurs.
– During clock setting, if no button is pressed
within 90 seconds, the system will exit clock setting
mode automatically.
Setting the timer
●
The system can be used as an alarm clock,
whereby the USB, CD, TUNER is switched on at
a set time. The clock time needs to be set first
before the timer can be used.
●
During setting, if no button is pressed within 90
seconds, the system will exit timer setting mode
automatically.
1
In standby mode or system on, press and hold
TIMER
on the remote control for more than 3
seconds.
➜
Display sequence scrolls
SET TIMER
and
SELECT SOURCE
.
➜
Display sequence shows
USB
,
CD
,
TUNER
and
flashes.
2
Press
VOLUME
+/-
(
VOL+/-
on the remote)
or the respective source button directly to select
the sound source.
pg001-024_MCM119_05
2007.4.20, 10:53
18
Summary of Contents for MCM119
Page 1: ...MCM119 Micro System User manual ...
Page 3: ...3 3 USB DIRECT 5 2 4 3 6 1 0 9 7 8 8 SYSTEM ...
Page 23: ...23 ...


