background image

English

11

#

PROG

CD: 

programs tracks

–     

Tuner:

 programs preset radio stations

$


9

CD:

 stops playback;  erase a program

%

REPEAT

selects continuous playback

^

SHUFFLE

selects random playback

&

MUTE

switches the sound off temporarily

Controls                                                       Installation

Placing MCM238

MCM238 is supplied with a stand, you may
attach or detach the stand to/from the main set.

Mounting the stand onto the set

1

Locate the bottom of the main unit and find the
slot, then slide the stand in the slot until it stops,
as indicated in the figure below.

P001-P025_MCM238_12_Eng

14/8/07, 19:52

11

Summary of Contents for MCM238

Page 1: ...System User manual Manuel d utilisation Manual de usuario Benutzerhandbuch Gebruikershandleiding Manuale dell utente Användarhandbok Brugervejledning Register your product and get support at www philips com welcome MCM238 ...

Page 2: ...s in your plug proceed as follows Connect the blue wire to the terminal marked N or coloured black Connect the brown wire to the terminal marked L or coloured red Do not connect either wire to the earth terminal in the plug marked E or e or coloured green or green and yellow Before replacing the plug cover make certain that the cord grip is clamped over the sheath of the lead not simply over the t...

Page 3: ...3 1 3 4 5 2 6 8 7 9 0 8 ...

Page 4: ...ider gränsen för laserklass 1 Observera Stömbrytaren är sekundärt kopplad och bryter inte strömmen från nätet Den inbyggda nätdelen är därför ansluten till elnätet så länge stickproppen sitter i vägguttaget SF Luokan 1 laserlaite Varoitus Laitteen käyttäminen muulla kuin tässä käyttöohjeessa mainitulla tavalla saattaa altistaa käyttäjän turvallisuusluokan 1 ylittävälle näkymättömälle lasersäteilyl...

Page 5: ...5 English Français Español Deutsch Nederlands Italiano Svenska Dansk Index English 6 Français 26 Español 46 Deutsch 66 Nederlands 86 Italiano 104 Svenska 124 Dansk 142 ...

Page 6: ... Volume adjustment MUTE Sound control 16 DSC DBB Displaying the clock 16 CD Discs for playback 17 Playing discs 17 Selecting and searching 18 Selecting a different track Finding a passage within a track during playback Programming tracks 18 Reviewing the program Erasing the program Different play modes REPEAT SHUFFLE 19 Display track information MP3 WMA only 19 Tuner Tuning to radio stations 20 Pr...

Page 7: ...asily reached The apparatus shall not be exposed to dripping or splashing Place the system in a location with adequate ventilation to prevent internal heat build up in your system Allow at least 10 cm 4 inches clearance from the rear and the top of the unit and 5 cm 2 inches from each side The ventilation should not be impeded by covering the ventilation openings with items such as newspapers tabl...

Page 8: ...ipment reasonably and take appropriate breaks Be sure to observe the following guidelines when using your headphones Listen at reasonable volumes for reasonable periods of time Be careful not to adjust the volume as your hearing adapts Do not turn up the volume so high that you can t hear what s around you You should use caution or temporarily discontinue use in potentially hazardous situations Do...

Page 9: ...tles backwards forwards Tuner tunes to radio stations ÉÅ CD starts or pauses playback 6 IR sensor for the infrared remote control Helpful hints Always point the remote control towards this sensor 7 DSC Digital Sound Control selects predefined sound settings ROCK JAZZ POP CLASSIC OPTIMAL 8 STANDBY ON ECO POWER press briefly to switch the set on or off standby ECO POWER In standby or Eco Power mode ...

Page 10: ...liance 9 TIMER enters the timer setting mode press and hold for more than 2 seconds 0 CLOCK Clock displays the set time In standby mode enters the clock setting mode press and hold for more than 2 seconds DSC Digital Sound Control selects predefined sound settings ROCK JAZZ POP CLASSIC OPTIMAL TIMER ON OFF switches the timer on off Notes for remote control First select the source you wish to contr...

Page 11: ...lects random playback MUTE switches the sound off temporarily Controls Installation Placing MCM238 MCM238 is supplied with a stand you may attach or detach the stand to from the main set Mounting the stand onto the set 1 Locate the bottom of the main unit and find the slot then slide the stand in the slot until it stops as indicated in the figure below ...

Page 12: ...the left speaker to LEFT red and black and the cable of the right speaker to RIGHT red and black as follows a Press the clip of the red terminal and fully insert the stripped portion of the colored or marked speaker cable into the socket then release the clip b Press the clip of the black terminal and fully insert the stripped portion of the black or unmarked speaker cable into the socket then rel...

Page 13: ...nna s end to the wall Helpful hints To receive optimal radio reception put the main unit and the antennas as far away as possible from the power adaptor Position the antenna as far as possible from aTV VCR or other radiation source Connecting an additional appliance It is possible to use an additional appliance e g TV VCR or CD recorder with the set On MCM238 you can playback music from an externa...

Page 14: ...e rear of the set For users in the U K please follow the instructions on page 2 Warning To avoid overheating of the system a safety circuit has been built in Therefore your system may switch to Standby mode automatically under extreme conditions If this happens let the system cool down before reusing it not available for all versions This product complies with the radio interference requirements o...

Page 15: ...m is disconnected from the power supply The set will exit from the clock setting mode if no button is pressed within 90 seconds To set the clock automatically by using a time signal which is broadcast together with the RDS signal see chapter RDS Setting the RDS clock Using the remote control IMPORTANT Remove the protective plastic tab before using the remote control Always point the remote control...

Page 16: ...ned in the set s memory Auto standby When the set has reached the end of CD playback and remains in the stop position for more than 15 minutes the set will switch off automatically to save power Volume control Volume adjustment Adjust the volume by pressing VOLUME VOL and the actual value between 1 and 31 are displayed VOL MIN is the minimum volume level VOL MAX is the maximum volume level MUTE Yo...

Page 17: ...th extension dlf are ignored and will not be played DRM protected WMA files WMA files in Lossless orVBR format IMPORTANT Make sure that the file names of MP3 files end with mp3 For DRM protected WMA files use Windows Media Player 10 or later for CD burning conversion Visit www microsoft com for details about Windows Media Player and WM DRM Windows Media Digital Rights Management Playing discs 1 Pr...

Page 18: ...re than once 1 In the stop position press PROGRAM to start programming PROG flashes 2 Press 4 once or repeatedly until the desired track number appears in the display MP3 WMA press ALBUM PRESET and 4 to select the desired album and track 3 Press PROGRAM to confirm Display shows briefly the number of tracks programmed Then the display shows the track number you just stored 4 Repeat steps 2 3 to sel...

Page 19: ...E repeatedly until the various modes are no longer displayed Helpful hints In the shuffle mode press to select tracks CD Display track information MP3 WMA only The ID3 tag is part of an MP3 WMA file and contains various track information such as the track s title or the artist s name During playback press DISPLAY repeatedly on the remote control Display show title name album name and ID3 tag infor...

Page 20: ...mber From this preset number upwards former programmed tuner stations will be erased The set will only program stations which are not in the memory already 1 Press the ALBUM PRESET buttons once or more to select the preset number where programming should start Note If no tuner preset number is selected default is preset 1 and all your presets will be erased 2 Press and hold PROGRAM until AUTO appe...

Page 21: ...ignal which is broadcast together with the RDS signal 1 Tuned to a RDS station refer to Tuning to radio stations 2 Press and hold RDS until SEARCH RDS TIME is displayed When RDS time is read the current time will be stored If the RDS station does not transmit RDS time within 90 seconds NO RDSTIME appears Note Some RDS radio station may be transmitting a real time clock at a minute interval The acc...

Page 22: ...he timer setting mode if no button is pressed within 90 seconds Activating and deactivating TIMER In standby mode press TIMER ON OFF on the remote once or more to activate or deactivate the timer If activated the last set source and start time are displayed If deactivated TIMER OFF appears Helpful hints The timer will not work at the set time if the set is switched on the timer is deactivated The ...

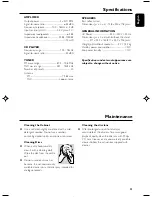
Page 23: ...ollow the instructions supplied with cleaner Maintenance Specifications AMPLIFIER Output power 2 x 5 W RMS Signal to noise ratio 65 dBA Frequency response 100 18kHz 3 dB Input sensitivity AUX 0 5V max 1 V Impedance loudspeakers 4 Ω Impedance headphones 32 Ω 1000 Ω 15mW CD PLAYER Frequency range 100 18kHz Signal to noise ratio 65 dBA TUNER FM wave range 87 5 108 MHz MW wave range 531 1602 kHz Numbe...

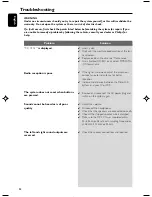
Page 24: ... sound outputs are reversed Problem Solution Insert a disc Wait until the moisture condensation at the lens has cleared Replace or clean the disc see Maintenance Use a finalised CD RW or a correct MP3 WMA CD format disc If the signal is too weak adjust the antenna or connect an external antenna for better reception Increase the distance between the Micro HiFi System and yourTV orVCR Remove and rec...

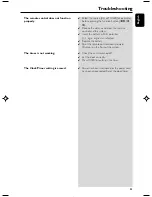
Page 25: ...he distance between the remote control and the system Insert the battery with its polarities signs aligned as indicated Replace the battery Point the remote control directly toward IR sensor on the front of the system Check the set is switched off Set the clock correctly PressTIMER to switch on the timer Power has been interrupted or the power cord has been disconnected Reset the clock timer Troub...

Page 26: ...nglish Français Português Español Deutsch Nederlands Italiano Svenska Dansk Suomi Polski Printed in China CLASS 1 LASER PRODUCT MCM238 PDCC JH JiaW 0733 Meet Philips at the Internet http www philips com ...

Reviews: