2-1
2-1
DISMANTLING INSTRUCTIONS
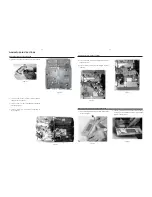
1) Press the 2 juts and pull out the Stand as shown in figure
1.
2) Loosen 5 screws A and 6 screws B to remove the Rear
Cabinet as shown in figure 2.
3) Loosen 3 screws C to remove the SP & ANT Jack Board
as shown in figure 3.
4) Loosen 5 screws D to remove the Power Module as
shown in figure 3.
Dismantling the Rear Portion and PCBs
Figure 3
Figure 2
Dismantling the Rear Portion and PCBs
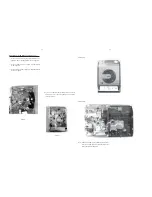
5) Loosen 2 screws E to remove the Bracket Jack Board as
shown in Figure 4.
6) Loosen 3 screws F to remove the Main Board as shown
in figure 5.
Figure 4
Figure 5
Figure 1
Dismantling of the Display Lens & the Volume knob
1) Use a flat head screw driver to give a push in the direction
as shown in figure 6.
Figure 6
2) Place two small screw drivers in between the front cabinet
& knob to give more leverage in pulling out the Volume
Knob as shown in figure 7.
Figure 7
Summary of Contents for MCM276R/37
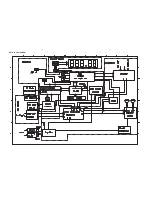
Page 11: ...4 1 4 1 SET BLOCK DIAGRAM ...
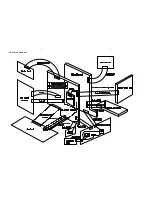
Page 12: ...SET WIRING DIAGRAM 5 1 5 1 ...
Page 18: ...6 6 6 6 LAYOUT DIAGRAM MAIN BOARD 5757 for 37 98 TOP SIDE ...
Page 19: ...6 7 6 7 LAYOUT DIAGRAM MAIN BOARD 5757 for 37 98 BOTTOM SIDE ...
Page 20: ...6 8 6 8 CIRCUIT DIAGRAM MAIN BOARD 5757 for 37 98 ...
Page 23: ...7 2 7 2 LAYOUT DIAGRAM CD MCU BOARD TOP SIDE ...
Page 24: ...7 3 7 3 LAYOUT DIAGRAM CD MCU BOARD BOTTOM SIDE ...
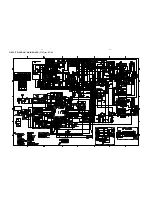
Page 25: ...7 4 7 4 CIRCUIT DIAGRAM CD MCU BOARD CD PORTION ...
Page 26: ...CIRCUIT DIAGRAM CD MCU BOARD MCU PORTION 7 5 7 5 ...
Page 29: ...LAYOUT DIAGRAM AC POWER BOARD TOP SIDE 8 2 8 2 LAYOUT DIAGRAM AC POWER BOARD BOTTOM SIDE ...
Page 30: ...8 3 8 3 CIRCUIT DIAGRAM AC POWER BOARD ...
Page 35: ...9 1 9 1 SET MECHANICAL EXPLODED VIEW 1 ª º 2 4 7 8 9 3 5 6 ...


