background image

3

3

1

#

3

0

!

@

*

&

%

2

9

7

6

8

$

^

(

pg 001-025_MCM394_22-Eng

2008.1.8, 9:14 AM

3

Summary of Contents for MCM394

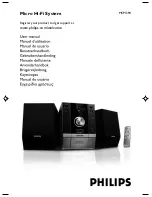
Page 1: ...MCM394 Micro Hi Fi System Register your product and get support at www philips com welcome ...

Page 2: ... N or coloured black Connect the brown wire to the terminal marked L or coloured red Do not connect either wire to the earth terminal in the plug marked E or e or coloured green or green and yellow Before replacing the plug cover make certain that the cord grip is clamped over the sheath of the lead not simply over the two wires Copyright in the U K Recording and playback of material may require c...

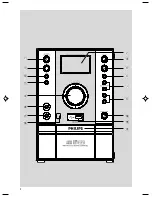
Page 3: ...3 3 1 3 0 2 9 7 6 8 ...

Page 4: ...pplad och bryter inte strömmen från nätet Den inbyggda nätdelen är därför ansluten till elnätet så länge stickproppen sitter i vägguttaget SF Luokan 1 laserlaite Varoitus Laitteen käyttäminen muulla kuin tässä käyttöohjeessa mainitulla tavalla saattaa altistaa käyttäjän turvallisuusluokan 1 ylittävälle näkymättömälle lasersäteilylle Oikeus muutoksiin varataan Laite ei saa olla alttiina tippu ja ro...

Page 5: ...lish Français Português Español Deutsch Nederlands Italiano Svenska Dansk Suomi Index English 6 Français 26 Español 46 Deutsch 66 Nederlands 86 Italiano 106 Svenska 126 Dansk 146 Suomi 166 Português 186 206 ...

Page 6: ...d control 14 CD MP3 CD Operations Discs for playback 15 Playing a disc 15 Text display 15 Selecting a different track 15 Finding a passage within a track 16 Selecting a desired Album Track MP3 disc only 16 Different play modes SHUFFLE and REPEAT 16 Programming the disc tracks 16 Reviewing the programme 16 Erasing the programme 16 Radio Reception Tuning to radio stations 17 Programming radio statio...

Page 7: ...d the top of the unit and 5 cm 2 inches from each side The ventilation should not be impeded by covering the ventilation openings with items such as newspapers table cloths curtains etc Do not expose the system batteries or discs to excessive moisture rain sand or heat sources caused by heating equipment or direct sunlight No naked flame sources such as lighted candles should be placed on the appa...

Page 8: ...ipment reasonably and take appropriate breaks Be sure to observe the following guidelines when using your headphones Listen at reasonable volumes for reasonable periods of time Be careful not to adjust the volume as your hearing adapts Do not turn up the volume so high that you can t hear what s around you You should use caution or temporarily discontinue use in potentially hazardous situations Do...

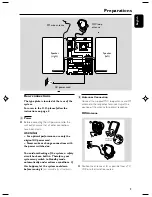
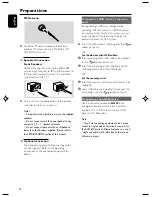
Page 9: ... switched on To avoid overheating of the system a safety circuit has been built in Therefore your system may switch to Standby mode automatically under extreme conditions If this happens let the system cool down before reusing it not available for all versions B Antennas Connection Connect the supplied MW loop antenna and FM antenna to the respective terminals Adjust the position of the antenna fo...

Page 10: ...a USB device or memory card By connecting a USB mass storage device including USB flash memory USB flash players or memory cards to the Hi Fi system you can enjoy the device s stored music through the powerful speakers of Hi Fi system Insert the USB device s USB plug into the socket on the set OR for the devices with USB cables 1 Insert one plug of the USB cable not supplied to the socket on the s...

Page 11: ...R 3 Then select the desired function for example ÉÅ à á Remove the plastic protective sheet Replacing battery lithium CR2025 into the remote control 1 Press the slot on the battery compartment 2 Pull out the battery compartment 3 Replace a new battery and fully insert the battery compartment back to the original position 1 2 3 CR2025 CAUTION Batteries contain chemical substances so they should be ...

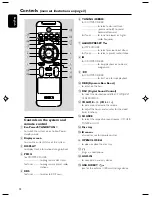
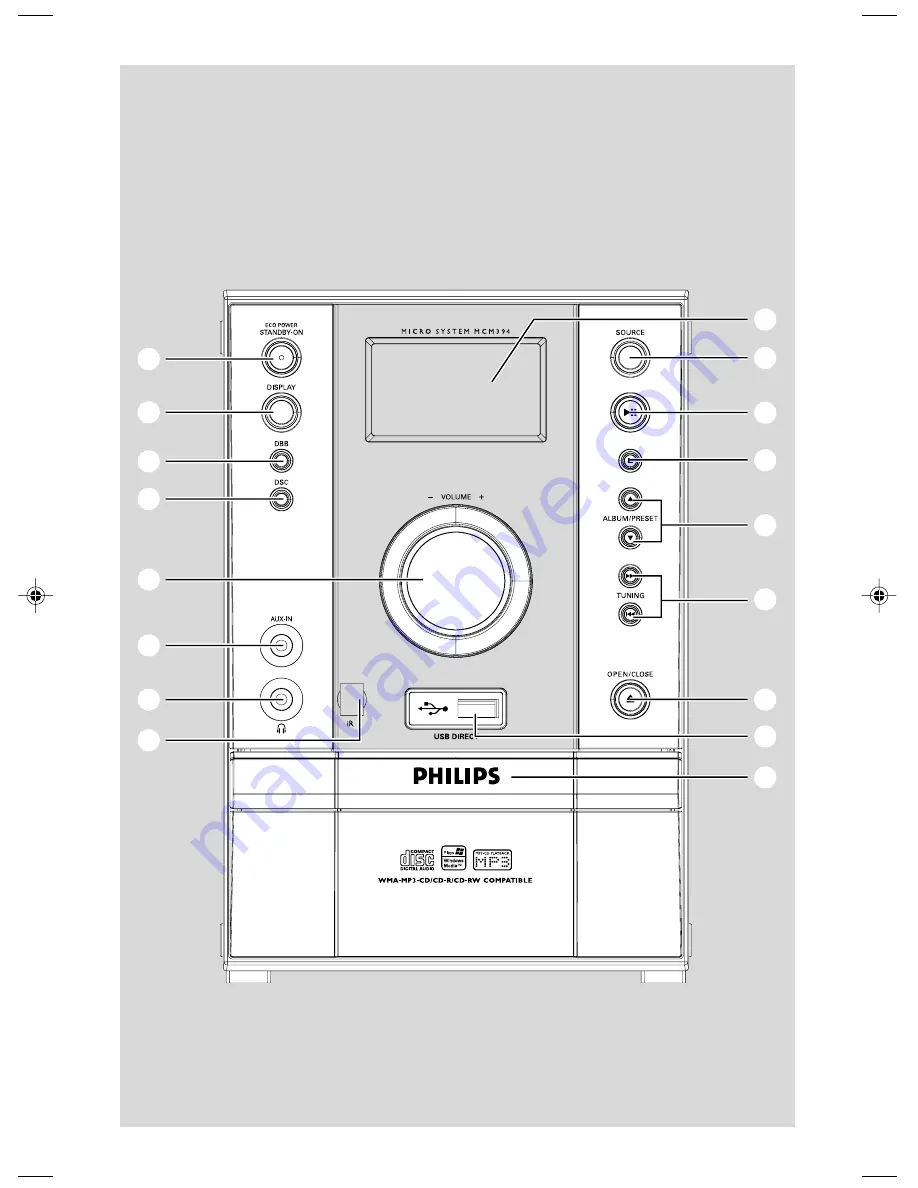
Page 12: ...or higher radio frequency 7 ALBUM PRESET 43 for MP3 CD USB to select previous next album forTuner to select a preset radio station 8 9 for CD MP3 CD USB to stop playback or to clear a programme 9 ÉÅ for CD MP3 CD USB to start or interrupt playback 0 DBB Dynamic Bass Boost to enhance the bass DSC Digital Sound Control to select the desired sound effect POP JAZZ CLASSIC ROCK VOLUME VOL to increase o...

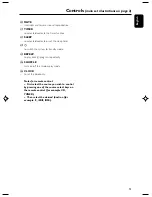
Page 13: ... or set the sleep timer B to switch the system to standby mode REPEAT to play track s program repeatedly SHUFFLE turns on off the random play mode CLOCK to set the clock only Notes for remote control First select the source you wish to control by pressing one of the source select keys on the remote control for example CD TUNER Then select the desired function for exampleÉ S T ...

Page 14: ...tandby mode with clock display Press and hold ECO POWER STANDBY ON 2 for 3 seconds or more to go back to Eco Power Standby mode Power saving automatic standby As a power saving feature the system will automatically switch to Standby mode if you do not press any buttons within 15 minutes after a disc has stopped playing Volume control Adjust VOLUME VOL to increase or decrease the volume level Displ...

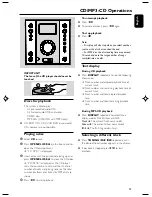
Page 15: ...pt playback Press É Å To resume playback press É Å again To stop playback Press Ç Notes Disc play will also stop when you select another source or the disc has reached the end For MP3 disc the disc reading time may exceed 10 seconds due to the large number of songs compiled into one disc Text display During CD playback Press DISPLAY repeatedly to see the following information Track number and elap...

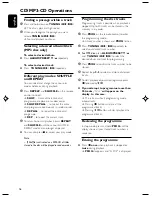
Page 16: ...n a MP3 CD all titles stored in the disc will be played in random order Programming the disc tracks Programming tracks is possible when playback is stopped Up to 20 tracks can be stored in the memory in any order 1 Press PROG on the remote control to enter the programming mode A track number is shown and PROG flashes 2 Press TUNING S T repeatedly to select your desired track number For MP3 disc pr...

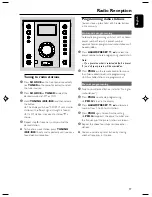
Page 17: ... will start with a chosen preset number From this preset number upwards former programmed radio stations will be overridden 1 Press ALBUM PRESET 4 3 to select the preset number where programming should start Note If no preset number is selected default is preset 1 and all your presets will be overridden 2 Press PROG on the remote control for more than two seconds to activate programming All availa...

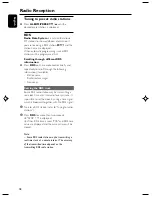
Page 18: ...formation if available Station name Radio text messages Frequency Setting the RDS clock Some RDS radio station may be transmitting a real clock time at an interval of every minute It is possible to set the clock by using a time signal which is broadcast together with the RDS signal 1 Tune to a RDS station refer to Tuning to radio stations 2 Press RDS for more than two seconds SEAR TM is displayed ...

Page 19: ...If your Mass storage device required a battery power source Please make sure you have a fresh battery in it or charge the USB device first and then plug it into the micro system again Supported Music type Supported formats USB or memory file format FAT12 FAT16 FAT32 sector size 512 bytes MP3 bit rate data rate 32 320 Kbps and variable bit rate WMA v9 or earlier Directory nesting up to a maximum of...

Page 20: ...th mp3 and the file names ofWMA files end with wma For DRM protectedWMA files useWindows Media Player 10 or later for conversion Visit www microsoft com for details aboutWindows Media Player andWM DRM Windows Media Digital Rights Management 1 Check the USB device has been properly connected See Installation Connecting an additional appliance 2 Press SOURCE USB on the remote once or more to select ...

Page 21: ...er setting The system can be used as an alarm clock whereby the CD TUNER or USB is switched on at a set time one time operation The clock time needs to be set first before the timer can be used During setting if no button is pressed within 90 seconds the system will exit timer setting mode automatically 1 In standby mode press TIMER on the remote control for more than two seconds 2 Press SOURCE re...

Page 22: ...s follows time in minutes 60 60 60 60 60 45 45 45 45 45 30 30 30 30 30 15 15 15 15 15 0 0 0 0 0 60 60 60 60 60 SLEEP XX is displayed XX is the time in minutes is displayed if the sleep time you have selected is not 0 2 When you reach the desired length of time stop pressing the SLEEP button To deactivate the sleep timer Press SLEEP repeatedly until 0 is displayed or press ECO POWER STANDBY ON 2 Cl...

Page 23: ...3 and WMA files Number of albums folders maximum 99 Number of tracks titles maximum 500 TUNER FM wave range 87 5 108 MHz MW wave range 531 1602 kHz Sensitivity at 75 Ω mono 26 dB signal to noise ratio 2 8 µV stereo 46 dB signal to noise ratio 61 4 µV Total harmonic distortion 5 Frequency response 63 12500 Hz 3 dB Signal to noise ratio 50 dBA SPEAKERS 2 way Bass reflex system GENERAL INFORMATION AC...

Page 24: ... supplied with cleaner Maintenance NO DISC is displayed Radio reception is poor Insert a disc Check if the disc is inserted upside down Wait until the moisture condensation at the lens has cleared Replace or clean the disc see Maintenance Use a finalised CD RW or CD R If the signal is too weak adjust the antenna or connect an external antenna for better reception Increase the distance between the ...

Page 25: ...D was recorded within 32 256 kbps bit rate with sampling frequencies at 48 kHz 44 1 kHz or 32 kHz Check the speaker connections and location Select the source CD orTUNER for example before pressing the function button É í ë Reduce the distance between the remote control and the system Insert the batteries with their polarities signs aligned as indicated Replace the batteries Point the remote contr...

Page 26: ...nglish Français Português Español Deutsch Nederlands Italiano Svenska Dansk Suomi Polski Printed in China CLASS 1 LASER PRODUCT MCM394 PDCC J W Wang 0752 Meet Philips at the Internet http www philips com ...

Reviews: