background image

5

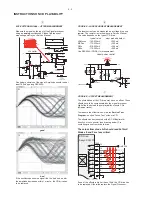
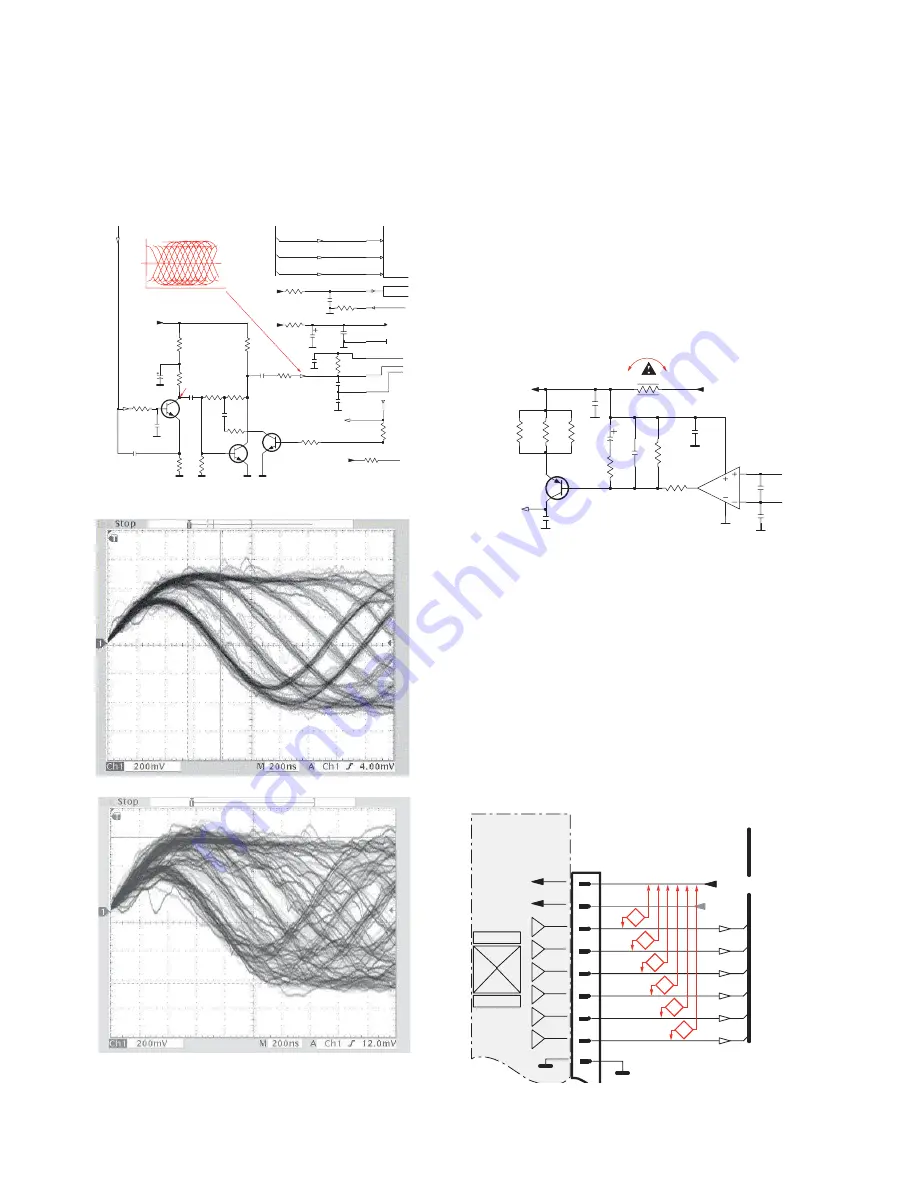
EYE-PATTERN SIGNAL – JITTER MEASUREMENT

Measure the signal on the input of the Signal processor
using an 

analog

oscilloscope. Please find the exact

measuring point in your Service Manual.

See below examples of the signal. Amplitude should read at
least 700mVpp using SBC444A.

good

bad

If the oscilloscope shows a signal like the ‘bad’ one, and/or
the amplitude decreases within 1 minute - the CD drive has
to be replaced.

6

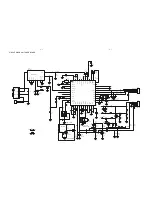
CD DRIVE – LASER CURRENT MEASUREMENT

The laser current can be measured as a voltage drop on a
resistor. The resistor is marked in every Service Manual.
The value depends on the type of CD drive.

typical value

most probably defect

VAMxxxx

: 150-230mV

t

350mV

MCDxx

: 170-230mV

t

300mV

DA1x

: 210-250mV

t

350mV

DA2x

: 175-200mV

t

250mV

Use SBC444A (CD-DA) for measurement.

7

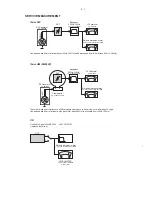
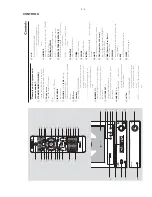
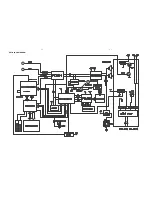
CD DRIVE – OFFSET MEASUREMENT

The photodiodes of the CD-drive may have an offset. These
offsets have to be compensated by the signal processor.
High offsets can lead to poor playability of some CDs
(skipping tracks).

To measure the offset values, start the 

Service Test

Program

- section “Focus Test” without a CD.

The offsets can be measured with a DC Millivoltmeter
directly on the connector (see drawing below). Pin
numbering varies from drive to drive.

The values from diode A-D should read 0±10mV.
Diodes E and F are less critical.

If one of the offsets is higher than ±10mV the CD drive has
to be replaced. Otherwise replace the Signal Processor.

Sanyo DA12T3

CD Drive

A

A

F

C

B

E

C

D

E

VCC

B

VREF

F

D

9

10

11

12

13

14

15

16

1800

+5V_HF

VrefCD10

A

D

E

B

C

F

GND

8

E

D

A

B

C

F

Laser power control

100n

2878

470n

2876

3821

1R

1K

3823

2880

33p

+5V

BC807-40

7879

3817

47R

3820

4R7

47R

3819

1n

2879

2877

47u

1

8

4

7811-A

LM358D

3

2

10K

3822

47R

3818

2841

100n

47n

2869

+5V_HF

LASER DIODE

U >250mV

->Laser damaged !

4,6V

3V

3,3V

3,9V

2V

0,17V

0,17V

Sanyo

DA12T3

HF-Amplifier

D3

D2

D1

Drive detection

680R

3905

3903

3K3

BC847B

7877

47n

2818

1K5

3902

5

7

4

2

1

6

3

64

8

9

10

11

470R

3893

+3.3V

2K2

3908

10K

3923

BC847B

7878

BC847B

7876

4n7

2813

3896

100R

220u

2885

2881

560p

47n

2887

560R

3901

2883

470n

2817

4u7

3n3

2814

3898

220R

3895

27K

470n

2884

+3.3V

3909

820R

3907

100R

3920

33K

3897

2882

82p

3K3

3904

2K7

3899

3906

470R

+5V_HF

HFIN

VrefCD10

100p

2815

2816

22n

LD

ON

to 3826,3827

VREF GE

VDDA1

VRIN

VSSA1

ISLICE

LD

ON

D1

D2

D3

D4

HFIN

HFREF

IREF

CD_DA: 0V / CD_RW: 3V

6

 (A-D)

800mVpp

TB = 0.5

P

s/div

EYE-PATTERN

1,8V

1,2V

2,4V

2,6V

0,65V

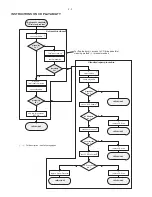
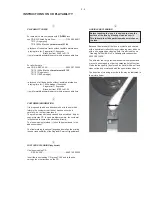
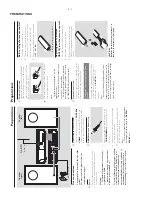
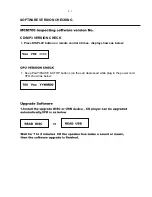
INSTRUCTIONS ON CD PLAYABILITY

2 -  5

Summary of Contents for MCM700/12

Page 1: ...rvice aids Leadfree safety information 2 2 Preparations and Controls 3 1 3 3 Disassembly Instruction 4 1 4 2 Software Checking 5 1 Block diagram 6 1 Wiring diagram 6 2 VFD Key Board Assembly circuit diagram 7 1 layout diagram 7 2 CD Block circuit diagram 8 1 layout diagram 8 2 to 8 3 Tuner board circuit diagram 9 1 layout diagram 9 2 CD MPEG board circuit diagram 10 1 10 4 AMP Block circuit diagra...

Page 2: ... 25 dB Total harmonic distortion d 1 Frequency response FM 63 6000 Hz Signal to noise ratio FM t 50 dBA USB PLAYER USB 12Mb s V1 1 support MP3 and WMA files Number of albums folders maximum 99 Number of tracks titles maximum 400 SPEAKERS Bass reflex system Dimensions w x h x d 145 x 230 x 215 mm GENERAL INFORMATION AC Power 230 240V 50 Hz Dimensions w x h x d 208 x 156 x 268 mm Weight with without...

Page 3: ... 707 89001 Tuner AM MW LW To avoid atmospheric interference all AM measurements have to be carried out in a Faraday s cage Use a bandpass filter or at least a high pass filter with 250kHz to eliminate hum 50Hz 100Hz RF Generator e g PM5326 Ri 50 L R LEVEL METER e g Sennheiser UPM550 with FF filter S N and distortion meter e g Sound Technology ST1700B DUT CD RECORDER Use Audio Signal Disc SBC429 48...

Page 4: ...ICE AIDS GB WARNING All ICs and many other semi conductors are susceptible to electrostatic discharges ESD Careless handling during repair can reduce life drastically When repairing make sure that you are connected with the same potential as the mass of the set via a wrist wrap with resistance Keep components and tools also at this potential ESD CLASS 1 LASER PRODUCT GB Safety regulations require ...

Page 5: ...ce CD Drive Laser current ok N Y check Laser current CD Drive offsets ok N Y check CD Drive offsets clean the lens check playability return set Customer complaint CD related problem return set return set replace CD Drive return set replace CD Drive return set replace Signal Processor return set fast lens cleaning 1 2 3 4 5 6 7 For flap loaders access to CD drive possible cleaning method 4 is recom...

Page 6: ...to contact the workshop directly The lens cleaning method 3 should be mentioned in the addendum sheet The final wording in national language as well as the printing is under responsibility of the Regional Service Organizations 3 FAST LENS CLEANING dry brush Use lens cleaning CD SBC AC300 9082 100 00043 Insert the lens cleaning CD press PLAY and follow the voice guide s instructions on the CD 4 LIQ...

Page 7: ...th a DC Millivoltmeter directly on the connector see drawing below Pin numbering varies from drive to drive The values from diode A D should read 0 10mV Diodes E and F are less critical If one of the offsets is higher than 10mV the CD drive has to be replaced Otherwise replace the Signal Processor Sanyo DA12T3 CD Drive A A F C B E C D E VCC B VREF F D 9 10 11 12 13 14 15 16 1800 5V_HF VrefCD10 A D...

Page 8: ... WViiZgn a i jb 8G cid i Z gZbdiZ Xdcigda 1 EgZhh i Z hadi dc i Z WViiZgn XdbeVgibZci 2 Ejaa dji i Z WViiZgn XdbeVgibZci 3 GZeaVXZ V cZl WViiZgn VcY jaan chZg i i Z WViiZgn XdbeVgibZci WVX id i Z dg cVa edh i dc 1 2 3 CR2025 CAUTION Batteries contain chemical substances so they should be disposed of properly EgZeVgVi dch GZVg XdccZXi dch The type plate is located at the rear of the system For user...

Page 9: ... 0 ALBUM for MP3 CD WMA USB skips to the beginning of a current previous subsequent album 5 6 for CD MP3 CD WMA USB fast searches back and forward within a track disc press and hold for FM tunes to radio stations down up for CD MP3 CD WMA USB skips to the beginning of a current previous subsequent track SOURCE selects the respective sound source for CD USB FM AUX 1 or 2 PROGRAM PROG for CD MP3 USB...

Page 10: ...aler or hilips for help É Å 5 6 Notes for remote control First select the source you wish to control by pressing one of the source select keys on the remote control for example DISC FM Then select the desired function for example ÉÅ à á DIM selects different levels of brightness for the display screen Numerical Keypad 0 9 for CD MP3 selects a track directly LOUD enables or disables automatic loudn...

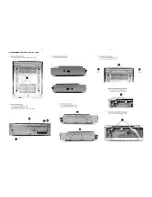
Page 11: ...4 1 4 1 DISASSEMBLY INSTRUCTION CD PART ...

Page 12: ...4 2 4 2 DISASSEMBLY INSTRUCTION TUNER AMP PART ...

Page 13: ...PAUSE STOP buttons on the set depressed while plug in the power cord VFD shown as below SOFTWARE VERSION CHECKING CD MP3 VERSION CHECK 1 Press DISPLAY button on remote control 4 times display shows as below device ...

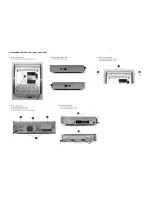
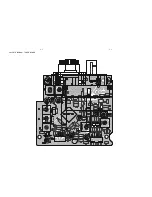
Page 14: ...6 1 6 1 SET BLOCK DIAGRAM ...

Page 15: ...6 2 6 2 SET WIRING DIAGRAM ...

Page 16: ...BY REM V GND 5V VF1 1 VF1 2 S3 3 S2 4 S1 5 S15 6 S16 7 S4 8 S5 9 S6 10 S7 11 G2 12 G3 13 G4 14 G1 15 G5 16 NC 17 G9 18 G6 19 G7 20 G8 21 S8 22 S9 23 S10 24 S11 25 S14 26 S13 27 S17 28 S18 29 S19 30 S12 31 VF2 32 VF2 33 VFD701 NE 1300CD 3 G S10 S11 S12 S13 S14 S15 S16 S17 S18 G10 G1 G2 G3 G4 G5 G6 G7 G8 G9 S10 S11 S12 S13 S14 S18 G5 G6 G7 G4 G3 G9 G8 S8 S9 G2 G1 G10 1 2 3 4 5 6 CN704 2 0 6P STB1 DA...

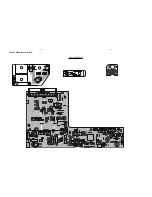
Page 17: ...7 2 7 2 LAYOUT DIAGRAM VFD KEY BOARD ASSEMBLY COMPONENT SIDE ...

Page 18: ......

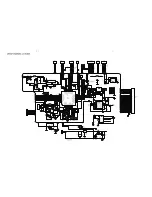
Page 19: ...8 2 8 2 LAYOUT DIAGRAM CD BLOCK COMPONENT SIDE ...

Page 20: ... BZX384 C11 R35 22 C23 224 R33 5K6 R34 47K Q3 BC547C Q2 BC857B R31 68K C35 22uF R32 10K R30 150 C33 82pF C29 1uF FM VDD VCC2 AM FM R29 820 R28 820 C40 153 C39 153 1 3 2 CF1 10 7M 1 3 2 CF2 10 7M R2 120 R1 120 R5 330 C2 104 C1 10uF 1 2 3 4 6 T7 511BE 43462 ANT 1 GND 2 GND 3 GND 4 VT 5 B 6 IF OUT 7 OSC OUT 8 GND 9 GND 10 FM FRONTEND TUNE1 KST F404 R6 330 R8 2 2K R9 100 C13 103 C3 104 C9 100uF FM R10...

Page 21: ...9 2 9 2 LAYOUT DIAGRAM TUNER BOARD ...

Page 22: ...10 1 10 1 CIRCUIT DIAGRAM SERVO BOARD MPEG DECODER CARD ASS Y This Board is not intended to repair The diagram for reference ...

Page 23: ...10 4 10 4 LAYOUT DIAGRAM SERVO BOARD MPEG DECODER CARD ASS Y This Board is not intended to repair The diagram for reference ...

Page 24: ... 47uH L301 47uH C371 104 C370 104 C381 153 C392 224 C376 104 100V C345 220P R308 5 6K R306 5 6K C344 474 C342 474 1 2 3 4 CN300 4p 2 5 C331 102 C332 102 C333 102 C335 102 C336 102 C330 102 C324 102 C326 102 C327 102 C329 102 R318 10 R317 10 C348 220P C350 220P C353 220P C354 220P Vddp2 Vssp2 Vssp2 Vddp2 C388 470uf 35v C387 470uf 35v C384 22uf 100V C367 104 C368 104 R319 10 R320 10 28V 28V C390 100...

Page 25: ...LAYOUT DIAGRAM AMP BOARD 11 2 11 2 ...

Page 26: ...7 8 2 5 7 8 2 1 3 5 7 8 2 5 7 8 2 5 5 9 7 8 2 7 8 0 1 1 1 6 7 8 2 9 8 7 3 X X 5 X X X X 5 9 1 75 B 75 B5 5 1 5 287 28 B5 5 1 5 1 5 1 5 1 28 B 1 1 1 1 1 287 1B 287B 1B5 287B5 287B5 287B 1 7 5 8 7 3 4 5 5 1 3 9 1 3 1 9 1 781 5 781 5 5 5 6 6 9 67 1 9 087 527 527 1 1 1 1 6 6 1 1 1 1 1 3 6 9 6 9 9 5 7 8 2 7 8 2 1 3 5 7 8 2 7 8 2 1 9 2 7 8 0 2 7 8 0 1 1 1 3 6 9 1 9 1 67 1 287 9 8 5 5 1 7 6 ...

Page 27: ...LAYOUT DIAGRAM AMP BLOCK PRE AMP BOARD 11 4 11 4 LAYOUT DIAGRAM AMP BLOCK HP VOLUME SWITCH BOARD ...

Page 28: ...12 1 12 1 24 25 26 27 29 30 31 32 33 34 35 37 38 39 40 28 AMP PART CD PART 41 EXPLODED VIEW DIAGRAM 3 ...

Page 29: ...DE PLATE R ASH 41 994000005075 PEDESTAL A 996510003237 AC LINE CORD 1 95M B 996510003238 MAIN SPEAKER BOX ASS Y L C 996510003239 TREBLE SPEAKER GRILLE D 996510003240 PLASTIC GRILLE E 996510003241 MAIN SPEAKER BOX ASS Y R F 996510003239 MCD700 TREBLE SPEAKER GRILLE G 996510003240 MCD700 PLASTIC GRILLE H 996500041019 CONTROL CABLE WIRE 300 2 5 30P I 996500041018 FM ANTENNA WIRE 1 5m J 996510003245 S...

Page 30: ...6510003056 MCD700 CD TOP CABINET 26 996500041006 MCM700 CD DOOR 29 996500041989 CD DOOR LEFT BRACKET 30 996500041990 CD DOOR RIGHT BRACKET 30 996500041990 CD DOOR RIGHT BRACKET 38 996500042076 SIDE PLATE R ASH 39 996500042055 MCD700 DVD CABINET BOTTOM L 996510003048 CD MODULE M 996510003062 MCM700 USB COVER T100 N 996510003063 FLAT FLEXIBLE CABLE O 996510003064 MCM700 USB DOOR SPRING Note Only the...

Page 31: ...994000004952 IC PT2309 S L PHONE PCB ASS Y MCM700 J200 996510003230 HEADPHONE SOCKET D3 5 VOLUME PCB ASS Y MCM700 COD301 996500041645 ROT ENCODER OUTPUT PCB ASS Y MCM700 CN101 996510003231 PINS CONNECTOR 2 5 4P J101 996510003232 SPEAKER TERMINAL 4P WP4 3 AMP PCB ASS Y MCM700 IC300 996510000464 CHIP IC TDA8920 PACKING Note Only these parts mentioned in the list are normal service parts 13 1 ...

Page 32: ...7 RELAY 100KR SF 065J B1 DISPLAY PCB ASS Y MCM700 T7 994000005137 I F T COIL BROWN 6295 VFD701 996500041321 VFD DISPLAY Q 994000005215 LED DIODE RED 2R3JSD UR101 IC701 996510000500 IC PT6311 SC16311 CD16311 S701 996510002905 IR SENSOR SW701 994000004963 LIGHT TOUCH SW TC103 H5 CPU PCB ASS Y MCM700 B1 996510002975 TRANSFORMER EE13 5V Note Only these parts mentioned in the list are D2 996510002976 D...

Page 33: ...D Mechanical Partslist updated 1 3 Manual 3141 785 31754 In this version 1 P12 3 CD Mechanical Partslist updated 33 996510003603 SERVO PCB ASS Y M5671U A1 70 996510013934 CD FRONT SEMI ASSEMBLED PARTS Refer to Page 14 2 picture Add A SWITCH BOARD ASS Y MCM700 B DISPLAY BOARD ASS Y MCM700 C USB BOARD ASS Y MCM700 D FUNCTION KNOB COVER E FUNCTION KNOB COVER F SWITCH KNOB 4 DIRECTIONS G MCM700 USB DO...

Page 34: ...14 2 996510013934 CD FRONT SEMI ASSEMBLED PARTS Remark 996510013934 not include wires and cables ...

Reviews: