9
Inst
al
la
ti
on
4
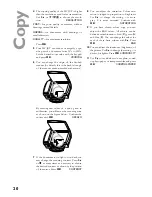
Insert the
black
cartridge “nose” down in
the
right
-hand compartment of the cartridge
holder.
5
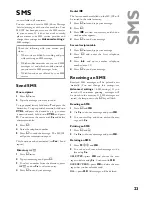
Insert the
colour
cartridge in the same way
in the
left
-hand compartment.
6
Close the cartridge holder. You’ll hear a click
when it snaps shut.
7
Close the machine.
8
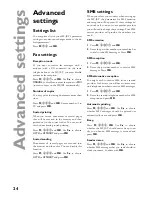
Push the supplied “Plug’n’Print” starter card
with the contacts at the top into the slot under
the control panel. This “Plug’n’Print” card is
used for charging the black cartridge and the
colour cartridge.
9
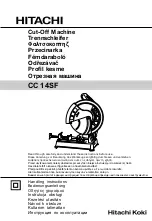
Changing the cartridges may take a short
while time and is completed when the display
shows:
Action completed
Remove card
Repeat the process with the same card for the
second cartridge.
Cartridge alignment
1
After inserting the cartridges for the
fi
rst time,
the machine will print out a page to check
their alignment.
enter VALUE
A
2
Enter the value A where the image is the
clearest.
3
Con
fi
rm with
OK
and repeat these steps for
values B, C and D.
enter VALUE
B
Your name and number
1
Enter your fax number (max. twenty digits)
and press
OK
(to enter a plus sign hold down
the
CTRL
key and press
Q
; to enter a blank
space, press the
_@
key).
2
Enter your name by using the keyboard for
text input (max. twenty characters). You can
also enter a plus sign (
CTRL
and
Q
) or a
slash (
CTRL
and
M
). Press
OK
. If you have
entered a wrong digit or character, you can
correct it with
/
and
C.
Time and date
Enter the date and time and con
fi
rm with
OK
,
e. g.
12 05 04 16 30
OK
for
May 12
th
2004, 4:30 p. m.
PC connection
v
Install the software
first
and
then
con-
nect the MF-JET via USB-cable to your PC,
when prompted to do so
.
Minimum configuration
Your PC must have the following minimum con-
fi
guration:
• Pentium processor, 200 MHz or higher
• Windows
®
98/2000/ME/XP and 128 MB
RAM
• 300 MB free disk space for the complete in-
stallation
• USB
port
Software installation
The Software-Package contains:
1
“
MF-Inkjet”: installs your printer and scan-
ner.


