background image

16

English

3139 115 21511

CD Operation

IMPORTANT!
– This system is designed for regular discs.
Therefore, do not use any accessories such
as disc stabiliser rings or disc treatment
sheets, etc., as offered on the market,
because they may jam the changer
mechanism.
– Do not load more than one disc into
each tray.

Discs for playback

This system can playback all audio CD, finalised
audio CD-Recordable (CDR) discs and finalised
audio CD-Rewritable (CDRW)discs.
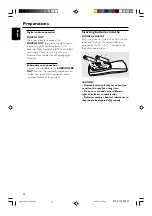
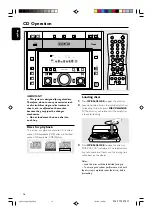
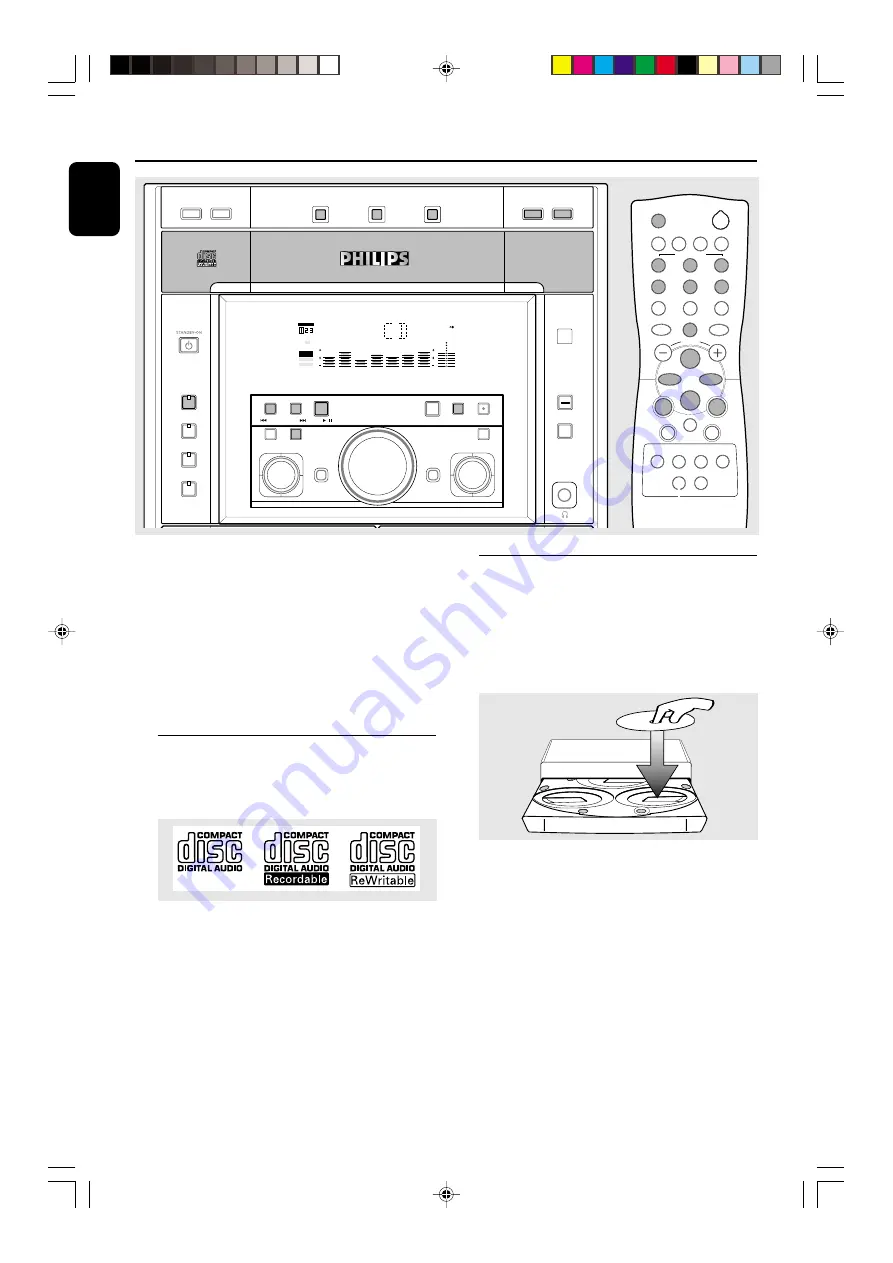
Loading discs

1

Press 

OPEN•CLOSE 

to open the disc tray.

2

Load up to two discs on the individual disc trays.
To load the third disc, press 

DISC CHANGE

.

The disc tray will rotate until the empty tray

is ready for loading.

3

C D   C H A N G E R

CLOCK.TIMER

VOLUME

DEMO

PRESET

TUNING

SHUFFLE
TIMER

PLAY    
MODE

SIDE

SET CLOCK

TIMER SET

BAND

RECORD

DUBBING

CD    TAPE

PROGRAM

CLEAR

RDS
MODE

1

2

3

TIMER

DBB

PROGRAM

AMPM

SHUFFLE

FMMW

LW

SW

STEREO

NR

FRONT

BACK

RECORD

HSD

2

2

1

OPEN•CLOSE

1

3

Press 

OPEN•CLOSE 

to close the disc tray.

"

READING

" is displayed.  The selected disc

tray, total number of tracks and the playing time
will appear on the display.

Notes:
– Load the discs with the label side facing up.
– To ensure good system performance, wait until
the disc tray completely reads the disc(s) before
proceeding.

BACK

REC/CD SYN

PROG

/A. REV

FLAT

PRESET

STOP

LOUDNESS

INCREDIBLE
SURROUND

TREBLE

BASS

DOLBY B NR

DOLBY B NR

CLOCK/

TIMER

DISC 1

DISC 2

DISC 3

3 CDC

TAPE 

CDR/AUX 

TUNER

DIGITAL STEREO HIFI SYSTEM

DISC CHANGE OPEN•CLOSE

DUBBING

NORMAL•FAST

60Hz

250Hz

500Hz

1KHz

2KHz

4KHz

8KHz

SOUND

VOLUME

PRESET

AM  LW

TRACK

REPEAT

MW  FM

STEREO

PROGRAM

TIMER

SHUFFLE

SURROUND

INCREDIBLE

FLAT

LOUDNESS

CD CHANGER

T.A.

NEWS

SLEEP

DIM

REC

FRONT

HSD

D

C

3

C H A N G E R

DIM

RDS

PLAY

DIGITAL CONTROL

SEARCH/

TUNE

NEWS•TA

PRESET

  /

A•B

IR SENSOR

2

AUX

CDR

TAPE 1/2

TUNER

CD

2

1

3

PROGRAM

REPEAT

SHUFFLE

DISPLAY

SLEEP

TIMER

INC.

SURR.

LOUD-

NESS

FLAT

BASS

L

R

TREBLE

BALANCE

SIDE

PAUSE

MUTE

Å

-

+

-

+

CD DIRECT

VOLUME

á

à

ë

í

É

Ç

pg 001-030_MZ9_22-Eng

1/23/02, 1:59 PM

16

Summary of Contents for MZ-9

Page 1: ...ed track passage 17 Replacing discs during playback 17 Repeat and Shuffle 17 Repeat play Random play Programming the disc tracks 18 Erasing the programme 18 Radio Reception Tuning to radio stations 19 Storing preset radio stations 19 20 Automatic preset programming Manual preset programming Tuning to preset radio stations 20 RDS 20 21 Setting the RDS clock NEWS TA 21 Tape Operation Recording Loadi...

Page 2: ... beside the voltage selector of your system is identical with the voltage of your local power supply If not please consult your dealer Place the system on a flat hard and stable surface Place the system in a location with adequate ventilation to prevent internal heat build up in your system Allow at least 10 cm 4 inches clearance from the rear and the top of the unit and 5 cm 2 inches from each si...

Page 3: ...lt in Therefore your system may switch to Standby mode automatically under extreme conditions If this happens let the system cool down before reusing it not available for all versions B Antennas Connection Connect the supplied AM loop antenna and FM antenna to the respective terminals Adjust the position of the antenna for optimal reception AM Antenna Fix the claw to the slot Position the antenna ...

Page 4: ... details FRONT L R AM ANTENNA R L AC MAINS LINE OUT FM ANTENNA 75Ω R L AUX CDR IN LINE OUT SUB WOOFER OUT DIGITAL OUT AUX CDR IN SUBWOOFER OUT DIGITAL OUT Analogue audio connections AUX CDR IN R L Use a cinch cable to connect these terminals to the analogue audio out terminals of an external equipment TV VCR Laser Disc player DVD player or CD Recorder for listening to or recording from this source...

Page 5: ...minal The subwoofer reproduces just the low bass sound effect explosions or the rumble of spaceships for example Preparations Inserting batteries into the remote control Insert two batteries Type R06 or AA into the remote control with the correct polarity as indicated by the and symbols inside the battery compartment 1 2 CAUTION Remove batteries if they are exhausted or will not be used for a long...

Page 6: ...he system only to stop programming forTape to stop playback or recording for Clock on the system only to exit clock setting or cancel timer for Demo on the system only to activate deactivate the demonstration 3 Source selection to select the following 3 CDC CD to select disc tray 1 2 or 3 TUNER to select waveband FM MW or LW TAPE TAPE 1 2 to select tape deck 1 or 2 CDR AUX AUX CDR to select the in...

Page 7: ...1 2 3 to select a disc tray for playback Disc tray Display screen to view the current status of the system REPEAT to playback track s disc s programme repeatedly SHUFFLE to playback all available discs and their tracks programme in random order SLEEP to activate deactivate or set the sleep timer SIDE to change tape side on tape deck 2 BALANCE L R to balance the sound level of the front left and ri...

Page 8: ...ing from all RDS stations and followed by FM MW and LW bands respectively Weak RDS stations may be stored in later presets When all the available radio stations are stored or the memory for 40 presets are used the last preset radio station or the first available RDS station will be played 2 The system will proceed to set the RDS clock if the first preset is an RDS station EASY SET is displayed fol...

Page 9: ...ease turn knob clockwise or pressVOLUME or decrease turn knob anti clockwise or pressVOLUME the sound level To listen through the headphones Connect the headphones plug to the n socket at the front of the system The speakers will be muted To switch off the volume temporarily Press MUTE on the remote control Playback will continue without sound and MUTE is displayed To restore the volume press MUTE...

Page 10: ...ffect specially for low volume level It can be switched on additionally to all sound settings Press LOUDNESS If activated LOUDNESS is shown and LOUDNESS ON is displayed If deactivated LOUDNESS OFF is displayed FLAT This feature allows you to temporarily switch off all the digital sound control setting for example BASS TREBLE INCREDIBLE SURROUND Press FLAT to switch off all the digital sound contro...

Page 11: ...RONT BACK RECORD HSD 2 2 1 OPEN CLOSE 1 3 Press OPEN CLOSE to close the disc tray READING is displayed The selected disc tray total number of tracks and the playing time will appear on the display Notes Load the discs with the label side facing up To ensure good system performance wait until the disc tray completely reads the disc s before proceeding BACK REC CD SYN PROG A REV FLAT PRESET STOP LOU...

Page 12: ...g discs during playback 1 Press DISC CHANGE The disc tray will open without interrupting current playback 2 To change the inner disc press DISC CHANGE again The disc will stop playing and the inner tray will rotate out Repeat and Shuffle You can select and change the various play modes before or during playback Repeat play 1 Press REPEAT on the remote control repeatedly to select TRACK to repeat p...

Page 13: ... playing time If you attempt to programme more than 40 tracks FULL is displayed If you press any of the CD DIRECT 1 2 3 buttons on the remote control the system will play the selected disc or track and the stored programme will be ignored temporarily The PROGRAM symbol also will disappear temporarily from the display It will reappear when playback of the selected disc ends During programming if no...

Page 14: ... desired preset number If a radio station has been stored in one of the presets it will not be stored again under another preset number 2 Press and hold PROG PROGRAM until AUTO is displayed PROGRAM starts flashing The system will automatically store the radio stations with sufficient signal strength starting from all RDS stations and followed by FM MW and LW bands respectively Weak RDS stations ma...

Page 15: ...pressed within 20 seconds the system will exit the programme mode automatically Radio Reception Tuning to preset radio stations 1 Press PRESET to switch on the PRESET mode PRESET is shown 2 Press 4 or 3 í or ë to select the desired preset number The preset number radio frequency and waveband are displayed For Recording please refer to Tape Operation Recording RDS RDS Radio Data System is a broadca...

Page 16: ...on Once the News PTY ProgrammeType orTA Traffic Announcement data is detected in a RDS station it will switch toTUNER mode automatically IMPORTANT You can activate NEWS TA function in standby demonstration or any source mode exceptTuner mode To activate NEWS TA function 1 Press NEWS TA repeatedly to select NEWS or TA function If NEWS is selected NEWS is shown and NEWS is displayed IfTA is selected...

Page 17: ...ying tapes To playback a selected tape deck 1 Press TAPE TAPE 1 2 repeatedly to select tape deck 1 or 2 2 Press É To stop playback Press STOP Ç BACK REC CD SYN PROG A REV FLAT PRESET STOP LOUDNESS INCREDIBLE SURROUND TREBLE BASS DOLBY B NR CLOCK TIMER 3 CDC TAPE CDR AUX TUNER DIGITAL STEREO HIFI SYSTEM DUBBING NORMAL FAST 60Hz 250Hz 500Hz 1KHz 2KHz 4KHz 8KHz SOUND VOLUME PRESET AM LW TRACK REPEAT ...

Page 18: ...g the sound is reduced to a low volume Note During rewinding or fast forwarding of a tape it is also possible to select another source 3CDC or TUNER for example General information on recording For recording use only tape of IEC type I normal tape The recording level is set automatically regardless of the position of theVolume Bass Treble Incredible Surround and so forth The tape is secured at bot...

Page 19: ...r to CD Operation Programming the disc tracks 2 Press CD SYN to start recording The disc will start playback automatically To stop recording Press STOP Ç Recording and disc playback will stop simultaneously Dubbing tapes 1 Load the prerecorded tape in tape deck 1 You can set the tape to the desired passage where recording will start 2 Press DUBBING NORMAL FAST once for normal speed dubbing or twic...

Page 20: ...o set the clock automatically through the time information in the RDS signal refer to Radio Reception Setting the RDS clock Timer setting The system can switch on to CD TUNER or TAPE 2 mode automatically at a preset time serving as an alarm to wake you up IMPORTANT Before setting the timer ensure that the clock is set correctly The timer will always be switched on after it has been set The timer w...

Page 21: ...ted source isTAPE and if the preset time is reached while high speed dubbing in progress Tuner will be selected automatically During timer setting if no button is pressed within 90 seconds the system will exit timer setting mode automatically Deactivating the timer 1 Press and hold CLOCK TIMER TIMER for more than two seconds 2 Press STOP on the system to cancel the timer OFF is displayed and the T...

Page 22: ...urround for example are available for selection Refer to the operating instructions for the connected equipment for details For Recording please refer to Tape Operation Recording Maintenance Cleaning the Cabinet Use a soft cloth slightly moistened with a mild detergent solution Do not use a solution containing alcohol spirits ammonia or abrasives Cleaning Discs When a disc becomes dirty clean it w...

Page 23: ...ange 87 5 108 MHz MW wave rang 531 1602 kHz LW wave range 153 279 kHz Number of presets 40 Antenna FM 75 Ω wire AM Loop antenna TAPE PLAYER Frequency response Normal tape type I 60 15000 Hz 5 dB Signal to noise ratio Normal tape type I 47 dBA Wow and flutter 0 4 DIN SPEAKERS System shielded 3 way 1 G bass port Impedance 6 Ω Woofer 1 x 6 5 Tweeter 1 x 2 5 PolydomeTweeter 1 x 1 Dimensions w x h x d ...

Page 24: ...pside down Wait until the moisture condensation at the lens has cleared Replace or clean the disc see Maintenance DISC NOT FINALIZED is displayed Use a finalised CD RW or CD R RADIO RECEPTION Radio reception is poor If the signal is too weak adjust the antenna or connect an external antenna for better reception Increase the distance between the Mini HiFi System and yourTV orVCR TAPE OPERATION RECO...

Page 25: ...tton É í ë Reduce the distance between the remote control and the system Insert the batteries with their polarities signs aligned as indicated Replace the batteries Point the remote control directly towards the IR sensor The timer is not working Set the clock correctly Press and hold CLOCK TIMER to switch on the timer If recording or tape dubbing is in progress stop recording Not all lighted butto...

Reviews: